P1010425 Rev. G pg. 5
Installing the DC Transfer Pack
The following instructions detail the installation for the components listed above, which will
allow a RW 420 printer to run from a DC power source.
• Turn off the printer and remove the battery pack.
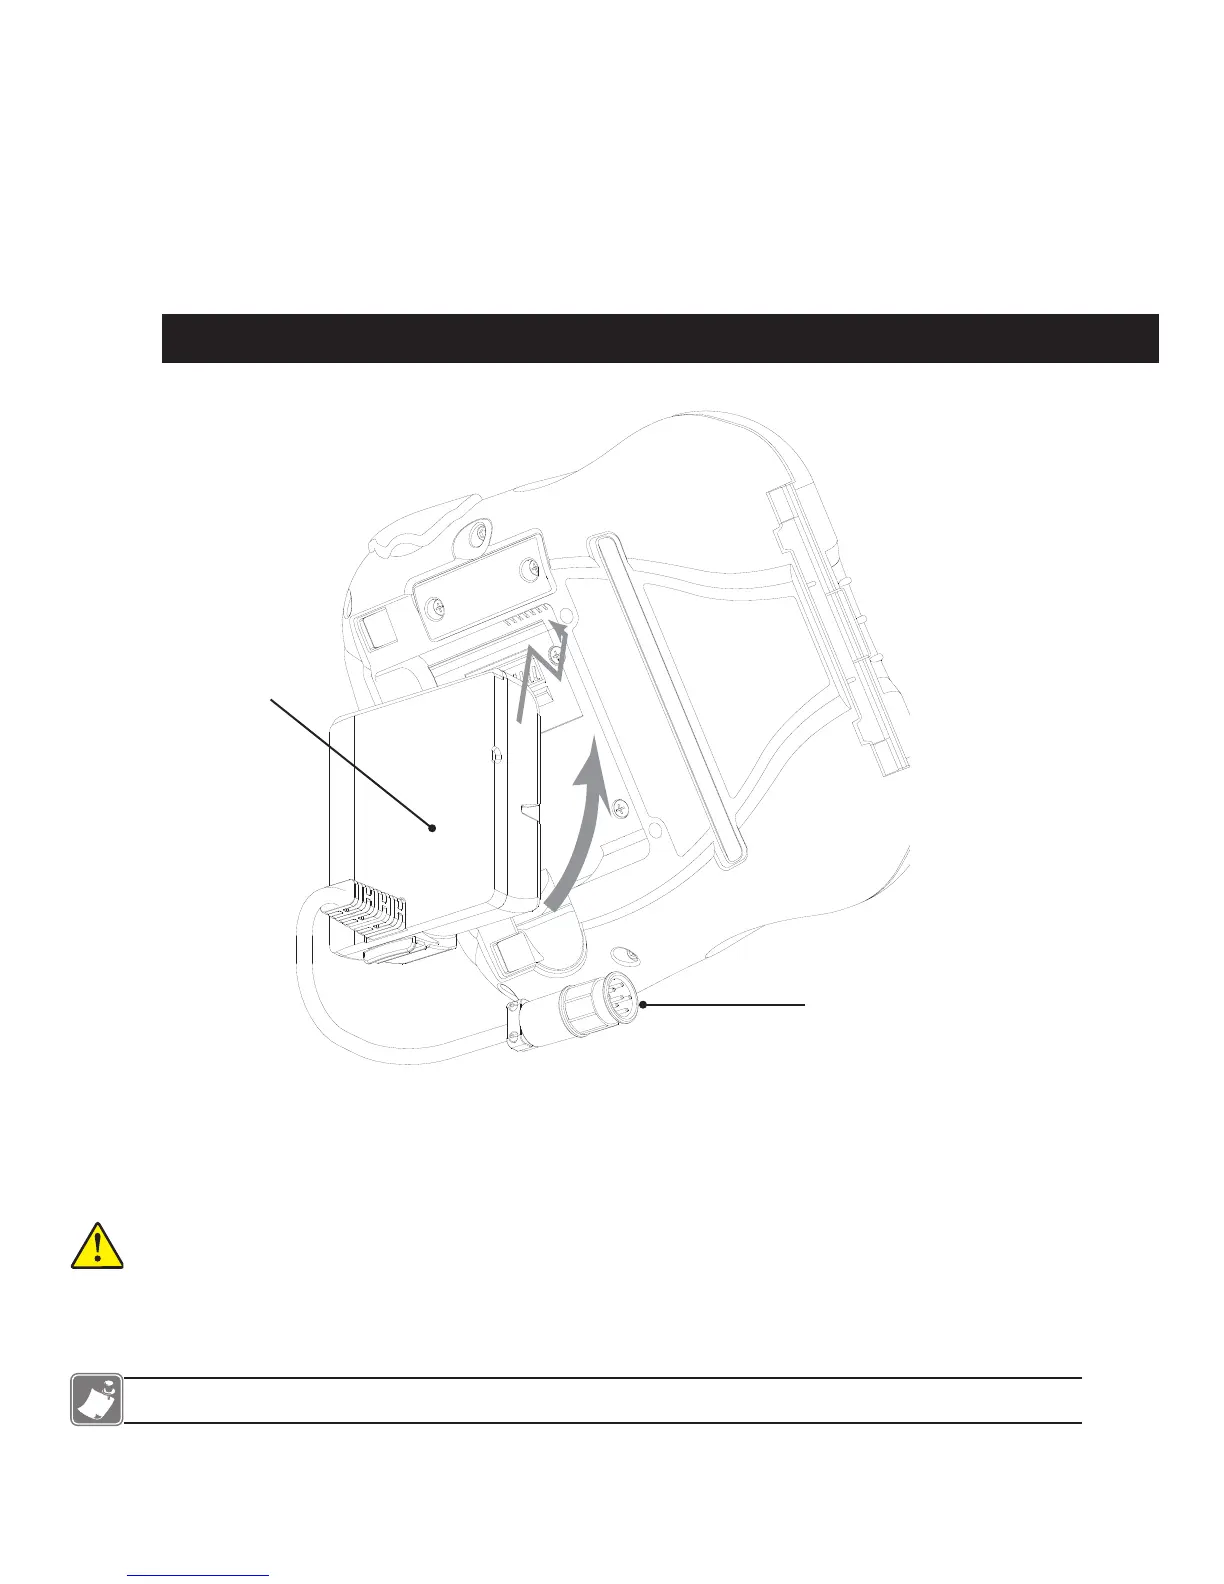
• Plug the DC Transfer Pack assembly into the printer. The battery pack assembly resembles
and installs like a normal battery.
Figure 1: DC TransFer PaCk insTallaTion
DC Transfer Pack
• Plug the DC cable from the Power Supply into the mating connector from the DC Transfer Pack.
The plugs are polarized to ensure correct installation. They can only be connected one way. Do
not attempt to force a connection. Secure the connection by turning the locking ring on the DC
cable connector until it clicks into place.
Caution: Since the RW 420 Mobile Battery Eliminator consumes vehicle power even when the
printer is turned off, it MUST be connected to a power source that is switched off when the vehicle is
turned off. Zebra Technologies Corporation is not liable for damage to any equipment caused by im-
proper installation of this equipment to any power source.
Note: When the vehicle’s power is turned on, the printer’s LCD will indicate the battery is full at all times.
Mating Connector
 Loading...

