Main Drive Belt Removal, Replacement, and Adjustment for Printers
Without the Peel-Off Option
1. Turn the printer OFF and remove the power cord.
2. Remove the media and ribbon.
3. Remove the Rear Cover, Front Control Panel Assembly, Media Sensor
Assembly and the Main Logic Board. See previous procedures if necessary.
NOTE: Scribing a mark into the outer edge of the Idler Pulley and into the printer
frame, prior to performing step # 4, may help when adjusting the belt tension.
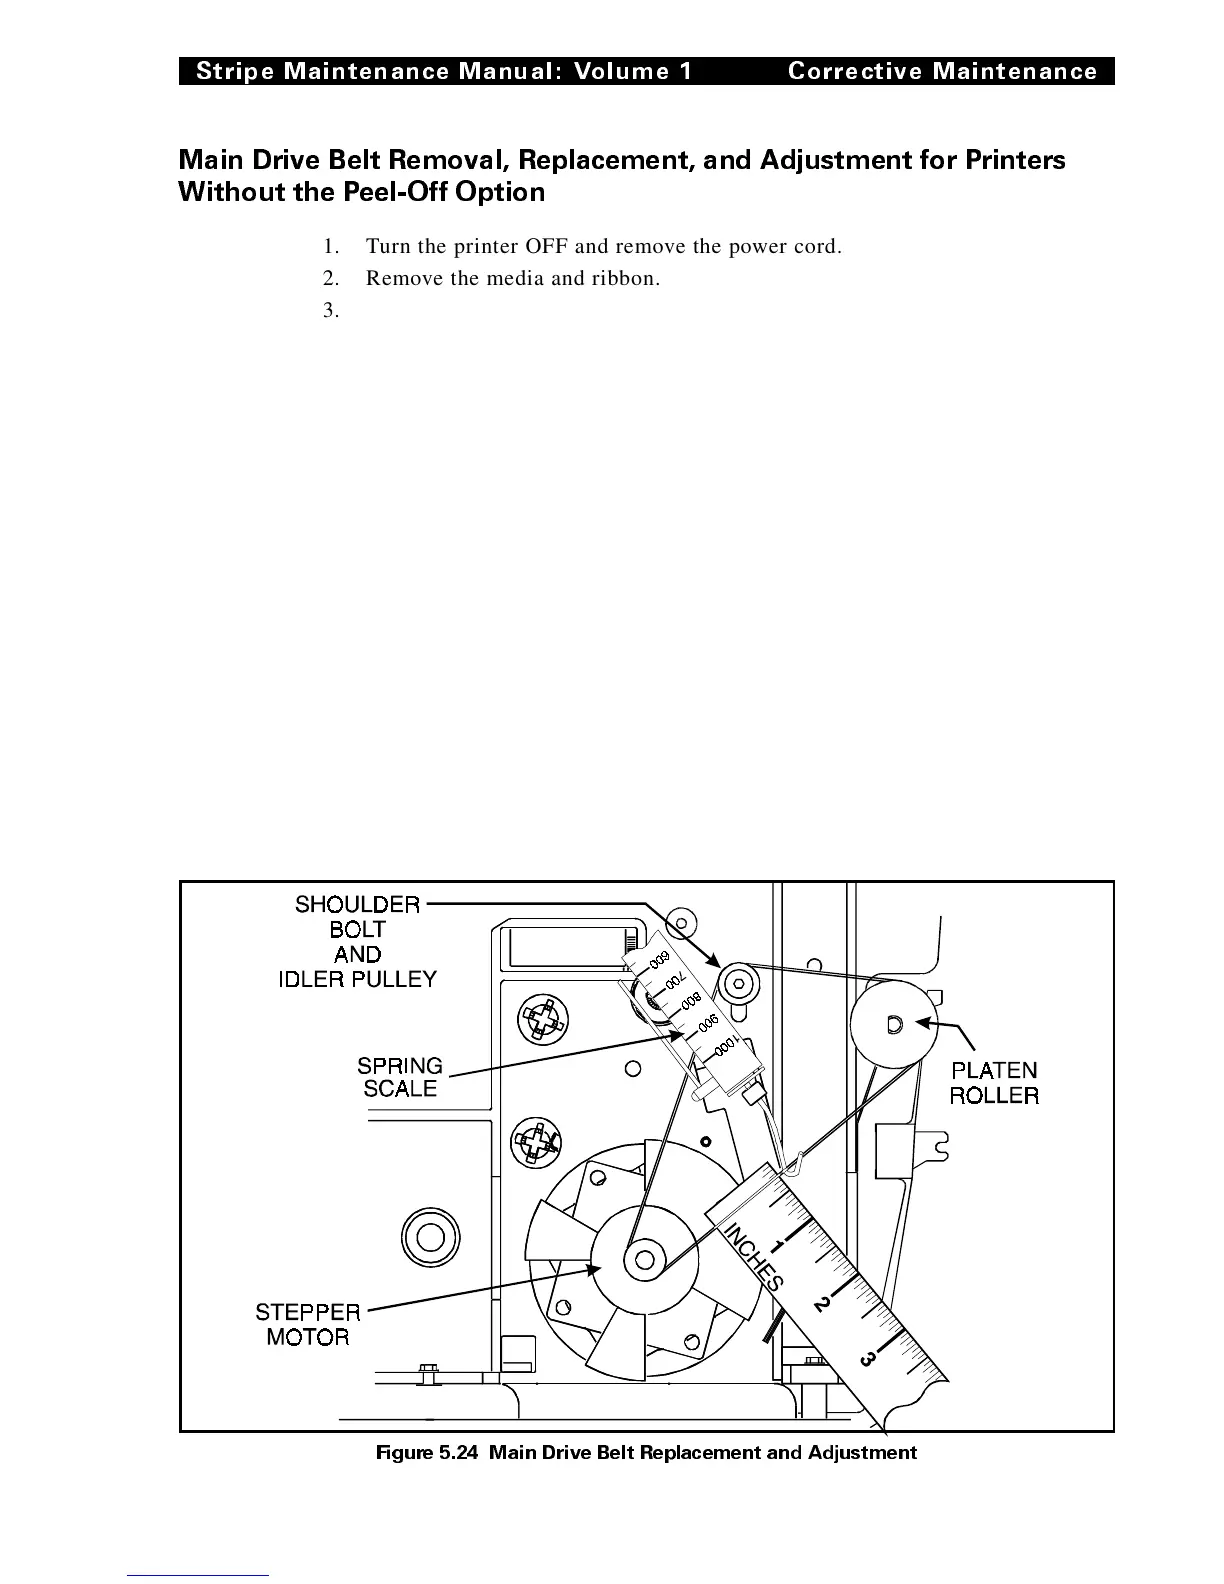
4. See Figure 5.24 and loosen the shoulder bolt holding the Idler Pulley in
position until the pulley freely moves up and down.
5. Remove the old Main Drive Belt and install the new one.
6. Hook a 1000 gram spring scale to the belt as shown in Figure 5-24, and
carefully pull up on the Idler Pulley to increase belt tension.
7.
When a scale reading of 500 grams (± 100 grams) creates a deflection of 1/4
inch, tighten the shoulder bolt to a torque of 20 inch-pounds.
8. Reinstall the Main Logic Board, Media Sensor Assembly, Front Control
Panel Assembly and Rear Cover.
9. Reload Media and Ribbon.
10. Reconnect power cord, power up and test printer.
Figure 5. 24 Main Drive Belt Replacement and Adj ustment
Stripe Maintenance Manual: Volume 1 Corrective Maintenance
44868L Page 5-35