5
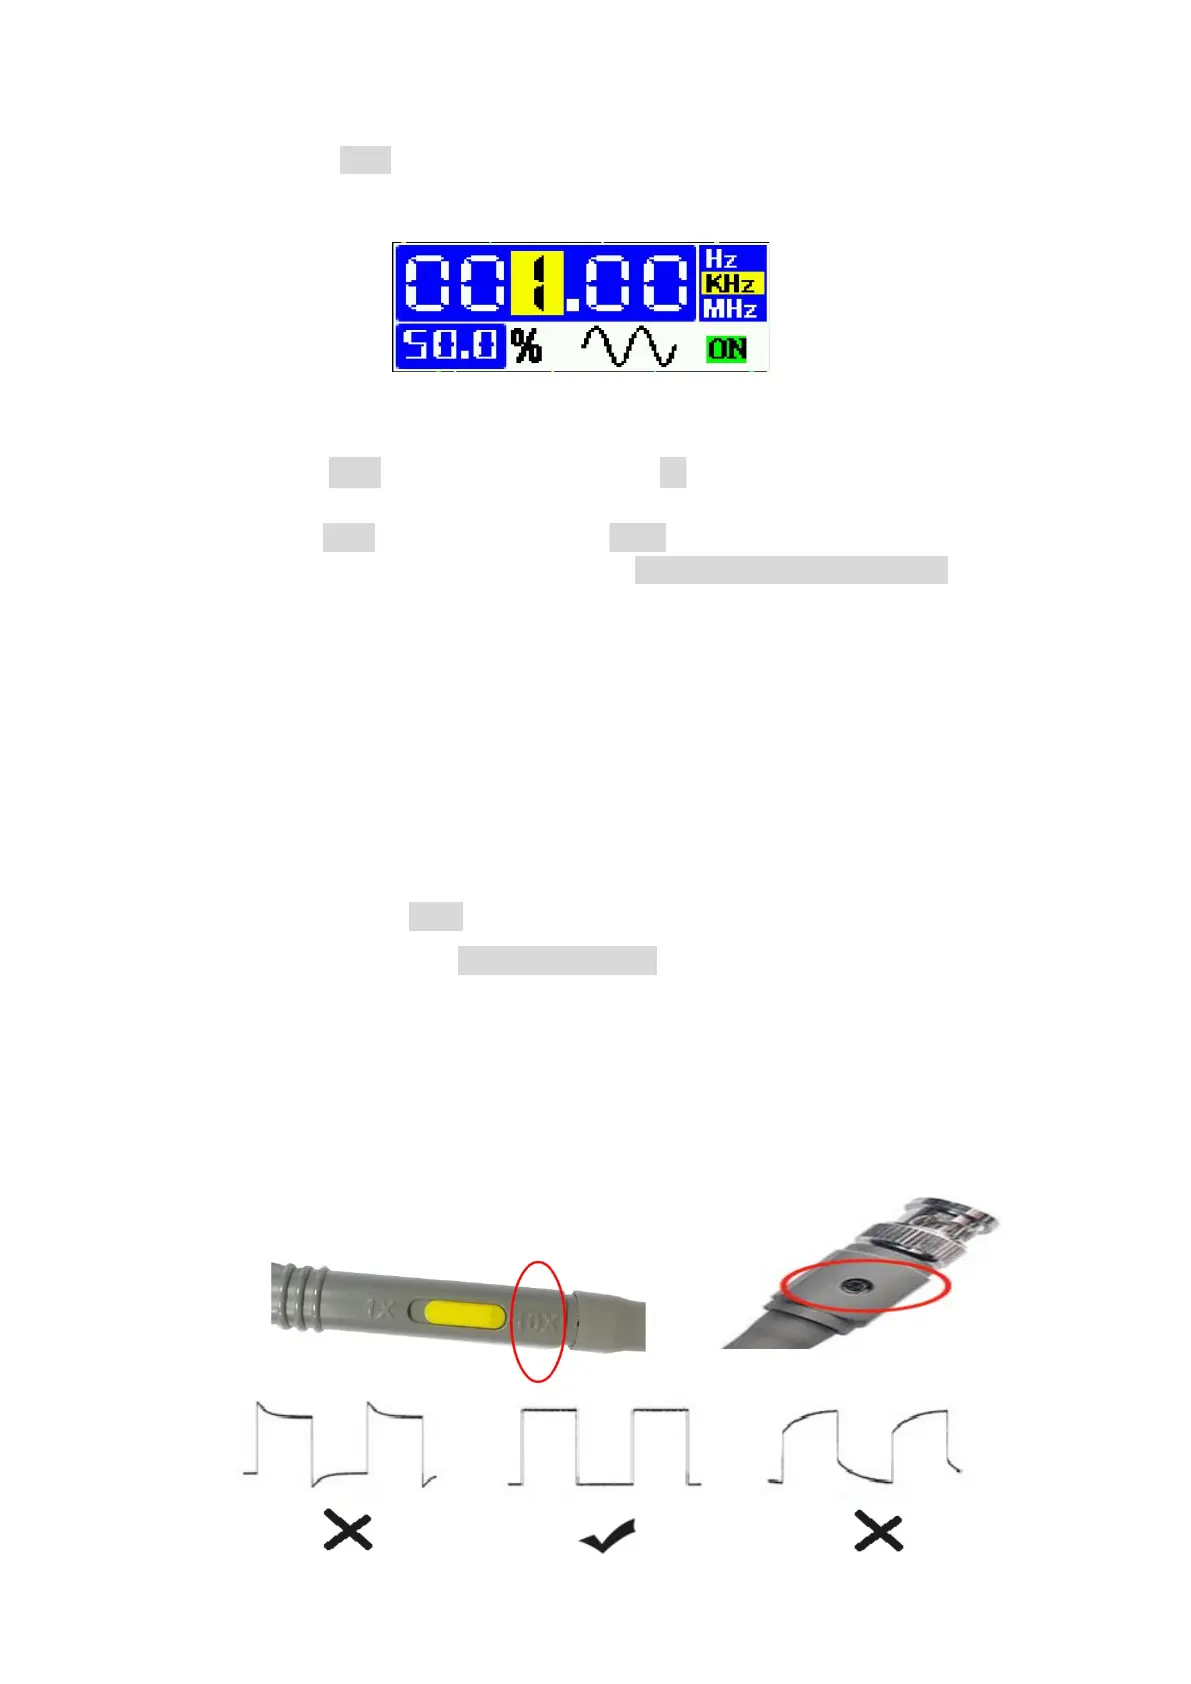
generator to the [ON] state. Press the [ns] key to switch waveforms. Press the [Func]
key to reset to 1.00Khz. 3. Press [menu] to exit the interface.
4. After pressing the [Auto] key, you can see the waveform of the generator.
2.5 Frequency meter and Pulse counter
Press the Func button and then press the up button↑ to turn on the 6-digit
high-precision frequency meter.
Press the Func key and then press the down buttonto turn on the pulse counter,
note that after turn on the counter, you need to manually adjust the trigger level, Once
the pulse crosses the trigger level, the counter will be incremented by 1. (Press and
hold the Func key, then press the up and down keys to move the trigger level).
3 Probes
3.1 Probe calibration
The calibration method is as follows:
1. Switch the probe to X10.
2. Connect the probe to a 1KHz square wave with an amplitude of about 2V-3V.
You can use the built-in generator.
3. Adjust the horizontal and vertical scales of the oscilloscope so that the waveform
is displayed stably at a suitable position on the screen.
4. Use a screwdriver to rotate the adjustable capacitor on the probe until you get the
waveform in the middle of the figure below. The left and right waveforms below
are references for incorrect calibration.


 To Next Page