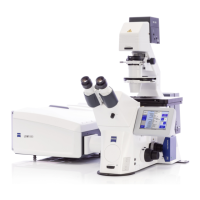
Do you have a question about the Zeiss LSM 880 with AiryScan FAST and is the answer not in the manual?
| Brand | Zeiss |
|---|---|
| Model | LSM 880 with AiryScan FAST |
| Category | Microscope |
| Language | English |
Steps 1-3 for powering on the microscope system and components.
Steps 4-6 for booting the PC, logging in, and launching the ZEN software.
Overview of the three distinct areas within the ZEN 2.3 software interface.
Procedure for powering on the Argon laser and activating other lasers.
Steps 1-3: Placing the sample and using shortcut buttons for visualization.
Steps 4-5: Adjusting focus and stage position for sample visualization.
Step 6: Selecting the 'Acquisition' tab to begin the imaging process.
Choices for collecting fluorophores: Simultaneous, Sequential, and Spectral.
Explanation of Line and Frame track switching for sequential imaging.
Steps for configuring Track 1 with laser and filter settings.
Steps for choosing detectors and defining emission band thresholds.
Configuring objective, frame size, scan speed, and averaging.
Adjusting laser power, pinhole, gain, offset, and digital gain.
Setting the pinhole and using automatic exposure for initial scans.
Activating and using the Range Indicator to identify over/underexposed areas.
Fine-tuning digital offset and master gain for optimal image intensity.
Visualizing and achieving balanced exposure without red or blue pixels.
Overview of Pinhole, Laser Intensity, and Detector Sensitivity.
How pinhole size impacts resolution and signal level.
Impact of laser power on signal, sample health, and potential artifacts.
How detector gain affects signal, noise, and image quality.
Applying averaging functions to reduce image noise.
Procedure for acquiring serial optical sections to create a Z-stack.
Steps for acquiring images over time to create a time-lapse series.
Procedure for acquiring tiled images to cover a larger field of view.
Steps to select, name, and save acquired images in CZI format.
Procedure for safely powering down the microscope and software.
Configuring basic settings for AiryScan imaging, including tracks and lasers.
Choosing appropriate emission filters for fluorophores in AiryScan.
Adding additional tracks and notes on line vs. frame switching for AiryScan.
Setting display histogram and master gain for AiryScan sensitivity.
Using 'Optimal' for frame size and setting scan speed for AiryScan.
Checking and performing initial alignment for AiryScan each time the sample changes.
Using continuous scan mode for automatic AiryScan alignment optimization.
Monitoring alignment status and stopping the scan once optimization is complete.
Applying AiryScan processing for RAW data to generate the final image.
Configuring basic settings for AiryScan FAST, including mode and tracks.
Selecting emission filters for fluorophores in AiryScan FAST.
Adding additional tracks for AiryScan FAST and notes on frame switching.
Choosing sampling rate and setting max speed for AiryScan FAST.
Setting laser power, display, and master gain for AiryScan FAST sensitivity.
Aligning AiryScan FAST if not previously done for the sample.