Do you have a question about the Zeiss Lumera 700 and is the answer not in the manual?
Select and activate the desired user profile from the main menu for personalized microscope settings.
Create and save new surgeon profiles, selecting surgical profiles like Anterior or Posterior.
Adjust light intensity and red reflex settings, with a warning about potential retinal injury from excessive light.
Assign specific functions to buttons on the foot control panel for optimized surgical workflow.
Configure functions for the hand grip buttons to suit individual surgeon preferences and workflow.
Activate and adjust the overhead display's brightness using the up/down arrows.
Perform white balance and customize camera brightness and color values.
Set image format (JPG/Tiff) and storage location (USB/Network) for recordings.
Resolve foot pedal connection issues, screen problems, and reset to default settings.
Properly turn off the microscope via the main power switch to preserve lamp life.
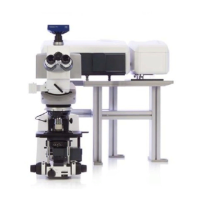
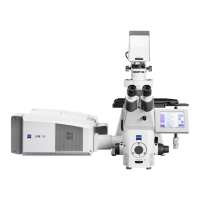
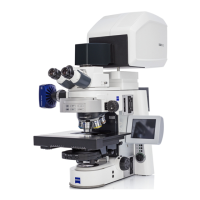
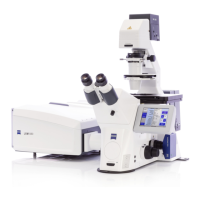
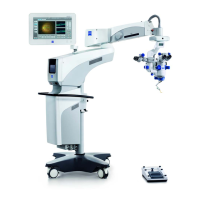
The Lumera 700 is a sophisticated surgical microscope designed to provide high-quality visualization and advanced features for various surgical procedures. Its operation is guided by a user-friendly interface, accessible through a main menu and various sub-menus, allowing for extensive customization to suit individual surgeon preferences and specific surgical needs.
The primary function of the Lumera 700 is to provide magnified, illuminated, and clear views of the surgical field. It achieves this through a combination of advanced optics, adjustable illumination, and integrated digital imaging capabilities. The microscope is designed to be either ceiling-mounted or floor-mounted, with the power switch located on the respective unit.
A key component of its operation is the foot pedal, which serves as a primary control interface. Once connected, the foot pedal allows for hands-free adjustment of various microscope functions, enhancing efficiency and sterility during surgery. The microscope also features an integrated overhead display, which provides crucial information and settings at a glance, further aiding the surgeon.
The Lumera 700 supports the creation and management of multiple user profiles, allowing different surgeons to save and quickly recall their preferred settings. This personalization extends to various aspects of the microscope's operation, including light intensity, red reflex settings, foot control panel assignments, handgrip functions, and camera settings.
For documentation and educational purposes, the device incorporates video recording capabilities. Surgeons can capture images and videos of surgical procedures, with options to customize image format, storage location (USB or network), and patient details.
Switching On: To begin operation, the power is switched on via the on/off switch located on either the ceiling-mounted or floor-mounted unit.
Foot Pedal Connection and Usage: Upon booting up, the foot pedal should be placed horizontally on the floor to establish a connection with the microscope. A symbol on the top right of the screen indicates a successful connection and the battery level. When not in use, the foot pedal should be hung on an appropriate bar to preserve battery power. In case of battery failure, a cable is provided to directly connect the foot pedal to the microscope.
User Profile Activation: The microscope defaults to the last used user profile. To change profiles, navigate to the "User" option in the Main Menu, select the desired surgeon from the drop-down list, and then click the "Activate" icon.
Foot Control Panel Customization: In the Main Menu, under "Additional Settings," select "Foot Control Panel." Each button on the panel can be clicked and assigned a specific function. Once optimized, save the settings.
Handgrip Customization: Similar to the foot pedal, the handgrip functions can be customized. In "Additional Settings," select "Handgrip," and assign functions to each button. Save the settings after customization.
Overhead Display Configuration: In "Additional Settings," select "Overhead Display." The display can be switched on, and its brightness adjusted using up and down arrows. Save the settings.
Camera Settings: In the Main Menu, click the "Camera" icon, then "White Balance." The system will prompt the user to hold a plain white paper under the microscope to perform white balance. Tabs 2 and 3 of the camera page allow for customization of brightness and color values.
Troubleshooting Connectivity Issues: If the foot pedal fails to connect, either use the provided cable for a direct connection to the microscope or, in the Main Menu, navigate to tab 2, then "System Settings," and click the "Pairing" icon.
Addressing Blank Screen: If the screen is blank, it might be due to accidentally touching the "/" button next to the on/off switch.
Restoring Default Settings: To revert to a surgeon's default settings, press the reset button located above the overhead display.
Preserving Lamp Life: To extend the lamp's lifespan, turn off the microscope by moving it upwards until it beeps. To turn it on again, lower it slightly.
Shut-down: To power off the microscope, use the main power switch.
| Type | Surgical Microscope |
|---|---|
| Integration | Integrated HD video camera |
| Apochromatic optics | Yes |
| Integrated HD video camera | Yes |
| Illumination | LED |
| Magnification | Motorized |
| Focus | Motorized |
| Objective Lens | F=200 mm |
| Camera Port | Yes |