Figure 4.3 Typical placement and orientation of support
timbers, drain, benches and floor seam (benches shaded
grey)
Section 5: Floor and Drain Assembly
Time needed: approximately 20 minutes
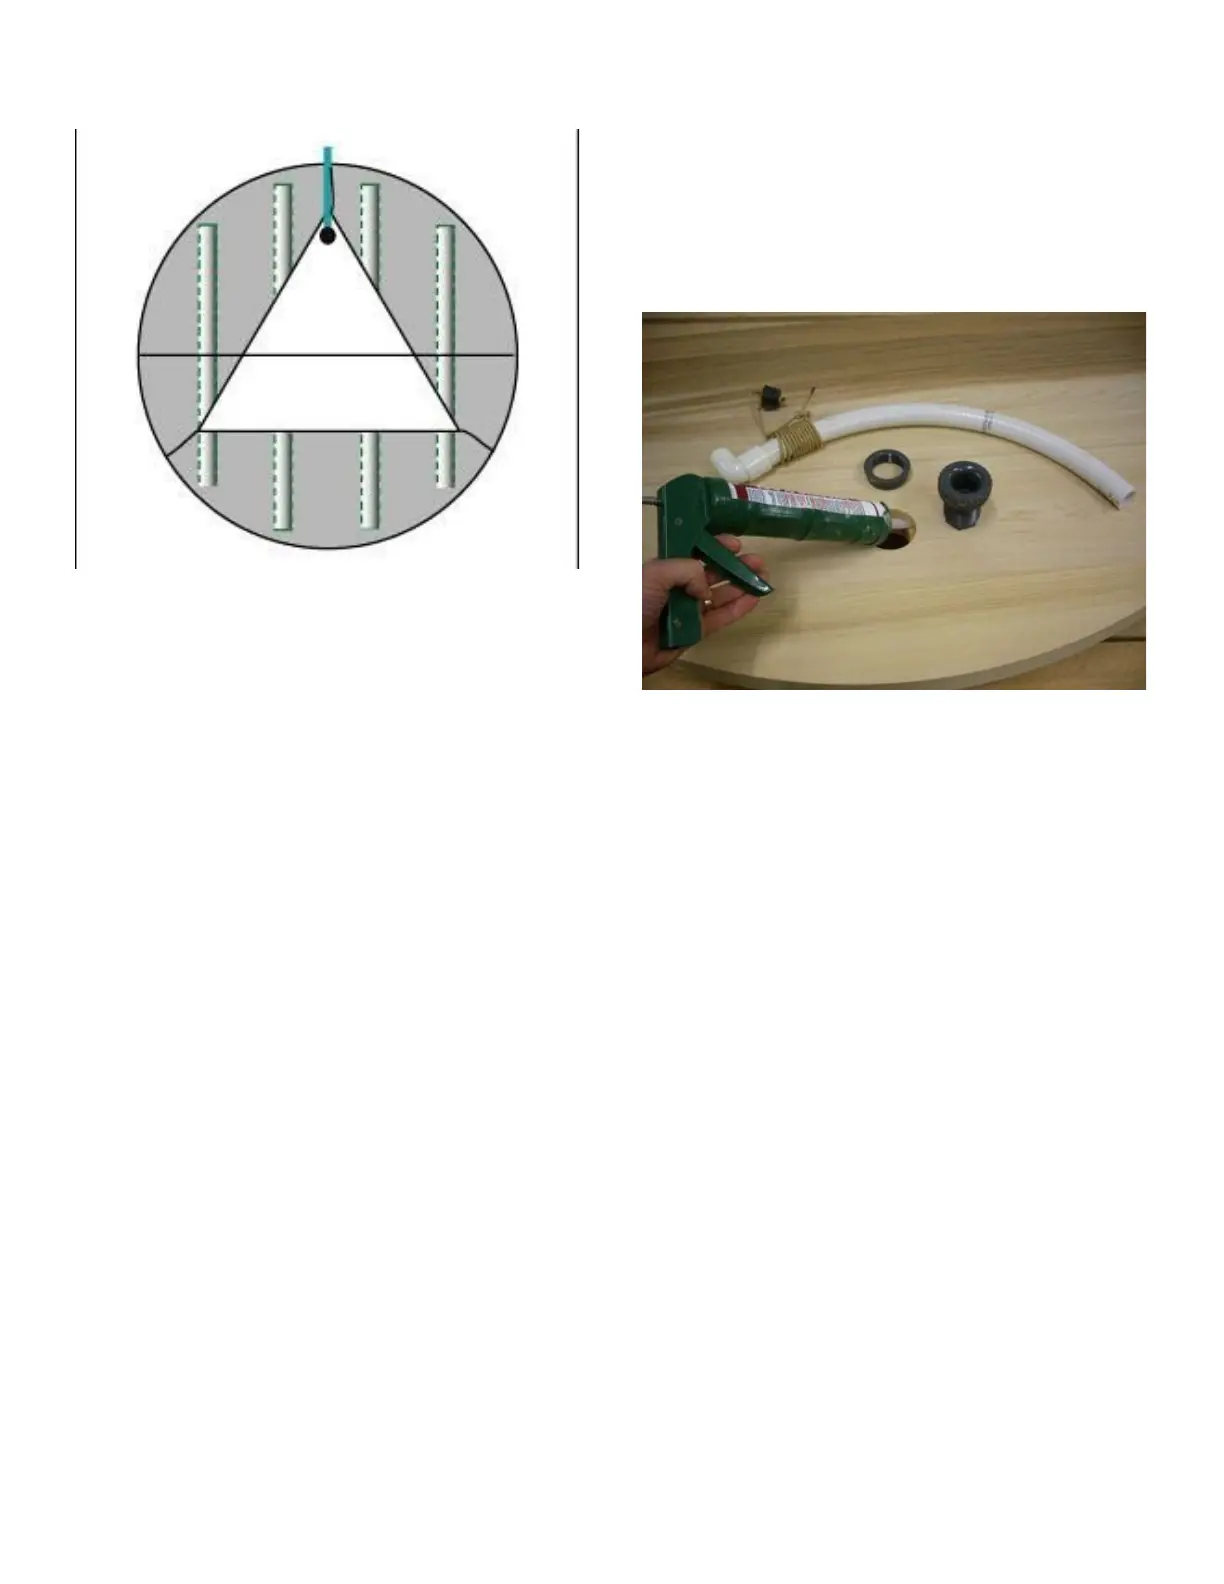
Install the floor drain and drain hose at this time in the
recessed hole in one half of the floor. The recess is in the
topside of the floor. Put a medium sized bead of silicone
around the corner of the recessed hole, and a small
amount on the threads of the drain (Figure 5.1.) Slip the
drain in place with the rubber gasket on the top side
(inside the tub) and tighten the large nut underneath hand
tight. Finish with 1/2 turn with a pipe wrench - do not
over tighten! Next, thread the drain pipe (about 18” long)
with elbow attached into the drain fitting.
Make sure this drain pipe is extending beyond the
perimeter of the tub for easy access. Install the rubber
drain plug inside the tub - hand tighten. Tip: you can
attach a garden hose fitting to the end of the drain hose so
that a standard garden hose can be used to direct the
drained water to the desired location. Water from your
tub is safe for watering lawns or other landscape plants.
Do not use on vegetables.
Place the long 1/16 x 3/4 inch stainless steel spline in the
slot on the edge of one half of the floor (this may have
been done in advance by us.) Tap the spline with the
mallet so that it goes in about halfway. Place a thin 1/8”
bead of silicone in the corner on each side of this spline.
Insert the two dowels in the pre-cut dowel holes below
the spline. The sole purpose of the dowels is to keep the
floor panels aligned.
Figure 5.1 Drain assembly and silicone bead being
applied to the recessed hole.
Place the two halves of the floor on the timbers with the
BEVEL SIDE DOWN, nicely sanded side up, so the floor
seam runs perpendicular to (right angle to) the chine
joists.
Check that the drain is placed properly and that the joists
do not interfere with it. At this time consider the
placement of the benches as well - making sure that the
drain will not be underneath a bench where it will be hard
to access. See Figure 4.3 for the relationship between the
drain, benches and floor. Make adjustments now as
needed.
Be sure that the mating edges of the floor are clean and
free of debris. Make sure you have a consistent bead
(1/8” inch diameter) of silicone on each of the mating
edges of the floor seam before assembly.