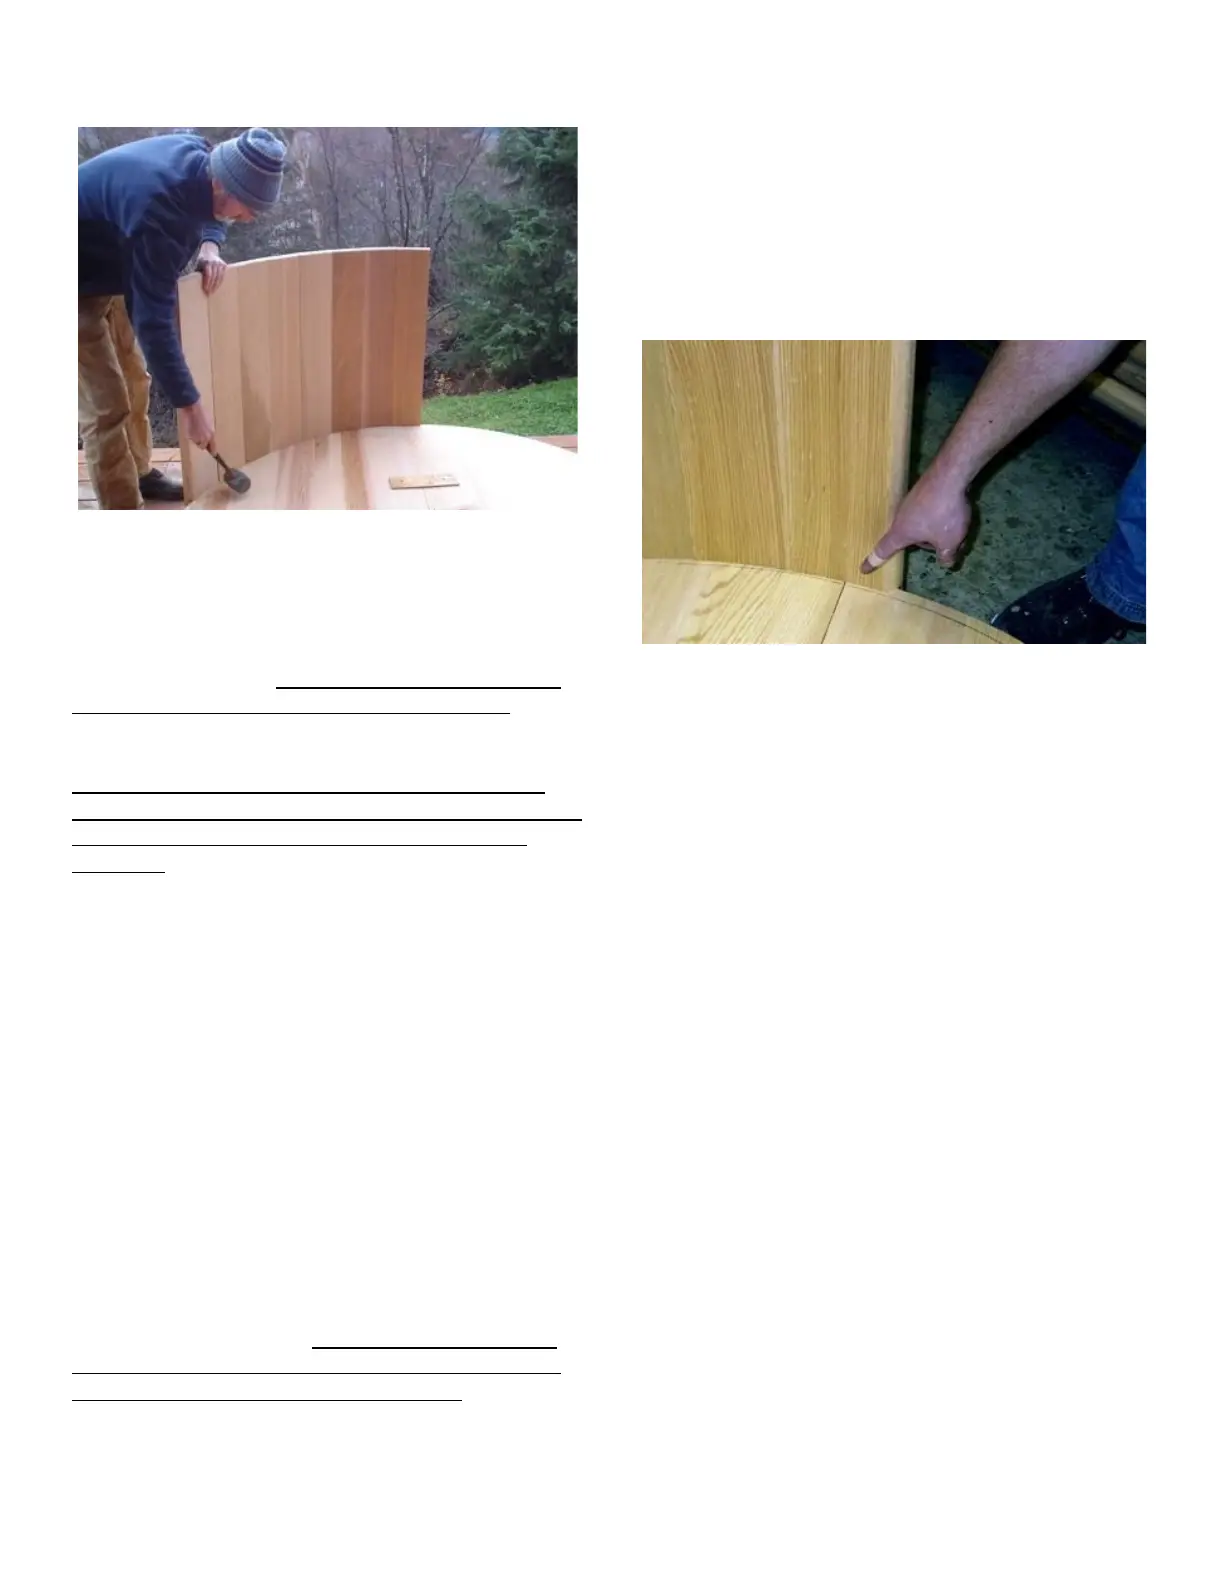
Figure 6.2 Adding staves
As you reach the places where the special staves go
(heating holes for example) add them in.
The other spot that needs special attention is the opposite
end of the floor seam. You must avoid having the floor
seam line up directly with a seam between staves. If it
works out that way, sort through the staves and find a
couple of narrower or wider staves to solve the problem.
If necessary, start over and shift the first stave over to
correct the problem. Arrange so the floor seam and stave
seam are a minimum of 3/4 inch apart. This is very
important! See Figure 6.3.
Keep an eye on the floor seam in the process of installing
staves. It should stay closed. If it spreads a bit - rap the
opposing sides of the floor with your mallet. Make sure
that the plywood brace is in place and doing its job.
Take your time and work your way around the tub adding
staves until you get back near the starting point. Stop
periodically to tap inward any staves that have loosened
in the process of adding others. Check the pencil
reference line to judge how you are doing. Use the mirror
to check for consistent tight joints or minimal gap (less
than 1/16”. The set of staves were custom cut to fit your
particular tub, so the last stave will fit right in if you have
been careful to keep the staves tight.
If the last stave seems a loose fit, first make sure that
you did not leave one out. Your packing list shows the
correct number of staves for your tub. Count the staves
and make sure you have the correct number. It is okay
for the last stave to be a loose fit, HOWEVER, will need
to distribute that excess space (gap) around the tub by
adjusting the position of the staves. Use the mirror and
mallet to work the staves sideways so that the excess is
distributed among several small gaps of 1/32 to 1/16th
inch or less. In other words, we want several tiny gaps
instead of one or two large ones. These will be taken care
of when the tub is tightened.
Figure 6.3 Make sure that the floor seam is straddled by stave
If the last stave seems too big, this is also a normal
condition that can occur if the staves have been driven
inward prematurely or there is more accumulated gap
between staves than we want.
Step 1: Close up any noticeable gaps between staves to
make more room. Do this by using the mallet on the
inside and your hand on the outside to tap the staves
sideways. Driving them inward only makes the circle
smaller and compounds the problem. Use your mirror to
find larger gaps and adjust as needed. It may seem
counter-intuitive, but loosen the staves by lightly tapping
out from inside first, then snug them together sideways to
close excess gap. Check all around the tub with the
mirror and fix any problem areas. Now see if your last
stave fits in. Repeat if necessary. Your tub kit was
custom fit in our shop checked for proper fit before
shipment.
If this does not solve the problem, do not force things,
instead stop and give us a call for assistance 888 810
7717.
Section 7: Compression Straps
Time needed: approximately 15 minutes
Once all the staves are in place you are ready for the
bottom compression strap. Locate the stainless steel