compression straps. They supply the external support
needed to tighten and support the tub. Refer to table
below for the proper number of straps for your tub.
Locate the large 8” x 5/8” bolts for the clamps. Remove
the nuts. We strongly recommend putting a little grease,
Vaseline, or never-seeze on the nut threads so they will
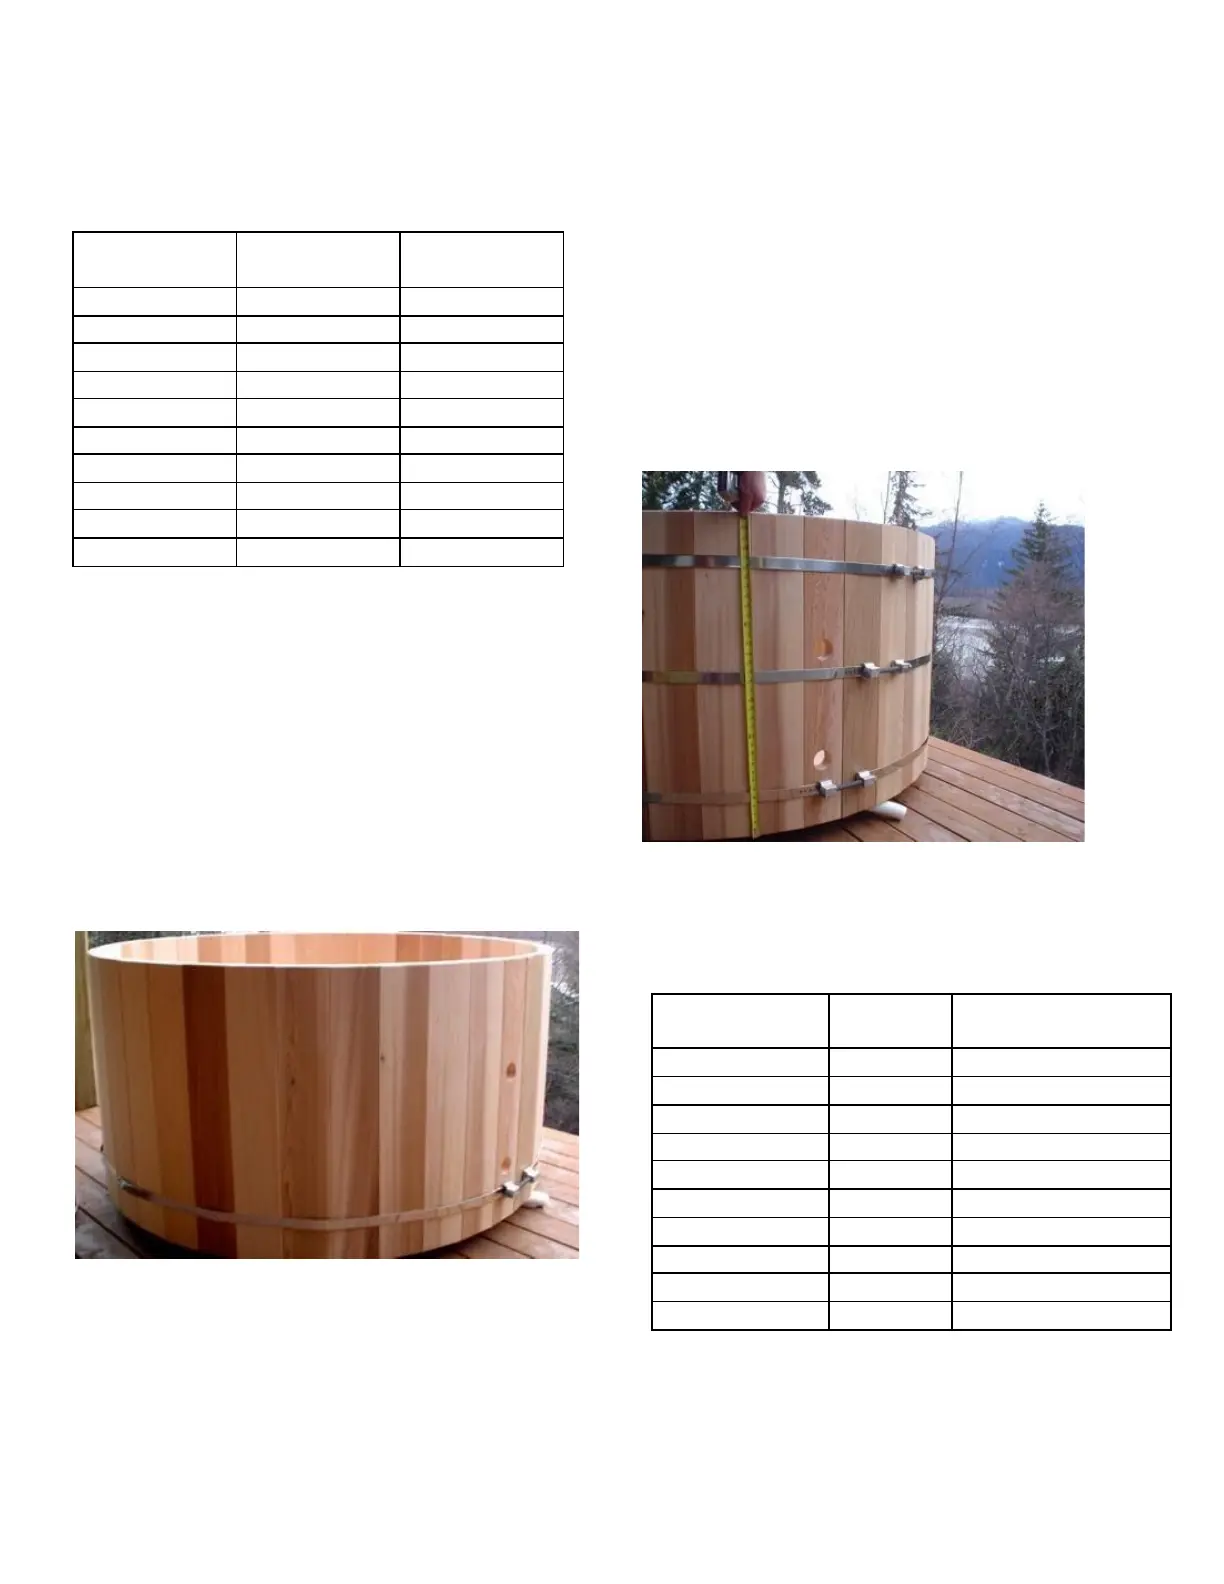
not corrode in the future. With your helper, fit the first
strap around the tub at 4.75 inches measured from the
bottom of the staves to the top of the compression strap.
This measurement is crucial so that pressure is applied
directly over the floor.
The fit may be tight, but you will
be able to pull the ends close enough to slip the bolt in
place and get the nut started. See Figure 7.1. Use your
15/16” socket wrench to take up a little slack so the strap
will stay in place - only a few turns.
Figure 7.1 first compression strap loosely in place.
Now install the other straps and position as shown in
Figure 7.2. The position of each bolt clamp should be
staggered. Also, the bolt clamp should straddle a seam
between staves.
Alternative strap technique: Loosen bolt almost all the
way, but leave attached – maximizing the diameter. You
should be able to drop the strap over the top of the tub
and into position.
The bottom strap should always be at 4 3/4 inches from
the bottom, measured from the bottom of the stave to the
top of the band. Use your wrench to slightly tighten each
band enough so they hold their position. Go around the
tub with a tape measure and check the height of each
band and make sure they look level, moving them up or
down as needed.
Figure 7.2 Proper placements of straps and bolts. Note
how bolts straddle a seam between staves and are
staggered.