Figure 5.2 Floor seam, dowels and silicone
Align the floor panels and use a mallet to tap them
together so spline and dowels line up and the seam is as
tight as possible. If you have access to a long enough
pipe clamp(s) you can use it to squeeze the panels
together. A small gap between the panels is acceptable
and will swell shut when water is introduced.
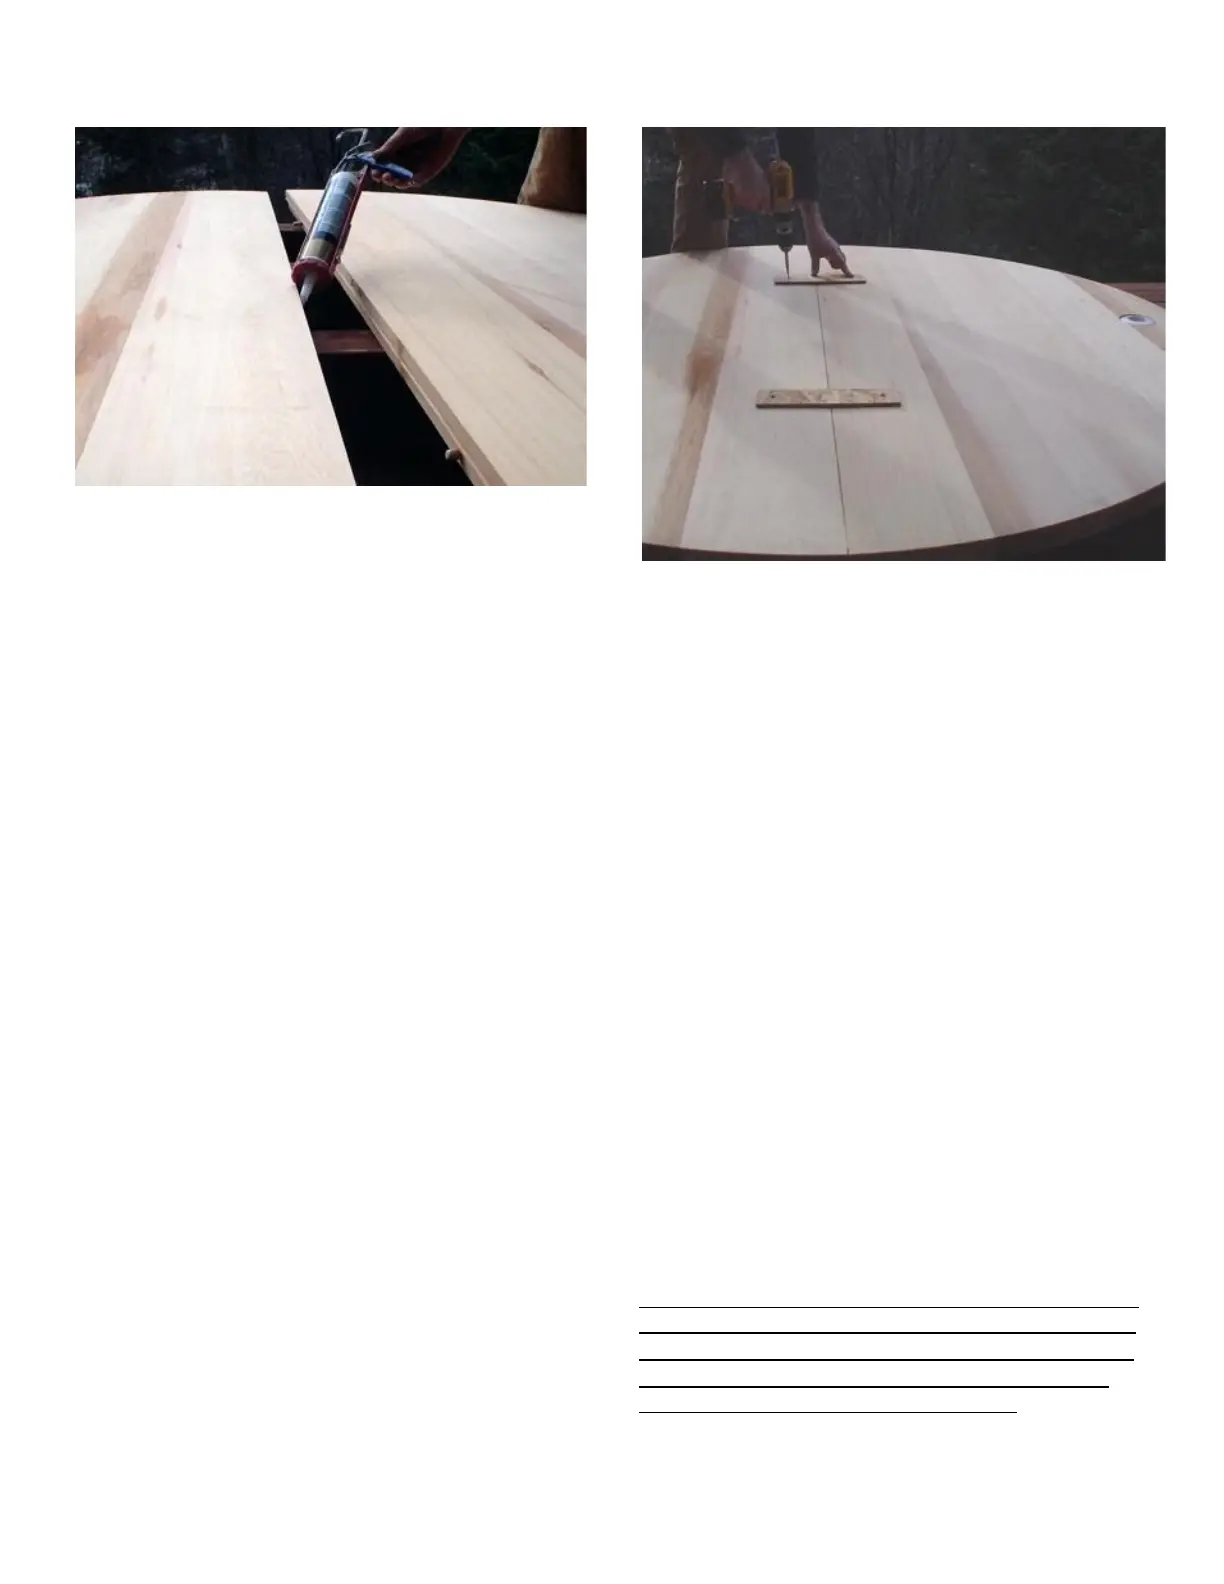
Use the two small pieces of scrap plywood provided as
temporary floor braces and lay them across the floor seam
several inches from each side of the tub. Temporarily
screw them directly to the top of floor with the four short
screws provided. (Figure 5.3) This will help keep the
center seam from opening up during assembly. They will
be removed in a later step after the tub is assembled.
Failure to use these braces will cause problems during
assembly. The small holes caused by the screws will
swell closed later.
Figure 5.3 Temporary floor braces
Now check that the floor is level and oriented as you want
it. Also check that the ends of the chine joists are at least
2 inches inside the edge of the tub floor (inside of the
bevel) so that they will not interfere with the placement of
staves. You may want the floor to have a slight tilt
toward the drain (1/4”). This can be accomplished by
shims or gravel UNDERNEATH the chine joists - i.e.
between the ground and the joists. This way the tub floor
is still fully supported. Take your time with this step -
the goal is a tub floor that is stable and level. Once the
floor is level and stable, go on to section 6.
Section 6: Staves
Time needed: approximately 45 minutes
The staves are the vertical wood parts that make up the
sides of the tub. Sort through the set of staves and
separate out the special staves (carvings, heater holes,
etc.) and set them aside. Now is the time to plan where
you want them placed on your tub. For example, place
the suctions and jets where they work best for your
installation. Review the instructions for the type of
heating system for your tub for more details before
continuing.
Your packing list shows the correct number of staves for
your tub. Count the staves now and make sure you have
the correct number. In some cases, we include a SPARE
stave, which is not to be used unless it is necessary to
replace one that is damaged. (Call us first)