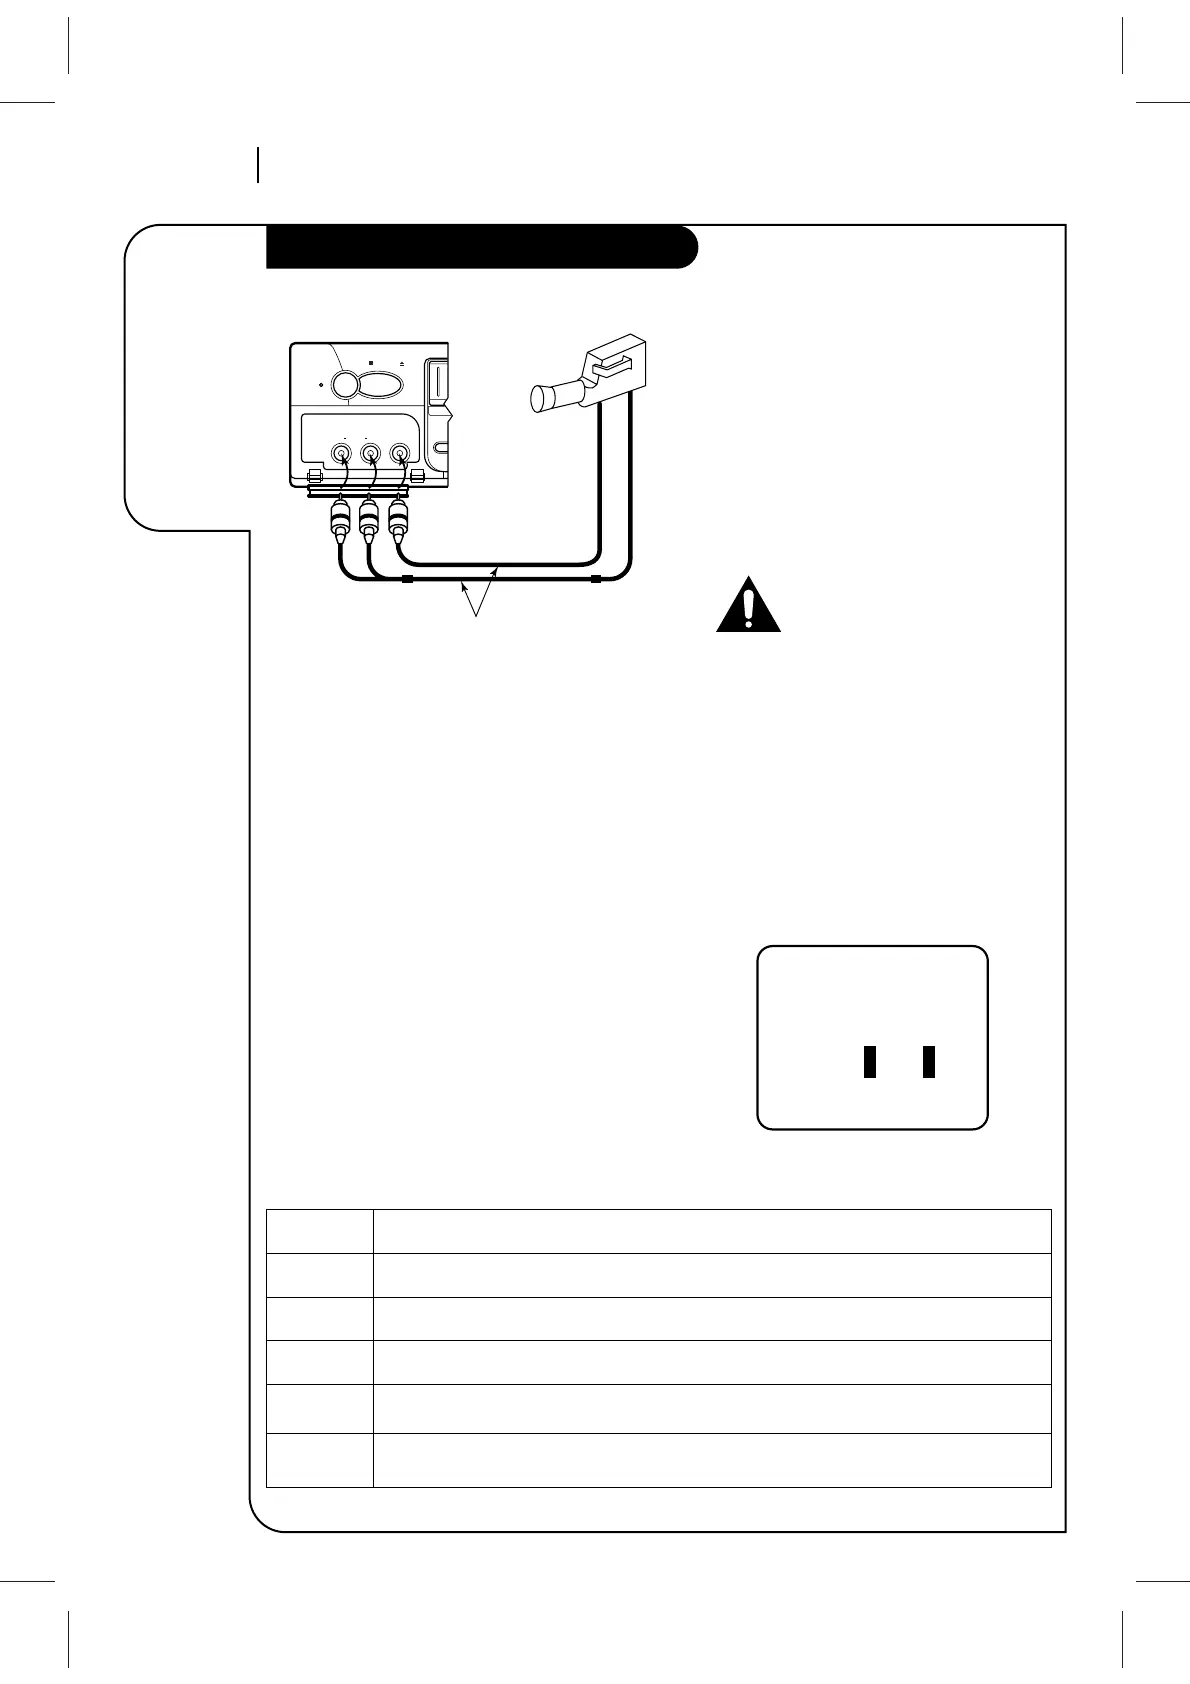
A/V cable is not provided with VCR.
Select AUX for Viewing an Audio/Video
source like a Camcorder
1. With TV and VCR on, place VCR in VCR mode by
pressing TV/VCR on the remote (and repeat) until
the VCR indicator appears in the VCR’s front panel.
2. Select channel 3 (or 4) on the TV. Note: If your TV
has A/V jacks, you may get a better picture if you
connect your VCR there. (Then, select the A/V
source on the TV.)
3. At the VCR, Channel Down lower than the lowest
channel (or Channel Up above the highest) to
select “AUX2” Or, you may—
Choose the SETUP menu as described in “How to
Access Menus.”
Press 3 for the SETUP menu’s SOURCE item.
Press 4 for AUX2, then ENTER. (Press QUIT/CC to
exit.)
Turn off power or unplug VCR
before making any connections.
Press 4 to select AUX2
SOURCE Shows the program source—TV, CATV, or AUX—selected for the VCR to receive.
TUNER The VCR is using its Tuner to receive programs from an antenna or cable.
TV Selects programs for the VCR from a rooftop-type antenna.
CATV Selects programs for the VCR from Cable TV.
AUX1 Selects programs for the VCR from the rear R-AUDIO-L—VIDEO IN jacks (where you may
have connected your camcorder).
AUX2 Selects programs for the VCR from the front R-AUDIO-L—VIDEO IN jacks (where you may
have connected your camcorder).
Items in the Menu