EasyManua.ls Logo

Zenna Home 2928SS User Manual

Zenna Home 2928SS
8 pages
To Next Page IconTo Next Page
Page #1 background imageLoading...
Page #1 background image
www.zennahome.com IS02929-I
Pg 1 of 8
MCS 4/13/2015
Assembly Instructions - Model 2928SS (Chrome)
Instrucciones de Ensamblado - Modelo 2928SS (Cromo)
Instructions d'assemblage - Modèle 2928SS (Chrome)
Before You Begin:
Thank you for purchasing this product. Please identify all parts and hardware pieces before you begin. When laying
out parts, place them on a soft surface to prevent scratching.
If any pieces are missing, call our Toll Free Number 1-800-892-3986 between 8:00AM-5:00PM EST Monday through
Friday or contact our website at www.zennahome.com for more information.
Antes de que empiece:
Muchas gracias por comprar este
producto.
Identifique todas las piezas y las piezas de ferretería antes de comenzar.
Al distribuir las piezas, colóquelas sobre una superficie suave para evitar que se rayen.
Si faltaran piezas, llame a nuestro número gratuito 1-800-892-3986 entre las 8:00 a.m.- 5:00 p.m., hora del este, de
lunes a viernes o contáctenos a través de nuestro sitio web en www.zennahome.com para solicitar mas información.
Avant de commencer :
Merci d’avoir acheté ce produit. Veuillez identifier toutes les pièces et les accessoires de montage avant de commencer.
Lorsque vous déballez les pièces, placez-les sur une surface non rugueuse afin d’éviter les éraflures.
S’il venait à vous manquer des pièces, appelez notre numéro sans frais 1.800.892.3986 entre 8 h et 17 h (heure de
l’Est des États-Unis), du lundi au vendredi, ou contactez notre site Web à www.zennahome.com pour de plus amples
informations.
©2015 Zenith Products Corp.
Question and Answer IconNeed help?

Do you have a question about the Zenna Home 2928SS and is the answer not in the manual?

Zenna Home 2928SS Specifications

General IconGeneral
BrandZenna Home
Model2928SS
CategoryBathroom Fixtures
LanguageEnglish

Summary

Getting Started and Preparation

Before You Begin

Instructions to identify all parts and hardware before assembly and contact information for missing pieces.

Tools and Parts Identification

Required Tools

Lists all necessary tools for the assembly process.

Product Component List

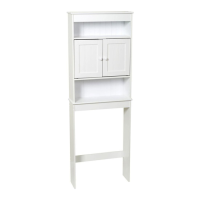
Details all product components, including tubes, shelves, screws, nuts, and caps.

Assembly Instructions

Step 1: Connect Shelves to Vertical Tubes

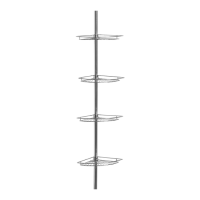
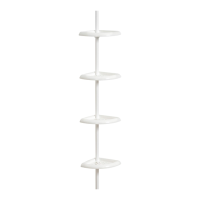
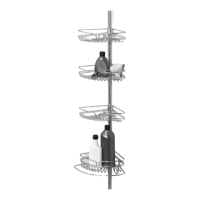
Connect the first two shelves to the straight vertical tubes using small screws.

Step 2: Attach Remaining Shelves

Attach the remaining two shelves to the straight vertical tubes using small screws.

Step 3: Install Top Curved Tapered Tubes

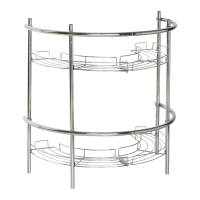
Connect the top curved tapered tubes to the vertical supports using large screws.

Step 4: Install Top Curved Tubes

Connect the top curved tubes to the vertical supports using large screws.

Step 5: Join Curved Tube Ends

Join the ends of the curved tubes to complete the main frame structure.

Step 6: Final Assembly with Caps and Fasteners

Install tube caps and secure the structure with remaining screws and nuts.

Related product manuals