General Maintenance
5.15
1. Remove the key from the ignition switch.
2. Press the Tension Tester steadily to the non-cogged
side
of the belt, half of the distance between the
motor-driven sprocket and rear wheel drive sprocket.
The “lip” of the tester will lead the tester on to the belt.
3. Slowly increase the pressure on the tester, until you
hea
r a clicking sound. Do not increase the pressure
after the tester has clicked.
4. Remove the tester carefully from the belt. Avoid rough
movement
s of the tester, as this would change the
results of the measurement. The measurement should
be in the range of 20-30 kg.
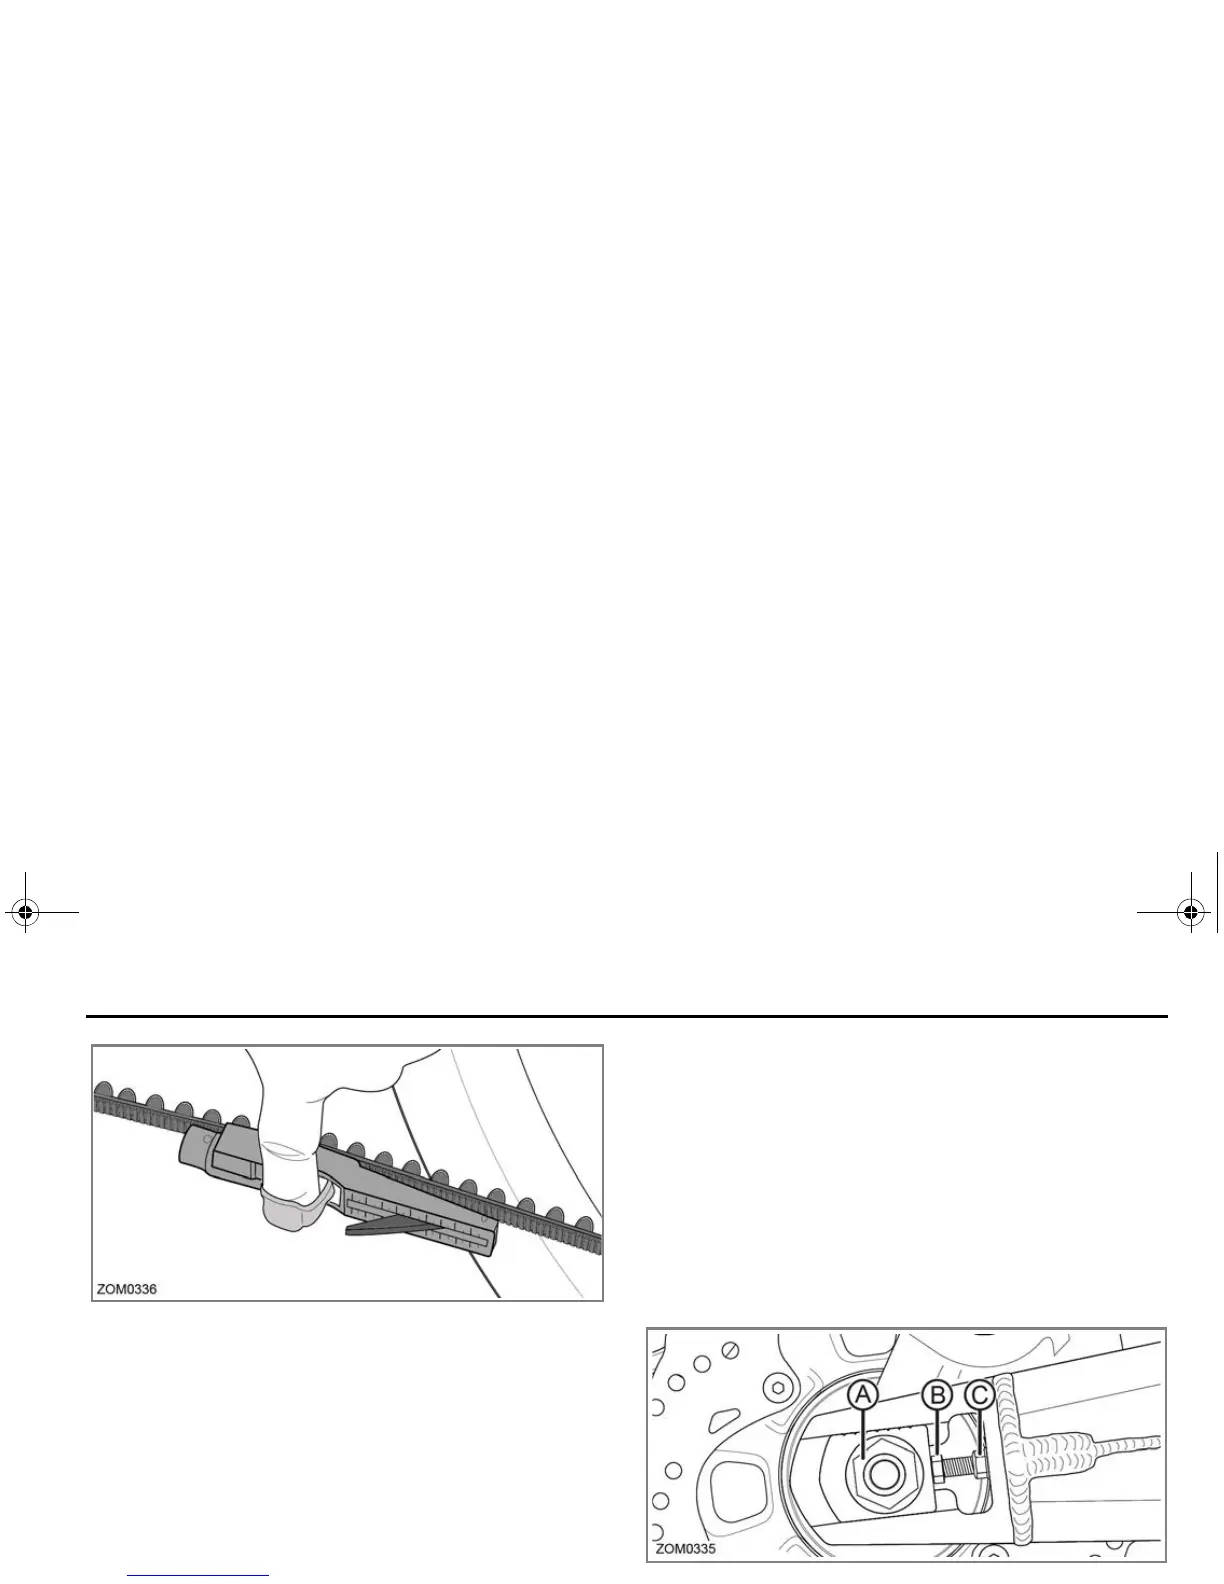
Drive Belt Adjustment Procedure
Note: Adjust both sides (left and right) equally.
1. Remove key from the key switch.
2. Loosen the rear axle nut (A).
3. Loosen the (left and right) 13 mm jam nuts (C).
4. Turn the (left and right) 13 mm adjustment bolts (B) 1/4
turn
at a time until the belt adjustment is within
specification.
Note: Belt tension will increase slightly when motor
mount bolts are fully torqued.
5. Tighten left and right jam nuts (C) to secure the belt.
6. Tighten the axle nut (A).
7. Test ride the motorcycle.
8. Recheck the belt for proper adjustment after the test
ri
de and readjust, if necessary.
Zero Owner's Manual (S and DS).book Page 15 Tuesday, January 20, 2015 2:37 PM