INSTALLATION
LEVELING
Cases must be installed perfectly level to allow efcient operation of the
refrigeration coils and complete drainage of defrost water. Since a level
area is seldom available, the following steps are recommended to insure a
level installation.
1. Measure off and mark on oor the exact dimensions of the case
lineup (Figure 2A). (Check blueprints).
2. Snap a chalk line at the locations for the front and back positions
of the bases.
3. Mark locations of all joints (front and back).
4. Using a laser or transit, nd the highest point along both base rail
position lines. Using the high point as a reference, mark the difference
directly on the oor to each joint, front and back (Figure 2B).
5. If you plan on using optional hat channels to raise the case height,
place them under each pair of bases. The 3 and 4-door hat channels
will be angled slightly to support the front and rear bases. (Figure 3
on page 6 and Figure 5 starting on page 7).
6. Place the required number of shims under each base or optional hat
channel at each joint (front and back) to equal the highest point.
7. The RVZC30, RMZC24, RVCC30 and RMCC24, 2 through 5-door
cases, have segmented bases mounted at the ends and under the
center section of the case. The RVZC30 and RVCC30 1-door and
RVZC30BB and RVCC30BB have full bases that run front to back
and are located at the ends and under the center sections of the case.
The 3RMZC30WA and 3RMCC30WA have segmented bases that run
front to back.
8. Tape all shims in place (Figure 2C). Figure 4 on page 6 shows
the correct orientation of shims under the base or channel.
9. Place additional support shims under all other bases or hat channels
(Figure 5 starting on page 7).
10. Use a carpenter’s level to check installation as you go. The case
should be level from front to back and side to side. Install the case
at the highest point rst, if part of a lineup. Check the level on the
face of the glass doors and sides of the mullions. Do not use the
ceiling to check level.
11. If you’ve purchased seismic restraints, specic instructions for
attaching those restraints are included in your document package.
These instructions should be read and followed before the lineup
is assembled.
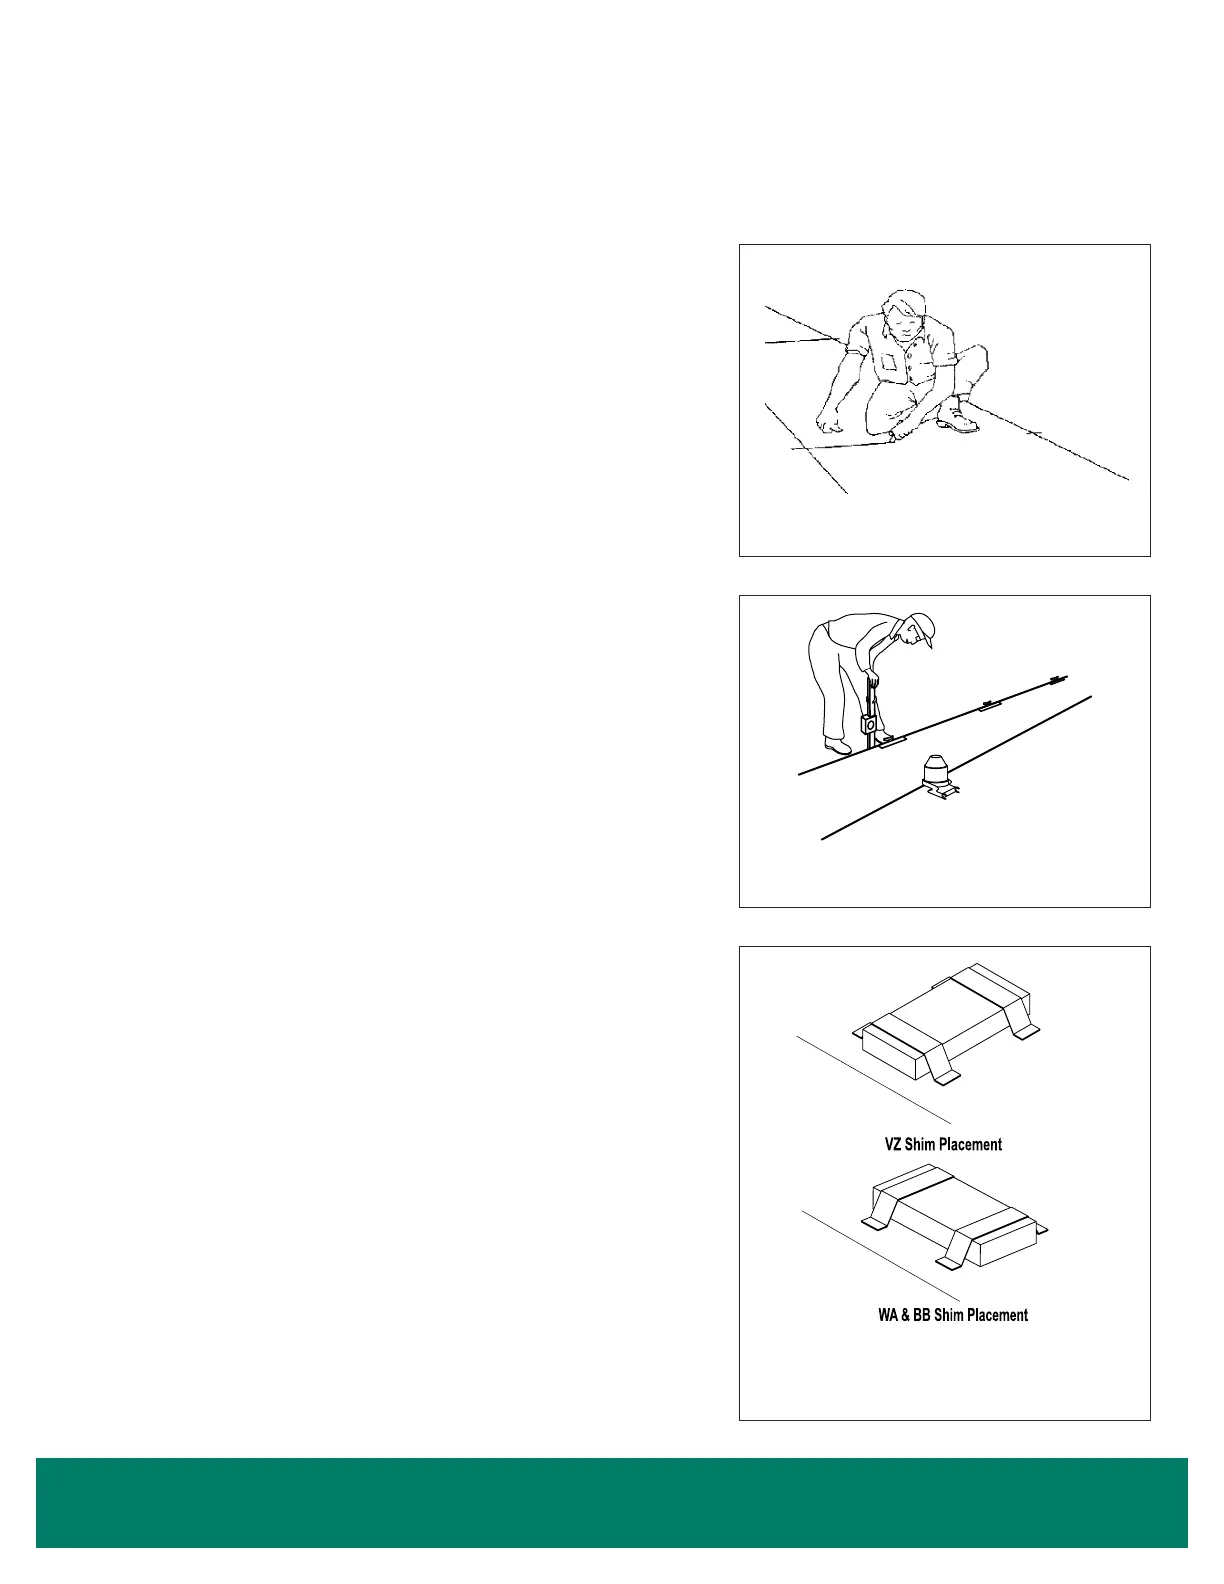
Figure 2: Leveling Cases Prior to Joining
C
a
s
e
F
ro
nt
Case Fro
nt
A. Measure and mark exact case outline
B. Mark oor level differences
C. Shim joints to equal highest points
Installation - Leveling • 5