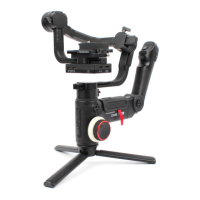
This document outlines the features and usage of the ZHIYUN CRANE 4, a professional-grade gimbal designed for camera stabilization. The CRANE 4 is engineered to provide smooth, stable footage across a variety of shooting scenarios, offering advanced control and flexibility for filmmakers and videographers.
Function Description
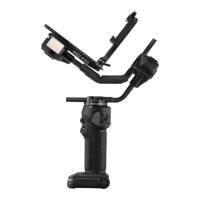
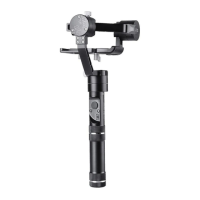
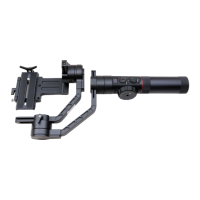
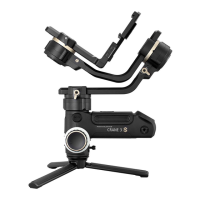
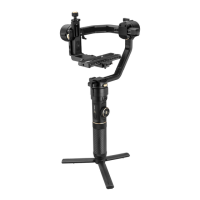
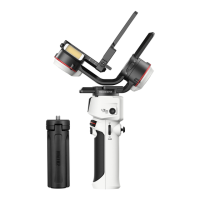
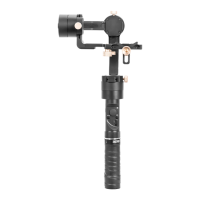
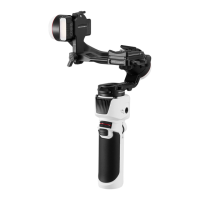
The CRANE 4 is primarily a 3-axis camera stabilizer, meaning it can counteract unwanted movements along the pan, tilt, and roll axes. This stabilization is achieved through a combination of powerful motors and sophisticated algorithms, ensuring that your camera remains level and steady even during dynamic shots. The gimbal supports a wide range of cameras and lenses, making it a versatile tool for various production needs. It features an integrated fill light, enhancing low-light shooting capabilities without requiring external lighting solutions. The CRANE 4 also incorporates a touchscreen display for intuitive control and real-time feedback on settings and status.
Usage Features
Quick Setup and Balancing:
The CRANE 4 is designed for efficient setup. Each axis (pan, tilt, roll) is equipped with a lock switch, allowing users to secure the axes for convenient installation, storage, and initial balancing. The default state is a locked storage state, which should be toggled to unlock the axes before use.
- Mounting the Tripod: The included tripod attaches to the bottom of the gimbal handle, providing a stable base for balancing and stationary shots.
- Mounting the Camera:
- Ensure the gimbal is powered off before mounting the camera.
- Install the camera onto the upper quick-release plate and secure it with screws.
- Attach the upper quick-release plate (with the camera) to the lower quick-release plate and lock the latch.
- If using a long or heavy lens, mount the lens support onto the lower quick-release plate. Adjust its height to securely support the camera lens and tighten the screws.
- For cameras that cannot be balanced with the dual-layer quick-release plate, a camera backing base can be used. First, mount the camera onto the backing base and tighten the screw. Then, install the backing base and camera assembly onto the quick-release plate and secure it with screws. Install the lens support as needed.
- Landscape Orientation: Unlock the quick-release plate latch, then install the dual-layer quick-release plate and camera assembly onto the quick-release plate leveling base. Finally, tighten the latch.
- Portrait Orientation: Unlock the quick-release plate leveling base latch. Hold the leveling base safety lock and push it left to detach it from the level mount. Install the leveling base onto the tilt axis arm, then lock the leveling base latch. Install the camera and dual-layer quick-release plate assembly onto the leveling base, and finally, lock the quick-release plate latch.
- Removing the Camera: To remove the camera (in either horizontal or vertical orientation), first unlock the upper quick-release plate latch. Then, hold down the safety lock of the upper quick-release plate and slide the camera and upper quick-release plate assembly out.
- Connecting Camera Control: Connect the camera control port and the camera/image transmission control port of the gimbal using one of the provided camera control cables (Type-C to Multi USB, Type-C to Type-C USB, Type-C to Micro USB, or Type-C to Mini USB), depending on your camera's USB port type. Refer to the ZHIYUN website for compatibility details.
Balancing the Gimbal:
Proper balancing is crucial for optimal performance and to prevent motor strain. The CRANE 4 requires both horizontal and vertical balancing of the tilt, roll, and pan axes.
- Horizontal Balance of the Tilt Axis:
- Unlock the tilt axis lock switch and loosen the quick-release plate latch.
- Push the camera forward or backward until it remains still and almost level with its lens facing front.
- Tighten the quick-release plate latch to secure.
- Vertical Balance of the Tilt Axis:
- Make the lens face up and loosen the level mount lock screw.
- Push the entire level mount forward or backward until the camera remains still and vertical to the ground.
- Tighten the screw to secure.
- Horizontal Balance of the Roll Axis:
- Unlock the roll axis lock switch and loosen the roll axis latch.
- Move the roll axis arm left or right until the camera remains still and level.
- Tighten the roll axis latch to secure.
- Vertical Balance of the Roll Axis:
- Unlock the roll axis lock switch and loosen the quick-release plate leveling base latch.
- Move the quick-release plate leveling base up or down until the camera remains still and level.
- Tighten the quick-release plate leveling base latch to secure.
- Balance of the Pan Axis:
- Unlock the pan axis lock switch and loosen the pan axis latch.
- Rotate the pan axis arm until the camera remains still and level.
- Tighten the pan axis latch to secure.
Accessories Installation:
- Installing a Fill Light Reflector: Align the opening of the fill light reflector with the fill light on the CRANE 4 and cover the reflector over the fill light.
- Installing TransMount Sling Grip 2S (Sling Grip):
- Align the installation screw of the sling grip with the installation screw hole on the gimbal.
- Adjust the sling grip to the appropriate position and tighten the screw.
- Rotate the sling grip to the far right and tighten the sling grip lock screw after adjustment. The sling grip can also be rotated to the far left for dual-hand use.
- Installing TransMount Wrist Rest 2S (Wrist Rest):
- Align the installation screw of the wrist rest with the installation screw hole on the gimbal.
- Adjust the wrist rest to the appropriate position and tighten the screw.
- Adjust the position of the screw by rotating the wrist rest angle according to usage needs.
- Note: Adjust the sling grip and wrist rest to a comfortable position. The sling grip is extendable, allowing for length adjustment.
Control and Operation:
- Power Button: Used to power on/off the gimbal.
- Joystick: Provides precise control over the gimbal's pan and tilt movements.
- Photo/Video Button: Triggers photo capture or video recording.
- Mode Switch: Allows switching between different gimbal modes (e.g., Pan Follow, Lock, POV).
- Touchscreen: The primary interface for navigating menus, adjusting settings, and viewing status.
- Fill Light Control Wheel: Adjusts the brightness or settings of the integrated fill light.
- Trigger Button: Often used for quick mode changes or re-centering the gimbal.
- Adjustment Wheel: Provides fine-tuning for various parameters, such as focus or zoom, depending on the camera and lens setup.
Software Features:
- Quick Keyword Search: The PDF electronic document supports quick keyword searching within the software. Users can click the search function or enter keywords to find relevant information.
- Quick Directory Jump: The PDF electronic document allows users to click on directory titles to quickly jump to specific chapters or sections.
- Firmware Upgrade & Calibration: The CRANE 4 supports firmware upgrades to introduce new features and improve performance. Calibration (including six-side calibration and motor fine-tuning) is essential for maintaining optimal stabilization and should be performed when needed, such as after a firmware update or if the gimbal's performance degrades.
- ZY Play App: The ZY Play app provides additional control and features for the CRANE 4, including remote control, advanced settings, and creative shooting modes. Users can download the app, connect it to the gimbal, and explore its various functionalities.
Maintenance Features
Charging:
The CRANE 4 features a built-in battery.
- First-Time Use: Fully charge the battery to activate the gimbal and ensure proper function.
- Charging Method: Use the provided USB Type-C cable to connect the CRANE 4 to a USB charger (not included). It is recommended to use USB chargers that support the PD protocol, with a maximum of 25W PD charging.
- Important Note: The USB charger is not provided in the package. Always power off the CRANE 4 before charging.
Calibration:
Regular calibration is important for maintaining the gimbal's precision and stability.
- Circumstances When Calibration Is Needed: Calibration may be required after a firmware update, if the gimbal exhibits unusual movements, or if it has been subjected to significant impact.
- Six-side Calibration: This comprehensive calibration process helps the gimbal learn its orientation and improve accuracy across all axes.
- Motor Fine-Tuning: Allows for precise adjustments to individual motor responses, optimizing performance for specific camera and lens setups.
Firmware Upgrade:
Keeping the gimbal's firmware up to date ensures access to the latest features, bug fixes, and performance enhancements. Firmware upgrades are typically performed through the ZY Play app.
Safe Operation Guidelines:
Adhering to safe operation guidelines is crucial for the longevity of the device and user safety. These guidelines typically include:
- Avoiding extreme temperatures and moisture.
- Not powering on the gimbal without a camera mounted and balanced.
- Handling the gimbal with care to prevent physical damage.
- Using only approved accessories and charging methods.
By understanding these functions, usage features, and maintenance aspects, users can effectively operate and care for their ZHIYUN CRANE 4, maximizing its potential for professional-grade videography.