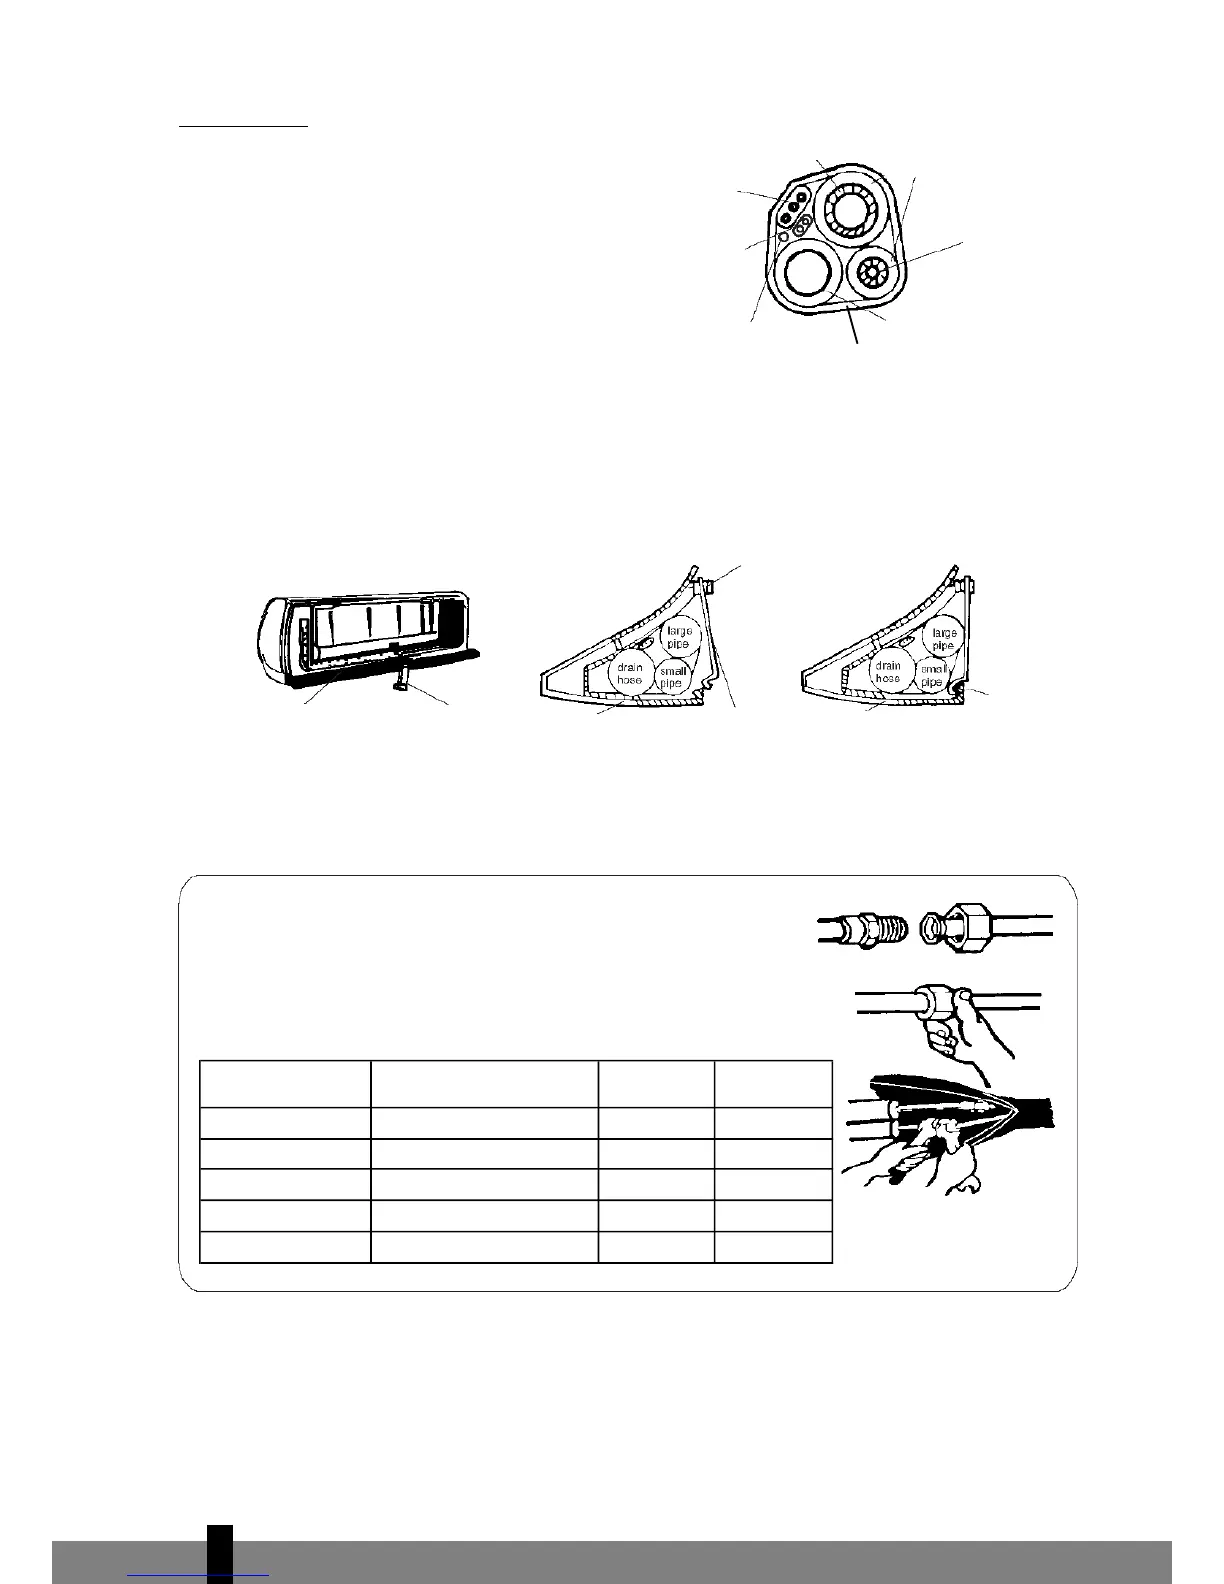
P
ipe insulation:
a. Place the drainage hose under the pipe.
b. Use insulating material exceeding 6 mm in
thickness.
- The drainage hose must slope downwards
s
lightly in order to allow moisture to drain
away easily.
Ensure that the drainage hose is not
twisted and does not protrude. The end
may not hang in the water.
If the drainage hose is extended with a hose, the section running alongside the indoor unit must be
insulated.
- If the wire/pipes are on the right hand side, the wires/pipes, power cable and drainage hose must be
insulated and fastened to the back of the indoor unit with a pipe clamp.
A. Fasten the pipe clamp to the groove.
B. Press the clamp to attach it to the mounting plate.
4
10
Large pipe
Power cable
S
mall
pipe
D
rainage hose
W
iring of defrosting
regulator (heat pump)
Power cable 1
(
heat pump)
Insulating pipe
Mounting plate
Pipe clamp
Mounting plate
Pipe clamp
Mounting plate
Hook here
Push through
here
Connecting the pipes
a. Connect the indoor unit pipes with two nut spanners. Select the
correct tightening moment in order to prevent the pipes, con-
necting pieces and nuts from being deformed or damaged.
b. First tighten by hand, and then with nut spanners.
Tape
Model Pipe dimensions
Nut size
S1126, S1135, S1153 Liquid Side (ø6 or 1/4 inch) 1.8 kg.m 17 mm
S1170 Liquid Side (ø10 or 3/8 inch) 3.5 kg.m 22 mm
S1126 Gas Side (ø10 or 3/8 inch) 3.5 kg.m 22 mm
S1135, S1153 Gas Side (ø12 or 1/2 inch) 5.5 kg.m 24 mm
S1170 Gas Side (ø16 or 5/8 inch) 7.5 kg.m 27 mm
 Loading...