13
sec.
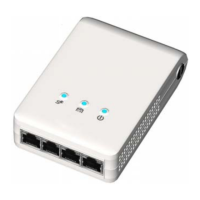
Step 3. In less than two minutes after the above step, press GROUP Button of
device B for 2 to 3 sec (make sure POWER LED starts blinking) to
ender
Group pairing procedure. After 8 ~ 10 sec, if device B is
successfully joined to Device A’s network group, the LED stop blinking
and the
Group pairing procedure completes. At this moment, device B will
connect well to device A and can start to transmit data between the two
devices.
This way, Powerline device B joins same logical network as device A. Users can
join device C to device A’s logical network with same procedure. Thus device C
joins well into device A’s logical network group, and device B is also in device A’s
logical network. Thus device A, B, and C are in the same logical network group.
Users can assign as many Powerline devices into this logical same network group
as possible with the maximum number described in the S
PECIFICATION section.
Remove a device from a logical network Group
For example, device A and device B are in the same logical network group, if uses
want to remove device A from this logical network group, just follow the procedure
in Step 1 by pressing GROUP button of device A for 10 seconds. This makes
device A not able to communicate with device B. If users want to remove a device
from a logical network group containing 3 or more devices, just operate the
GROUP button of this device as in Step 1.
Setting different network Group
To remove device B from the logical network of device A, just do Step 1 as above.
This way, a random network name is generated and which is different from device
A’s network name. By adding other devices to device B’s network group or to
device A’s network group using same procedures as Step 2 and 3, users can form
two groups of logical network.
The following are some application examples and their installations.
 Loading...