The Zip'r Traveler & Xtra Owner's Manual describes a mobility scooter designed to provide mobility to individuals who are limited to a seated position and have the capacity to operate such a device. These scooters are state-of-the-art life-enhancement devices, with Zip'r Mobility offering a range of products to suit individual user needs. The final selection and purchase decision rests with the user and their healthcare professional.
Safety Guidelines and Warnings:
The manual emphasizes the importance of safety, using specific symbols to identify warnings, mandatory actions, and prohibited actions.
- WARNING! (black symbol on an orange triangle with a black border) indicates potentially hazardous conditions that could lead to personal injury, component damage, or malfunction if procedures are not followed.
- MANDATORY! These actions must be performed as specified to prevent personal injury and/or equipment damage.
- PROHIBITED! These actions should never be performed as they can cause personal injury and/or equipment damage.
Initial setup of the mobility scooter must be performed by an authorized provider or qualified technician. Users are mandated to read and understand the entire owner's manual before operating the scooter for the first time.
Important Technical Specifications and Limitations:
- Maximum Weight Capacity: 250 lbs / 112 kg. Exceeding this limit voids the warranty and may cause personal injury.
- Inclines: Users should not exceed recommended inclines or weight limits.
- Curb Negotiation: Do not attempt to negotiate a curb greater than 1 inch. Anti-tip wheels may interfere with smooth transitions when ascending or descending curbs.
- EMI-RFI: The product has been tested and passed at an immunity level of 20 V/M.
- Anti-Tip Wheels: These are integral safety features and must not be removed or modified.
- Batteries: Requires two 12-volt batteries. Always use two batteries of the exact same type, chemistry, and amp-hour (Ah) capacity. Do not mix old and new batteries; replace both at the same time. Battery servicing or replacement should only be done by an authorized provider or qualified technician.
- Charger: The scooter uses an off-board charger. Do not use extension cords with the charger; plug it directly into a standard electrical outlet.
Usage Features:
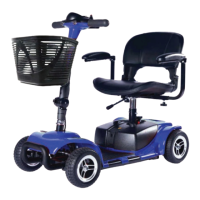
The scooter features a tiller console that houses all controls:
- Key Switch: Turns the scooter on (clockwise) and off (counter-clockwise). Removing the key is recommended to prevent unauthorized use.
- Throttle Control Lever: Controls forward and reverse speeds. Pushing the right side with the right thumb moves forward; pushing the left side with the left thumb moves in reverse.
- Horn Button: Activates a warning horn, which only functions when the scooter is turned on.
- Speed Adjustment Dial: Preselects and limits the scooter's top speed. A tortoise image represents the slowest setting, and a hare image represents the fastest setting.
- Headlight Switch: Toggles the front headlight on (forward) and off (rearward).
- Battery Level Indicator: Displays approximate battery strength using a color code: green for fully charged, yellow for medium, and red for immediate recharge. Accuracy is best checked at full speed on a dry, level surface.
- Troubleshooting LED Indicator: Located on the control stack, it flashes to indicate specific issues (see "Troubleshooting" section).
Pre-Ride Safety Check:
Before each use, users should perform a safety check:
- Check all harness connections for security.
- Verify battery level.
- Ensure brakes operate properly.
- Inspect tires for damage or excessive wear.
- Check all electrical connections for tightness and corrosion.
- Ensure the manual freewheel lever is in drive mode.
- Charge the scooter for 6-8 hours before first use.
Operating the Mobility Scooter:
- Getting On/Off: Always remove the key from the key switch before getting on or off to prevent accidental movement.
- Steering: Pull the right handgrip to steer right, left handgrip to steer left. Move the tiller to the center for straight driving.
- Stopping: Slowly release the throttle control lever; electromagnetic regenerative brakes engage automatically.
- Reverse Speed: Slower than forward speed.
- Stability: Avoid actions that adversely affect steering and stability, such as holding a leash, carrying passengers, hanging articles from the tiller, or towing/being pushed by another vehicle.
Comfort Adjustments:
- Tiller Angle Adjustment: Loosen the tiller adjustment knob, raise the tiller to the desired angle, and retighten. The tiller lock (at the bottom front) should only be locked during transportation. Always remove the key before adjusting.
- Swivel Seat Adjustment: A lever on the right side of the seat base allows the seat to disengage, rotate to the desired position, and lock into place.
- Armrest Width Adjustment: Loosen adjustment knobs, slide armrests in or out, align holes, and tighten knobs. Armrests can be lifted for easier access.
- Seat Height Adjustment: Use the attached ring to pull and remove the detent pin from the lower seat post. Raise or lower the upper seat post to the desired height, align holes, and fully insert the detent pin. The seat may need to be fully removed for this adjustment.
Assembly & Disassembly:
The scooter consists of five main sections: front frame, rear frame, battery box, seat post, and seat. Disassembly is the reverse of assembly.
- Tilt the rear frame back, connect front frame curved locking brackets to rear frame bracket pegs.
- Press the latch in the middle of the rear frame to release/lock the frames.
- Push the rear frame forward with a downward motion until the latch locks onto the front frame locking peg.
- Adjust tiller angle.
- Place battery box into compartment, ensuring connections are engaged.
- Insert chrome seat post extension into seat post at desired height.
- Install seat by lowering it onto the seat post extension and rotating until it locks facing the tiller.
Manual Freewheel Lever:
Located at the rear of the scooter, this lever allows manual pushing.
- Push forward to disable drive and brake systems (freewheel mode).
- Push backward to re-engage drive and brake systems (drive mode).
- WARNING! Never operate the freewheel lever while seated or on an incline. Use only on a flat surface. Do not use as a tie-down point.
- PROHIBITED! Disengage drive motors only on a level surface. Remove the key. Stand to the side when engaging/disengaging.
Battery Pack:
Easy-to-remove with a handle. Contains two rechargeable batteries and the main circuit breaker (reset button).
Maintenance Features:
- Daily: Charge battery if used for more than twenty minutes. Store in a warm, dry, climate-controlled environment.
- Cleaning: Clean shroud (durable ABS plastic with high gloss finish) with a damp towel. A light application of car wax can help retain gloss. Use rubber conditioner on tire sidewalls, bumpers, and trim pieces.
- PROHIBITED! Do not spray the entire scooter with water. Do not apply rubber conditioner to tire tread (dangerously slippery). Do not use rubber or vinyl conditioner on the seat or floorboard (dangerously slippery).
- MANDATORY! Protect batteries from freezing temperatures; never charge below freezing.
- Regular Checks: Inspect tires for wear, seat posts for wear (contact Zip'r if worn).
- Lubrication: Motor/transaxle assembly and axle bearings are pre-lubricated and sealed, requiring no additional lubrication.
- Moisture: Keep console, charger, battery, and electronics free of moisture.
- Storage: For prolonged storage, place boards under the frame to raise it off the ground, reducing the possibility of unevenness on flat-free tires.
Troubleshooting (Self-Diagnostic Warning Light):
The LED indicator flashes to signal specific issues:
- 1 Flash: Battery needs charging or poor connection.
- 2 Flashes: Poor motor connection.
- 3 Flashes: Potential short circuit between motor and battery (contact Zip'r Mobility).
- 6 Flashes: Scooter in drive inhibited mode (charger may be connected).
- 7 Flashes: Throttle fault (check if stuck).
- 8 Flashes: Controller fault (check connections).
- 9 Flashes: Freewheel lever not in drive position.
- 10 Flashes: Excessive voltage applied to controller (poor battery connection).
- Continuous blinking (if functional): Battery needs a full charge soon.
Warranty:
- Registration: Must register product on Zipr.com within 30 days of purchase for warranty validity. Failure to register voids the warranty.
- Three-Year Limited Warranty: Covers all structural frame components (platform, fork, seat post, frame). Zip'r will replace defective scooters/wheelchairs or mail replacement parts.
- One-Year Limited Warranty: Covers drivetrain components (transaxle, motor, electronic components). Zip'r will replace defective scooters/wheelchairs or mail replacement parts.
- Service: Customers contact their own Repair/Service Technicians. Zip'r provides warranty items directly to customers or their technicians.
- Exclusions (Wearable Components): ABS plastic shrouds and footrest, motor brushes, brake pads, tires, upholstery and seating, batteries.
- Other Exclusions: Repairs/modifications without Zip'r Mobility consent, circumstances beyond control, labor service calls, shipping costs.
- Implied Warranties: Limited to one year from original purchase date, and all implied warranties are excluded.
- Claims: Must be accompanied by proof of purchase, order number, and product serial number.
- Validity: Only for products purchased, registered within 30 days, and shipped within the continental USA.