The device described in the manual is the Roger Rabbit Vinyl Garden Fence 3-Pack, model number ZP19056, manufactured by Zippity Outdoor. This product is a decorative and functional fencing solution designed for garden use, offering an easy-to-assemble and maintain vinyl construction.
Function Description
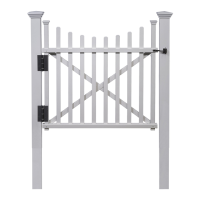
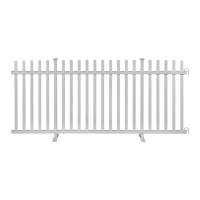
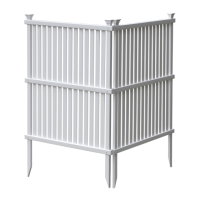
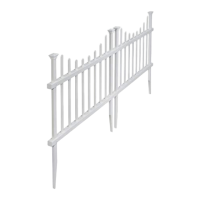
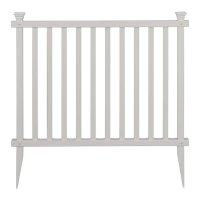
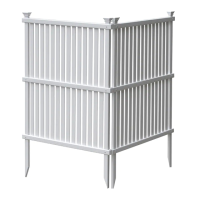
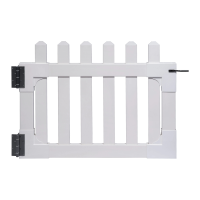
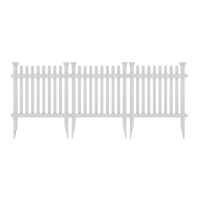
The Roger Rabbit Vinyl Garden Fence serves primarily as a boundary or decorative element for gardens and outdoor spaces. It is designed to be installed in the ground, providing a semi-permanent barrier. The 3-pack configuration allows for the creation of a longer fence line or multiple smaller enclosures. The fence panels can be connected in a straight line or at a 90-degree angle, offering flexibility in layout to suit various landscape designs. Its vinyl construction ensures durability and low maintenance, making it suitable for outdoor environments.
Important Technical Specifications
- Product Name: Roger Rabbit Vinyl Garden Fence 3-Pack
- Model Number: ZP19056
- Material: Vinyl
- Dimensions per panel: 24" W x 22" H (Width x Height)
- Components (per 3-pack, implying 3 panels):
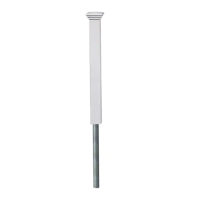
- Post Cap (A): 6 units (for 6 posts)
- Post Anchor (B): 6 units (3/4" x 1/4" x 12")
- Top Rail (C): 3 units (1½" x 1½" x 24")
- Bottom Rail (D): 3 units (1½" x 1½" x 24")
- Picket (E): 24 units (½" x 1¼" x 21½")
- Post (F): 6 units (1½" x 1½" x 23¾")
- Rail End Cap (G): 12 units (6 installed, 6 loose)
- Joiner Clip (H): 6 units
- ¾" Steel Screw (I): 24 units (Bag A)
- 1" Steel Screw (J): 12 units (Bag B)
- Assembly Time: Approximately 30 minutes for 3 fence panels.
- Recommended Assembly Area: Approximately 5' x 8' for unobstructed assembling.
Usage Features
The Roger Rabbit Vinyl Garden Fence is designed for straightforward assembly and versatile use.
- Easy Assembly: The manual emphasizes "Easy Does It!" and provides clear, step-by-step instructions for laying out materials, assembling the fence frame, inserting pickets, and connecting additional panels. The estimated assembly time of 30 minutes for three panels highlights its user-friendly design.
- Modular Design: The product comes as a 3-pack, allowing users to create a continuous fence line or separate sections. The inclusion of joiner clips enables connecting panels in both straight line applications and 90-degree corner applications, providing flexibility for various garden layouts.
- Ground Installation Options:
- Soft Ground: The fence panels can be pushed directly into soft ground until the post anchors are entirely submerged.
- Hard Ground (Method 1 - Loosening Soil): For harder ground, the top 6" of soil can be loosened with a claw hammer, followed by adding water to further soften the soil. A block of wood is then used to protect the posts while lightly hammering them into the ground.
- Hard Ground (Method 2 - Digging Holes): If the ground remains too hard, two 8" diameter by 8" deep holes can be dug to accommodate the posts, after which the fence panel is leveled, backfilled with excavated dirt, and tamped.
- Decorative Element: The vinyl construction and picket design offer an aesthetic appeal suitable for enhancing garden aesthetics.
- Video Instructions: A QR code is provided for users to scan and watch a video on how to assemble the product, offering an alternative visual guide to the written instructions.
Maintenance Features
The vinyl construction of the Roger Rabbit Garden Fence is inherently low-maintenance, a significant advantage for outdoor products.
- Durable Material: Vinyl is known for its resistance to weathering, rot, and pests, reducing the need for frequent repairs or replacements common with wood fences.
- Easy to Clean: Vinyl fences typically require only occasional cleaning with soap and water to maintain their appearance, eliminating the need for painting, staining, or sealing.
- Replacement Parts Availability: In case of missing, damaged, or defective parts, Zippity Outdoor provides a clear process for ordering replacements via their website (nychgroup.com/parts) or by contacting customer service. This ensures the longevity and continued functionality of the fence.
- Customer Support: Comprehensive customer service is available via phone (704-892-5222 / 877-234-6196) and email (support@zippity-outdoor.com) for assembly assistance, troubleshooting, and part inquiries. This support system helps users maintain their product effectively.
- Batch Lot Information: Users are advised to provide the batch lot number (stamped on the end of the box) when contacting customer service, which aids in quick and accurate assistance for maintenance and part replacement.