This document provides assembly instructions for the Zippity Baskenridge Vinyl Gate Kit with Fence Wings (Model ZP19038). This product is designed to create a functional gate system with integrated fence wings, suitable for outdoor use. The estimated assembly time is 60 minutes.
Function Description:
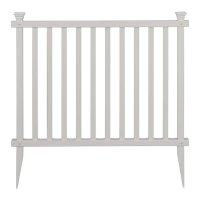
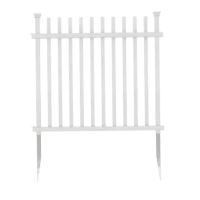
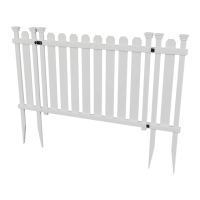
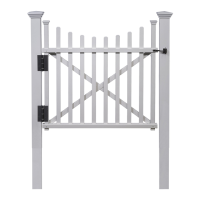
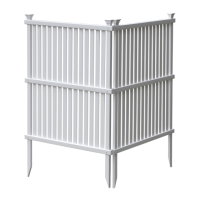
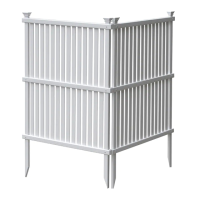
The Zippity Baskenridge Vinyl Gate Kit is a pre-fabricated gate system designed to provide an entryway within a fence line. It includes a gate frame, pickets, posts, and fence wings, along with all necessary hardware for assembly and installation. The gate is intended to be installed with supporting fence panels (sold separately, ZP19037) to ensure stability and proper operation. The design emphasizes ease of assembly with clear, step-by-step instructions and a recommendation for a "dry run" assembly before permanent fastening.
Important Technical Specifications:
- Model Number: ZP19038
- Overall Dimensions (Gate Kit with Fence Wings): 51 3/8" W x 36" H
- Gate Frame Dimensions:
- Width (between posts): 36 inches
- Height: 36 inches
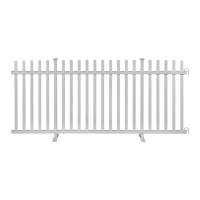
- Fence Wing Dimensions:
- Height: 36 inches (posts), 31 1/2 inches (rails)
- Width (per wing, rail length): 7 3/8 inches
- Ground clearance (bottom rail to ground): 8 1/2 inches
- Picket dimensions: 1 1/4" x 1 1/4" x 31 1/4"
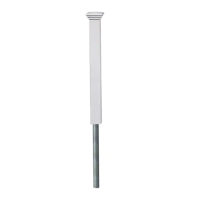
- Post dimensions: 7/8" x 1 1/2" x 44" (for fence wings), 7/8" x 1 1/2" x 34" (for gate posts)
- Rail dimensions: 1 1/2" x 1 1/2" x 7 3/8" (for fence wings), 1 1/2" x 1 1/2" x 36" (for gate)
- Installation Spacing (for fence wings):
- Inside-to-inside post spacing: 38 1/16 inches
- Center-to-center post spacing: 40 3/16 inches
- Hardware:
- 1/2" Black Self-Drilling Stainless Steel Screws (14 included) - for hinges and latch
- 3/4" White Self-Drilling Stainless Steel Screws (40 included) - for gate frame and fence wings
- 1/16" Drill Bit (1 included) - for pre-drilling
- Materials: Vinyl components for gate frame, pickets, posts, and fence wings. Stainless steel screws for durability.
- Assembly Time: Approximately 60 minutes.
Usage Features:
- DIY-Friendly Assembly: The instructions emphasize a straightforward assembly process, recommending a "dry run" to ensure all parts fit correctly before permanent fastening.
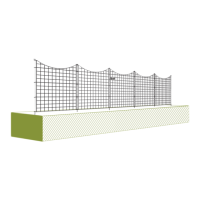
- Integrated Fence Wings: The kit includes two fence wings that attach to the main gate posts, providing a seamless transition to existing or new fence panels. These wings are crucial for supporting the gate system.
- Gate Latch and Hinges: The kit comes with two gate hinges and one gate latch, ensuring secure closure and smooth operation of the gate.
- Ground Installation: The fence wings are designed to be installed directly into the ground. The manual provides guidance on loosening soil and using a block of wood for gentle hammering to achieve the correct depth (bottom rails about 2" above ground).
- Hard Ground Option: For challenging soil conditions, an optional method involving a 1 1/2" diameter auger bit and water is suggested to facilitate post installation.
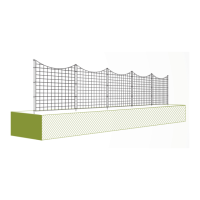
- Support for Gate: A key recommendation is to connect the hinge post to a fence panel, which in turn is connected to another post. This distributes the weight strain across multiple posts, enhancing the gate's performance and longevity. Installing fence panels on both sides of the gate is considered ideal.
- Visual Aids: The manual includes detailed diagrams and illustrations for each assembly step, making it easier to visualize the process. A QR code is provided for accessing an assembly video.
Maintenance Features:
- Durable Materials: Constructed from vinyl, the gate and fence wings are designed for outdoor use and are expected to be low-maintenance. Stainless steel screws are used to resist corrosion.
- Troubleshooting Support: The manufacturer provides comprehensive support for missing, damaged, or defective parts, as well as assembly and installation assistance via their website, email, and phone.
- Part Identification: A detailed list of materials with part names and quantities is provided to aid in identifying and ordering replacement parts if needed.
- Batch Lot Information: Users are advised to provide the batch lot number (stamped inside the box) when contacting customer service for quicker and more accurate assistance.
- Non-Abrasive Assembly Surface: A recommendation to assemble components on a non-abrasive surface (e.g., shipping box) helps prevent scratching and maintain the product's appearance.
- No Excessive Force: The instructions state that excessive force should not be needed during assembly, indicating a well-engineered fit of components.