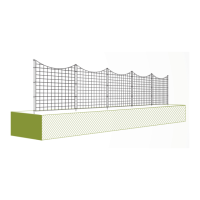
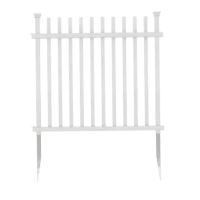
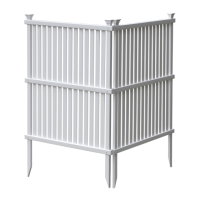
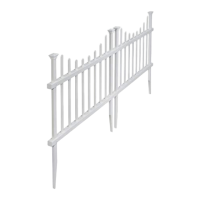
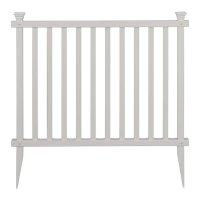
The Zippity Highland Vinyl Privacy Lattice Screen is a 2-pack outdoor product designed to provide privacy and aesthetic appeal to your outdoor space. Each screen measures 36" W x 57" H, offering a substantial barrier. The assembly process is estimated to take approximately 60 minutes, and Zippity provides a video tutorial accessible via a QR code for visual guidance, emphasizing their "Easy Does It!" approach to product assembly.
Before beginning assembly, it's crucial to check inside the larger pieces of the box for any other materials that might be packed within. When assembling components, always place them on a non-abrasive surface, such as the shipping box, to prevent scratching. A recommended area of approximately 5'x 8' is suggested for unobstructed assembly. The manual stresses that excessive force should not be necessary during component assembly, indicating that parts should fit together smoothly.
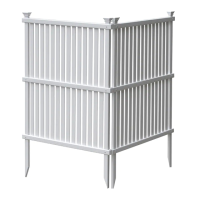
Technical Specifications and Dimensions:
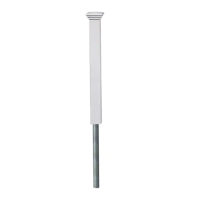
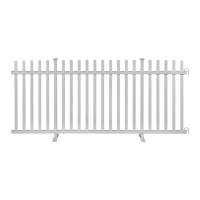
The Highland Vinyl Privacy Lattice Screen has a total height of 57 inches and a width of 36 inches. The main lattice panel itself measures 54 1/2 inches in height. The post anchors, which are inserted into the ground, extend 16 inches below the bottom of the screen. The horizontal rails and vertical pickets form a grid pattern, with specific dimensions for each component ensuring a precise fit. The post anchors (B) are 3/4" x 14" x 20", while the posts (D) are 7/8" x 1 1/2" x 56 1/2". Vertical pickets (C) are 5/8" x 5/8" x 52 1/2", and horizontal pickets (E) are 1 1/2" x 1/4" x 32 1/2". The horizontal rails (F) are 1 1/2" x 1 1/2" x 36". The lattice openings are approximately 2 1/4 inches by 2 1/4 inches.
Assembly Instructions Overview:
The assembly process is broken down into seven main steps:
Step 1: Lay Out Materials
This initial step involves identifying and laying out all components to ensure everything is present and organized. The kit includes:
- Post Cap (A): 4 pieces
- Post Anchor (B): 4 pieces, measuring 3/4" x 14" x 20"
- Vertical Picket (C): 20 pieces, measuring 5/8" x 5/8" x 52 1/2"
- Post (D): 4 pieces, measuring 7/8" x 1 1/2" x 56 1/2"
- Horizontal Picket (E): 28 pieces, measuring 1 1/2" x 1/4" x 32 1/2"
- Horizontal Rail (F): 4 pieces, measuring 1 1/2" x 1 1/2" x 36"
- Rail End Cap (G): 8 pieces (4 loose, 4 installed)
- 3/4" Self-Drilling Stainless Steel Screw (H): 16 pieces (from Bag A)
- 1" Self-Drilling Stainless Steel Screw (I): 4 pieces (from Bag B)
- Joiner Clip (J): 2 pieces
- 1/8" Steel Drill Bit (K): 1 piece
Step 2: Assemble the Picket Grid
This step focuses on creating the lattice panel:
- Step 2.1: Take 10 vertical pickets (C) and arrange them, ensuring the routed holes for each picket align.
- Step 2.2: Insert 14 horizontal pickets (E) through the routed holes in the vertical pickets. The manual notes that some light force may be required to insert the horizontal pickets.
Step 3: Attach the Posts
- Step 3.1: Starting with one post (D), slowly slide the horizontal pickets, one by one, into the routed holes of the post. Repeat this for the second post, ensuring the tabs of the posts are at the back of the screen as shown. The end of the post with the plastic tab will be the top of the screen.
Step 4: Attach the Rails
This step involves securing the horizontal rails to the assembled picket grid and posts:
- Step 4.1: Take 2 loose rail end caps (G) and press-fit one rail end cap to each end of the two horizontal rails (F).
- Step 4.2: With the routed holes facing up, slide one horizontal rail (F) over the bottom of the posts (D). Guide the vertical pickets (C) into the routed holes of the rail. Continue sliding the rail up until the pre-drilled holes in the rail and posts align.
- Step 4.3:
- Slide the post anchors (B) into the bottom of the posts, ensuring 16 inches of the post anchor are visible.
- Use the 1/8" drill bit (K) to drill 4 total holes in the post anchor through the pre-drilled holes in the bottom rail.
- Drive 4 of the 3/4" self-drilling stainless steel screws (H) into the pre-drilled holes in the horizontal rail.
- Step 4.4: With the routed holes facing down, slide the other horizontal rail (F) over the top of the posts (D). Continue sliding the rail down, inserting each vertical picket (C) into the routed holes in the top rail, until the pre-drilled holes in the top rail and posts align. Drive 4 of the 3/4" self-drilling stainless steel screws (H) into the pre-drilled holes.
Step 5: Install the Screens
This step details how to place the assembled screens into the ground:
- Step 5.1: Repeat Steps 2-4 to assemble the second screen.
- Step 5.2: Move the screen to its final location and identify where the posts will be located. Attempt to push the unit into the ground until all 16 inches of the post anchors are no longer visible.
- Optional Installation for Hard Ground:
- If the ground is too hard, loosen the top 6" or 7" of the ground with a claw hammer.
- Add water to the loosened soil.
- Use a block of wood to protect the top of the post and gently hammer the post into the ground.
- Step 5.3: Level the screen as necessary, then backfill any excavated dirt and tamp it down.
- Step 5.4 (Optional): If the ground is very hard, you may need to dig a single hole large enough to accommodate one post from each panel. This hole should be approximately 8 inches in diameter and 16 inches deep. Backfill and tamp the dirt after placing the post.
Step 6: Fasten Joiner Clips
- Step 6.1: Fasten the two screens together using the two joiner clips (J) and four 1" self-drilling stainless steel screws (I). The manual illustrates both 90° and 45° application methods for connecting the screens.
Step 7: Install Post Caps
- Step 7.1: Push the post caps (A) down over the posts to lock them into place, completing the assembly.
Troubleshooting and Support:
Zippity emphasizes customer support for missing or damaged parts, assembly help, and returns.
- Missing or Damaged Parts: Customers are advised to visit the Zippity website first (parts.nychbrands.com) to order replacement parts. For further issues, contact customer service via email (support@zippity-outdoor.com) or phone (704-892-5222 / 877-234-6196). Customer service agents are available weekdays from 8 am-5 pm EST. When calling, it's helpful to provide the item number ZP19047 and the specific part name (found on page 4), as well as the batch lot number stamped on the end of the box.
- Assembly Help: For problems with assembly or installation, customers can call the same numbers for assistance.
- Returns: If a return is necessary, Zippity encourages customers to contact them first to resolve any issues. If a return is still desired, it must be initiated through the company from which the product was originally purchased.
The Zippity Highland Vinyl Privacy Lattice Screen is designed for straightforward assembly and provides a durable, low-maintenance privacy solution for outdoor environments. Its vinyl construction ensures longevity and resistance to weather elements, making it a practical addition to any yard or garden.