Do you have a question about the Zippity ZP19072 and is the answer not in the manual?
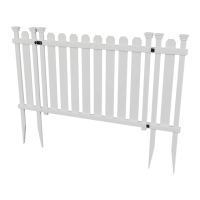
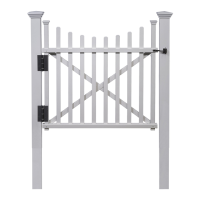
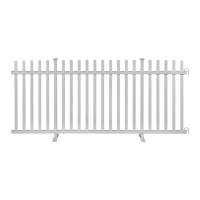
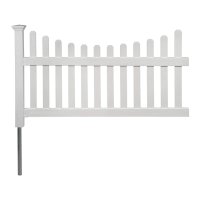
Identifies the Woodtek Vinyl Slatted Portable Puppy Fence Kit 2-Pack, model ZP19072/ZP19073.
Provides guidance on preparing the assembly area and handling components to avoid damage.
Instructions for ordering replacement parts and contacting customer service for issues.
Contact information for help with assembly problems or initiating product returns.
Check inside larger pieces for other packed materials to ensure all components are present.
Slide slats into the routed holes of the center support until it sits in the middle.
Slide slats into one post, then slide a second end post over the slats.
Identify and attach top/bottom rails to posts using rail end caps and screws.
Slide bottom rail onto posts, secure with screws, and connect panels using connector pins.
Attach portable feet to the underside of the bottom rail, securing them with screws.
Repeat assembly steps 3 and 4 to construct the second fence panel.
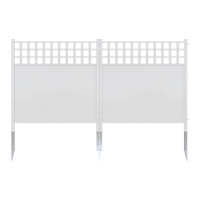
Connect two fence panels side-by-side using connector pins for a straight configuration.
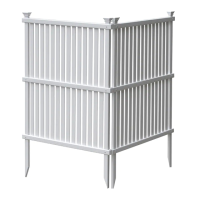
Connect panels at an angle using connector pins and secure with locking pins.
Lock the connector pins in place using the provided locking pins to ensure stability.
| Brand | Zippity |
|---|---|
| Model | ZP19072 |
| Category | Fencing & Gates |
| Language | English |