The provided document is an installation manual for the Zodiac EL Series Saltwater Chlorinator, covering all models (EL25 and EL35). This device is designed for pool and spa sanitation, specifically for generating chlorine from saltwater.
Function Description
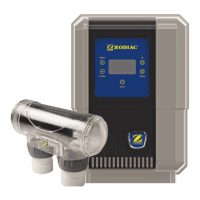
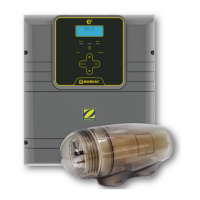
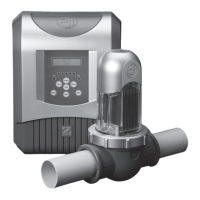
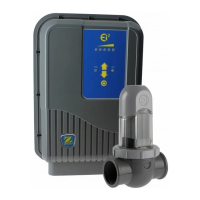
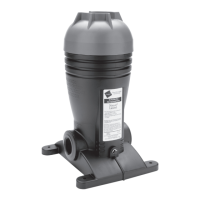
The Zodiac EL Series Saltwater Chlorinator is a system that produces chlorine to sanitize pool and spa water. It operates by passing saltwater through an electrolytic cell, where an electrochemical reaction converts the salt into chlorine. The system includes a controller that manages the chlorination process and an electrolytic cell where the chlorine is generated. The controller features an internal operating timer that defines the length of time the filter pump operates during two separate periods each day, allowing for automated control of filtration and chlorination. The chlorinator is designed to be the last piece of equipment in the circulation system, installed horizontally and level with correct flow orientation. It is recommended to install the cell on a bypass equipped with isolation valves, especially if the system flow rate exceeds 300 Lpm, to avoid load loss and prevent improper backflow. The controller also incorporates a non-replaceable backup power source to maintain time-setting memory during short power interruptions. The system is equipped with a protective mechanism that limits sanitizer production under unfavorable operating conditions, such as cold water or insufficient salt levels.
Important Technical Specifications
The manual provides specifications for two models: EL25 and EL35.
EL25 Model:
- Nominal chlorine production: 25 g/h
- Nominal output amps: 4.4 A
EL35 Model:
- Nominal chlorine production: 35 g/h
- Nominal output amps: 5.8 A
Common Specifications for both models:
- Required salt level: 6000 ppm
- Power supply voltage: 230-240 VAC
- Protection index: IP23
- Flow through the cell: Minimum 80 Lpm
- Operating water temperature: 10°C - 40°C
Physical Dimensions:
- Controller: 22.54 cm (width) x 32.3 cm (height) x 13.15 cm (depth)
- Electrolytic Cell: 32 cm (length) x 15.5 cm (height) x 11 cm (width), with inlet/outlet ports 11.5 cm apart.
Installation Requirements:
- The controller must be installed at least 3.5 meters from the inside wall of the pool/spa, 1.5 meters off the ground, and within 1.5 meters of the cell.
- The cell must be plumbed within 1.5 meters of the controller.
- Electrical connections require permanent power from a 30 mA residential circuit breaker.
- Non-metallic plumbing is required for the controller installation.
Usage Features
The chlorinator features a user-friendly interface with a display and buttons for navigation and settings.
User Interface:
- MENU button: Accesses the main menu.
- ENTER button: Confirms selections.
- UP/DOWN buttons: Browse menus, increase/decrease settings.
- AUTO button: Cycles through system power modes (Manual - Running, Manual - Stopped, Auto).
Operation Modes:
- Auto - Running/Stopped: The chlorinator/pump operates according to programmed timers.
- Manual - Running: The chlorinator/pump runs continuously.
- Manual - Stopped: The chlorinator/pump remains off continuously.
Initial Start-Up:
- Setting the Clock: Users can set the hour, minutes, and AM/PM via the MENU and ENTER buttons, using UP/DOWN for adjustments.
- Output Level: Chlorine output can be set between levels 1 to 8 (P1 to P8) from the main screen using the UP/DOWN buttons.
Programming Timers:
- The controller allows setting two separate timer periods (TIMER1 and TIMER2) for the filter pump to operate daily. Both ON and OFF times must be entered and validated.
- If no timer is set, filtration and/or chlorination will run continuously.
- Recommended filtration times: 8-10 hours/day for single-speed pumps (in season), 4-5 hours/day (off season); 12-14 hours/day for variable-speed pumps (in season), 8-10 hours/day (off season).
Water Chemistry:
- The manual provides a detailed water chemistry table with ideal ranges for Free Chlorine, pH, Total Alkalinity, Calcium Hardness, Cyanuric Acid, Salt Level, and Metal content. It also offers guidance on how to increase or decrease these parameters.
- Regular testing (weekly for most parameters, quarterly for equipment sensors) is crucial for maintaining balanced water.
Maintenance Features
The manual outlines essential maintenance procedures to ensure the longevity and optimal performance of the chlorinator.
Cell Maintenance:
- The EL25/EL35 models have an automatic cleaning feature to prevent salt and calcium deposits on the cell plates under normal conditions.
- The cell includes a negative charge sensor that monitors flow and salt levels. If a low salt or no flow condition is indicated, manual cleaning may be required.
- Manual Cell Cleaning:
- Switch off the filter pump and chlorine generator, close valves, and unplug the cell terminal cap.
- Unscrew the retaining ring and remove the electrode.
- Immerse the electrode (without terminals) in a cell cleaning solution (e.g., Zodiac Salt Chlorinator Cell Cleaner or a mixture of 1 part hydrochloric acid to 10 parts water) for about 10 minutes to dissolve calcium deposits.
- Rinse the electrode with clean water and re-fit it into the cell housing.
- Replace the cell head and plug assembly, reset valves and switches, and turn the pump and controller on.
- Confirm chlorine output and settings.
General Maintenance Schedule (Table 4):
- Weekly or sooner:
- Check cell for calcium buildup (soak electrode in acid/water mixture if needed).
- Check water chemistry (balance pH, adjust output).
- Check cable connections to cell (ensure no water contact).
- Every Three Months:
- Check cell connections for leaks (isolate pump, turn power off, clean and grease O-rings or replace).
- Check for insects/ants (spray surface insecticide around the unit).
- Every Six Months:
- Check chlorine levels and pump operating hours (adjust timer and output).
- Prevent insect ingress to controller (turn controller off, spray insecticide onto walls around controller, not directly into unit).
Winterizing:
- Active Winterizing: For temperatures above 10°C, the chlorinator can run during winter.
- Passive Winterization: For temperatures below 10°C, the chlorination cell needs to be deactivated. This involves shutting down the pool, lowering water levels, draining piping, and leaving the cell electrode in place with isolation valves open.
- Reopening the Pool: Adjust water level, check water parameters (TAC/TH/pH/Salinity/Chlorine/Stabilizing Agent/Copper/Metals), adjust parameters for a balanced pool, check equipment condition, check/calibrate sensors, and restart the chlorinator once the salt level reaches 6000 ppm and has dissolved.
Troubleshooting:
The manual includes a troubleshooting table for common fault indications such as "NO FLOW," "LOW SALT," "Display Blank," "Low/No Chlorine in pool," "Clock loses time," and "Timer is set to OFF." For each fault, possible causes and solutions are provided, ranging from checking pump/valve status and salt levels to cleaning the cell, checking electrical connections, and contacting a technician.