
H
Hannah AcostaAug 13, 2025
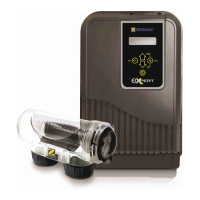
What to do if the Zodiac Lighting Equipment pH dosing stops and the INFO indicator is flashing?
- SStephen ZunigaAug 13, 2025
If the "INFO" indicator is flashing and the pH setpoint hasn't been reached after 5 hours of injection, start by checking the pH level in your pool using a photometer or test strip. Also, inspect the pH sensor wiring on both the control box and the sensor holder. Ensure the pH minus container isn't empty and replace it if needed. For further troubleshooting, consult a pool specialist to test the peristaltic pump or address high alkalinity levels.