This document is an installation and user manual for the Zodiac Vortex™ electric pool cleaner. It provides comprehensive information on the device's function, technical specifications, usage, and maintenance.
Function Description
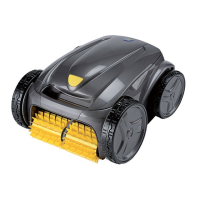
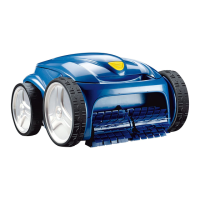
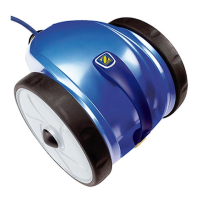
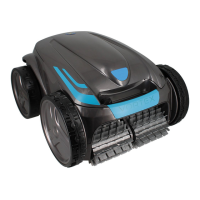
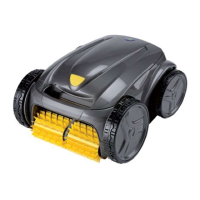
The Zodiac Vortex™ is an electric pool cleaner designed to operate independently of the pool's filtration system. It connects directly to the mains power supply and is engineered to navigate and clean various areas of the pool, including the bottom, walls, and waterline, depending on the specific model. The cleaner sucks in debris and stores it in its internal filter. A control box allows users to start, select, and program cleaning operations. The "Lift System" function, available on some models, facilitates the removal of the cleaner from the water by directing it to a wall and allowing it to climb to the waterline, expelling water to lighten its weight.
Important Technical Specifications
The Vortex™ cleaner models covered in this manual include GV 3320, OV 33xx, RV 42xx, Vortex™ 205, Vortex™ PS 200, AV 348 50, AV 350 50, BV 5200, J 3485, J 5200, GV 3420, GV 3520, GV 5220, OV 3400, OV 34xx, OV 35xx, OV 5200, OV 53xx, OV 54xx, RV AQ54, RV CAxx, RV 43xx, RV 44xx, RV 53xx, RV 54xx, Vortex™ 3 PLUS, Vortex™ 4 PLUS, Vortex™ 305, Vortex™ PS 400, RV 45xx, RV 5500, and RV 5600.
Key technical specifications are:
- Control box power supply: 220-240 VAC, 50 Hz
- Cleaner power supply voltage: 30 VDC
- Maximum power input: 150 W
- Cable length: Varies by model, from 15 m to 25 m (15 m, 18 m, 21 m, 25 m options)
- Cleaner weight (without cable): 10.2 kg
- Suction width: 270 mm
- Maximum operating depth: 4 m
- Power supply protection rating: IPX5
- Cleaner protection rating: IPX8
The cleaner is designed to operate in pool water with a temperature between 15°C and 35°C, a pH between 6.8 and 7.6, and a free chlorine level of less than 3 mg/l.
Usage Features
The Vortex™ cleaner offers several user-friendly features:
- Immersion: The cable should be fully rolled out alongside the pool to prevent tangling. The cleaner should be placed vertically into the water and moved slightly to release trapped air, ensuring it sinks and settles on the pool bottom.
- Attachment to Base: Depending on the model, the cleaner can be attached to a base for storage or transport.
- Electricity Supply: The control box must be connected directly to a dedicated 30 mA Residual Current Device (RCD) protected power outlet, at least 3.5 meters from the pool edge, and protected from direct sunlight, rain, or splashes. Extension leads are prohibited.
- Control Box Functions: The control box allows users to start/stop the appliance, view "Control" and "Clean filter" indicators, activate "Remove from pool mode," select the surface to be cleaned (bottom only, bottom + walls + waterline, or waterline only), choose pool shape (flat-bottomed rectangular or other shapes/bottoms), set cleaning intensity (low or intensive), program cleaning cycles, and adjust cleaning time.
- Cleaning Cycles: Users can select a default cleaning cycle or customize it by adjusting the cleaning time in 30-minute increments.
- Time and Programming: The control box allows setting the current day, hour, and minutes. Up to 7 cleaning cycles can be programmed, specifying days, hours, and minutes. The time setting is saved for approximately 2 minutes if the power supply is disconnected.
- Remote Control (depending on model): Some models include a kinetic remote control with movement sensors for directing the cleaner. It allows for forward, backward, left turn, right turn, and stop commands. The remote control can be synchronized with the control box.
- Removing from Water: The "Lift System" automated mode can be activated to bring the cleaner to the waterline. Alternatively, the cleaner can be manually pulled to the edge of the pool by its floating cable and lifted out by the handle, allowing water to drain.
- Good Practices: After each cleaning, the filter should be cleaned immediately. The cable should be untangled and laid out in the sun to restore its original shape. The cleaner should be stored vertically on its caddy, away from direct sunlight, humidity, and splashes. A protective cover is available as an option.
Maintenance Features
Regular maintenance is crucial for the cleaner's performance and longevity:
- General Cleaning: The appliance should be cleaned regularly with clean or slightly soapy water and rinsed thoroughly. Solvents should not be used, and the appliance should not be left to dry in direct sunlight by the pool.
- Filter Cleaning: The filter should be cleaned with clean water as soon as the appliance is removed from the pool after each cleaning cycle to prevent debris from drying. If the filter is blocked, it can be cleaned with an acid solution (e.g., spirit vinegar) at least once a year. A "clean filter" indicator on the control box signals when cleaning is recommended.
- Propeller Cleaning: To clean the propeller, the cleaner must be disconnected from the power supply. Users should wear gloves, loosen the screw on the grid, remove the grid and flow guide, and then carefully push and hold the end of the propeller to remove any debris (hair, leaves, stones).
- Brush Replacement: Brushes should be replaced if wear indicators show significant wear, typically every 2 years for optimum performance. Worn brushes are removed by detaching tabs from their holes. New brushes are fitted by sliding the side without tabs under the brush holder, rolling the brush around its support, sliding tabs into attachment holes, and pulling until the edge passes through the slit. Excess tabs are then cut with scissors.
- Tyre Replacement: Worn tyres can be removed and replaced with new ones.
- Troubleshooting: The manual provides a troubleshooting guide for common issues such as incomplete cleaning, the appliance not staying on the pool bottom, failure to climb walls, no movement on start-up, tangled cable, blocked nozzles/plug holes, and abnormal wall-climbing behavior. It also details user alerts with error codes and solutions, and a pre-diagnostic menu (on some models) to display total operating time, last error code, and operating time during the error.
For any work beyond simple user maintenance, a qualified professional should be contacted. The warranty is voided if safety mechanisms are deactivated or bypassed, or if unauthorized third-party spare parts are used.