20X Bar-tacking and Button Sewing Machine(LCD N) Operation and Debugging
48
This key is used to modify the pattern number or parameter value. Under trial
sewing mode, this key is used to move single needle and feed cloth.
This key is used to select among various pattern types, menu items or parameters.
Under sewing editing mode (unready for sewing), press it to enter sewing speed
setting mode directly.
This key is used to display editing interface, select item or display detailed
information.
This key is used to return to the previous interface.
Set and save C patterns, and press this button to start sewing the saved C pattern.
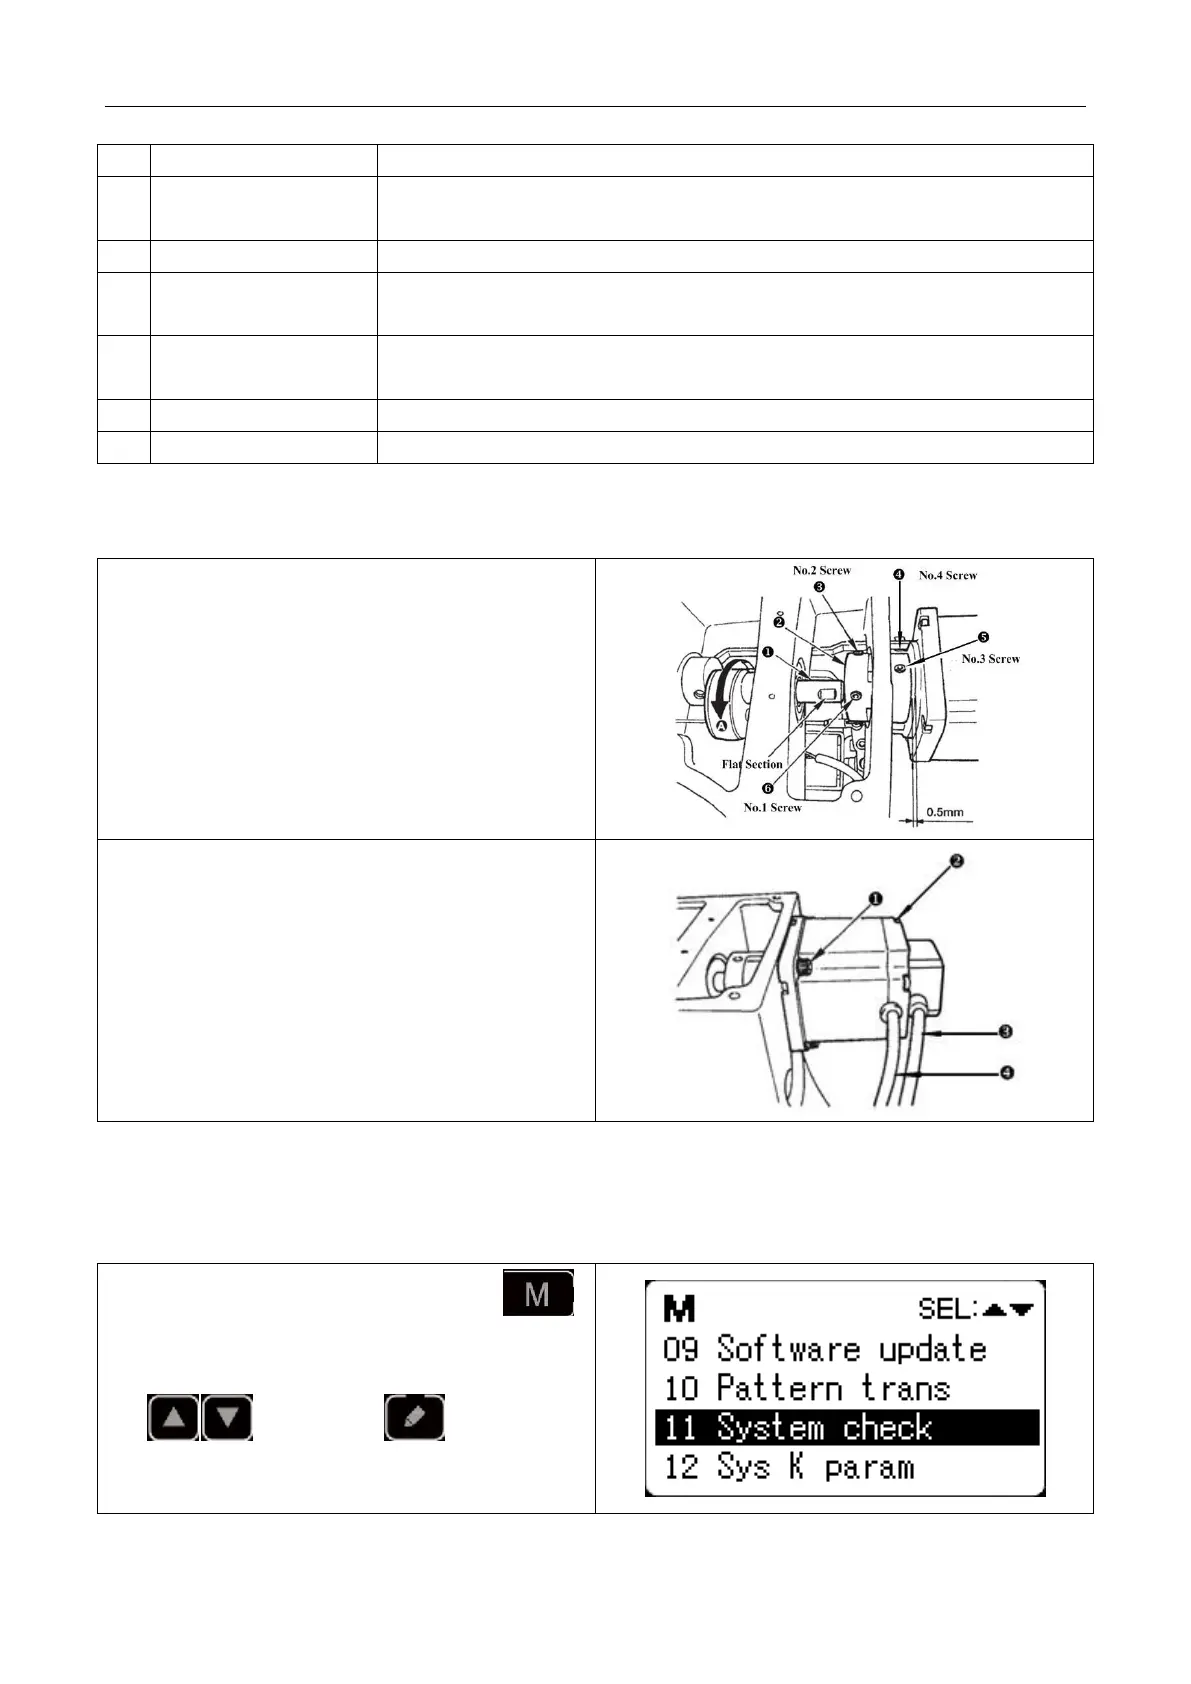
2.2 Installing the Main Shaft Motor
Assemble the main motor to the main shaft through the
coupling. And you need 4 screws to fix the coupling to
the upper shaft and the main shaft. Fix the coupling with
No.1 Screwand make sure that it is vertical towards the
Flat Section, and then screw No.2 screw. Fix the
coupling to the main shaft motor with No.3 screw, and
make sure it is vertical to the flat section of the main shaft
motor. Then screw the No.4 screw to finish the
assembling task. The right diagram shows you the details:
This right diagram shows you the directions of external
cables of the main shaft motor (look from back, and the
line is on your left-hand side):
Screws for fixing the main shaft motor, totally 4;
Screws for fixing the back cover of the motor, totally 4;
main shaft motor encoder signal cable; power line for
the main shaft motor.
2.3 Text Mode
This mode is activated to conduct maintenance operation.
1) When the sewing LED is off, hold pressing
key for 3 seconds, and you would hear the ring of the
buzzer. Then select item “11 system test” by pressing
key and press key to enter test
mode.
 Loading...