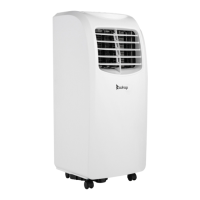
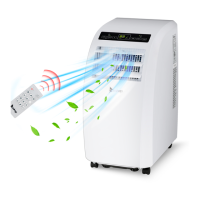
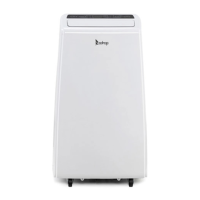
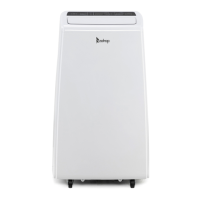
This document describes the Zokop YPO2-09C Portable Air Conditioner.
Function Description
This series of mobile air-conditioners are available in cooling-only and cooling & heating models of different sizes. The cooling-only models offer cooling, dry, air blowing, and sleep functions. The cooling & heating models offer cooling, dry, air blowing, and heating functions. The fan speed is adjustable between high and low, and the temperature setting range is 17-30°C. The unit also includes various protection functions, such as a 24-hour timed ON/OFF setting.
Important Technical Specifications
- Model: YPO2-09C
- Rated Operating Range: 220-240V / 50Hz power output.
- Exhaust Hose Length: 280mm-1500mm (determined by air-conditioner specifications). Using a prolonged or different hose may affect functionality.
- Fuse Parameters:
- Model: FSD or 50F
- Voltage: 250V
- Current: 3.15A
- Operating Temperature Range (Cooling Mode): Do not operate if ambient temperature is greater than 35°C.
- Operating Temperature Range (Heating Mode): Do not operate if ambient temperature is lower than 5°C.
Usage Features
General:
- Suitable for indoor use only.
- Must be placed on a flat, dry surface, at least 50cm away from surrounding objects or walls.
- Ensure proper grounding according to local wiring rules.
- Do not insert objects into the air inlet/outlet; keep them unblocked.
- When installing a drain pipe, ensure a good connection without flexure.
- Adjust horizontal/vertical louvers gently by hand to avoid damage.
- Keep the unit upright when moving.
- Keep away from gasoline, flammable gases, ovens, or other heat sources.
- Do not dismantle, inspect, or modify without authorization. Faulty units should be repaired by the manufacturer or professionals.
- Do not install or operate in bathrooms or other wet environments.
- Supervise children or disabled people when the unit is in use.
- Do not turn off by removing the plug.
- Do not place cups or other liquid-containing objects on the unit.
- Do not use pest control aerosol or other flammable substances near the unit.
Control Panel Operations:
- ON/OFF Button: Starts/shuts down the unit. Upon start, the power indicator displays green, the buzzer plays startup music, and the unit enters cooling mode (for cooling-only models) with high fan speed. Upon shutdown, all loads stop, the buzzer plays shutdown music, and the unit enters standby.
- Mode Button:
- Cooling-only models: Switches between cooling, air supply, dry, and sleep modes.
- Cooling & heating models: Switches between cooling, air supply, dry, and heating modes.
- Dry Mode: Compressor starts if ambient temperature is ≥17°C, shuts down if ≤15°C, and restarts if ≥17°C (with 3-minute protection). Fan is forced to low level.
- Sleep Mode: Performs cooling. Set temperature increases by 1°C after two hours, and again after another two hours. Fan is forced to low level.
- Fan Button:
- In cooling, heating, and air supply modes, cycles through high→low→high fan speeds.
- Maintains previous fan speed when switching between cooling, air supply, and heating modes.
- Timer Button:
- Upon start, sets timed shutdown. Upon shutdown, sets timed start.
- Adjust timing (1-24 hours) using up/down buttons.
- Timed start: Unit starts when set time is reached.
- Timed shutdown: Unit shuts down when set time is reached.
- Only the last timing setting is valid and for one-time use.
- ON/OFF operations via button or remote clear all timing settings.
- Pressing the timer button once queries remaining time; twice within 5s cancels timing.
- Up/Down Buttons: Changes set temperature (17-30°C in cooling/heating modes). Simultaneously pressing up/down switches between Fahrenheit and Celsius degrees.
Remote Control Operations:
- Power Key: Turns ON/OFF the A/C.
- Speed Key: Chooses high/low fan speed.
- Temperature/Time Adjusting Key: Increases/reduces setting temperature in cooling mode; adjusts timing ON/OFF time in timing mode.
- Mode Key: Chooses cool, fan, dry modes.
- Timer Key: Sets ON time in standby mode; sets OFF time in ON mode.
- Sleep Key: Chooses sleep mode (cooling-only models).
- °C/°F Key: Switches between Celsius and Fahrenheit.
Installation:
- Preparation: Leave the unit in an upright position for at least 2 hours before first use.
- Heat Exhaust Hose Assembly:
- Screw the round end of the short connector counterclockwise into the heat exhaust hose (at least 3 turns).
- C-Shape Buckle Installation:
- Slide the C-shape buckle onto the back shell's rotation shaft, aligning the rotary hole.
- Rotate the buckle counterclockwise to clip it firmly.
- Heat Exhaust Hose Assembly and Unit:
- Pull the end of the heat exhaust hose apart.
- Hold the C-shape buckle with one hand and the short connector with the other, then press the C-shape buckle onto the snap of the lower air duct bottom until it clips the back shell firmly.
- Ensure the hose end reaches one step inside the lower air duct bottom and is snapped into place.
- Window Sealing Board Assembly:
- Half-open the window and mount the sealing board assembly vertically or horizontally.
- Adjust the parts to contact the window frame and fasten with copper screws.
- Unit Installation:
- Move the unit with the heat exhaust hose assembly installed before the window, keeping it at least 50cm from walls/objects.
- Snap the flat end of the heat exhaust hose short connector into the elliptical hole of the window sealing board assembly.
- Ensure the hose is not bent (flexure greater than 45°) and is properly ventilated.
Water Drainage:
- Manual Drain:
- Turn off power and unplug the unit when "full water" indicator illuminates.
- Place a vessel below the water outlet at the back.
- Screw off the drain cap, unplug the water plug, and let water flow out.
- Protect the drain cap and water plug. Tilt the unit slightly backward.
- If the vessel is not large enough, block the outlet with the water plug to prevent spillage.
- Once drained, insert the water plug and screw on the cap tightly.
- Continuous Drain:
- Screw off the water cap and unplug the water plug.
- Insert an OD 13mm PVC drain hose (8mm-10mm) into the water outlet.
- Connect the drain hose to a WC or outdoor.
- Recommended for heating mode; avoid for cooling mode to enhance cooling effects.
- Place the drain hose in an inaccessible place, not above the water outlet, and keep it free from flexure.
- Keep the drain cap and water plug properly.
Maintenance Features
General:
- Turn off power and unplug the unit before maintenance.
Surface Cleaning:
- Wipe the unit surface with a wet soft cloth.
- Do not use chemical solvents (alcohol, gasoline) as they may damage the surface or unit.
Filter Frame and Filter Mesh Cleaning (every two weeks):
- Removal:
- Grip the evaporator and condenser filter frames and gently pull them out.
- Grip the evaporator and condenser filter meshes and gently pull them out.
- Apply even force to avoid twisting or damaging the frames/meshes. Remove frames first, then meshes.
- Cleaning:
- Wash the filter frames and meshes in warm water (approx. 40°C) with neutral cleaner.
- Dry them in the shade.
- Do not damage the mesh fabric.
- Installation:
- Install the filter mesh first: point the back end toward the socket and push evenly.
- Install the filter frame next: point the back end toward the socket and push evenly.
- Install in reverse order of removal. Ensure meshes are in place before frames. Install gently to avoid damage.
Handle Position and Remote Control Storage Area Cleaning:
- Remove the remote control from its storage area.
- Clean the handle position and storage area with a wrung-out wet soft cloth.
- Do not drip water into the unit.
- To return the remote control, insert it in the reverse direction of removal.
End of Season Storage:
- Drain all water from the unit manually.
- Start the unit in low fan speed, air supply mode for half a day to dry the interior and prevent mold.
- Turn off, unplug, wrap the power cord around the wire-winding post, insert the plug into the universal jack, and install the water plug and drain cap.
- Remove the heat exhaust hose assembly and store it properly. To remove, hold the C-shape buckle, pull it outward, rotate clockwise until separated from the back shell, then take out the assembly.
- Pack the air-conditioner in a soft plastic bag, store in a dry place with dust-proof measures, out of reach of children.
- Remove batteries from the remote control and store them properly.
- Ensure the unit and all accessories are stored in a dry place and protected.
Multiple Protection Functions
- Anti-freeze Protection (E4): During cooling, if the compressor runs for >10 minutes and pipe temperature (Tp) is ≤2°C for 20 seconds, the compressor and water spraying motor turn off. Other loads operate, and E4 is displayed. Buttons are inactive (except OFF). Protection is relieved when Tp rises to ≥8°C, restoring original status after a 3-minute compressor delay.
- Full Water Protection: When water in the tray exceeds the alarm level, the unit alarms and the full water indicator illuminates. The unit will automatically shut down after 5 beeps if not drained. Draining the water restores previous operating status automatically.
- Delay Protection of Compressor: The unit has a 3-minute delay restart protection for the compressor, except for the first power-on.
- Fluorine-free Protection (E3): If the compressor operates continuously for 10 minutes and the pipe temperature sensor detects a difference of <3°C between pipe and room temperature for 30 continuous minutes, the unit enters fluorine-free protection. The compressor and water spraying motor turn off, the fan operates in low speed mode, and E3 is displayed.