ZEBRA Timer-thermostat
v 0.V 12/170 TAGBASE 21
ES
EN
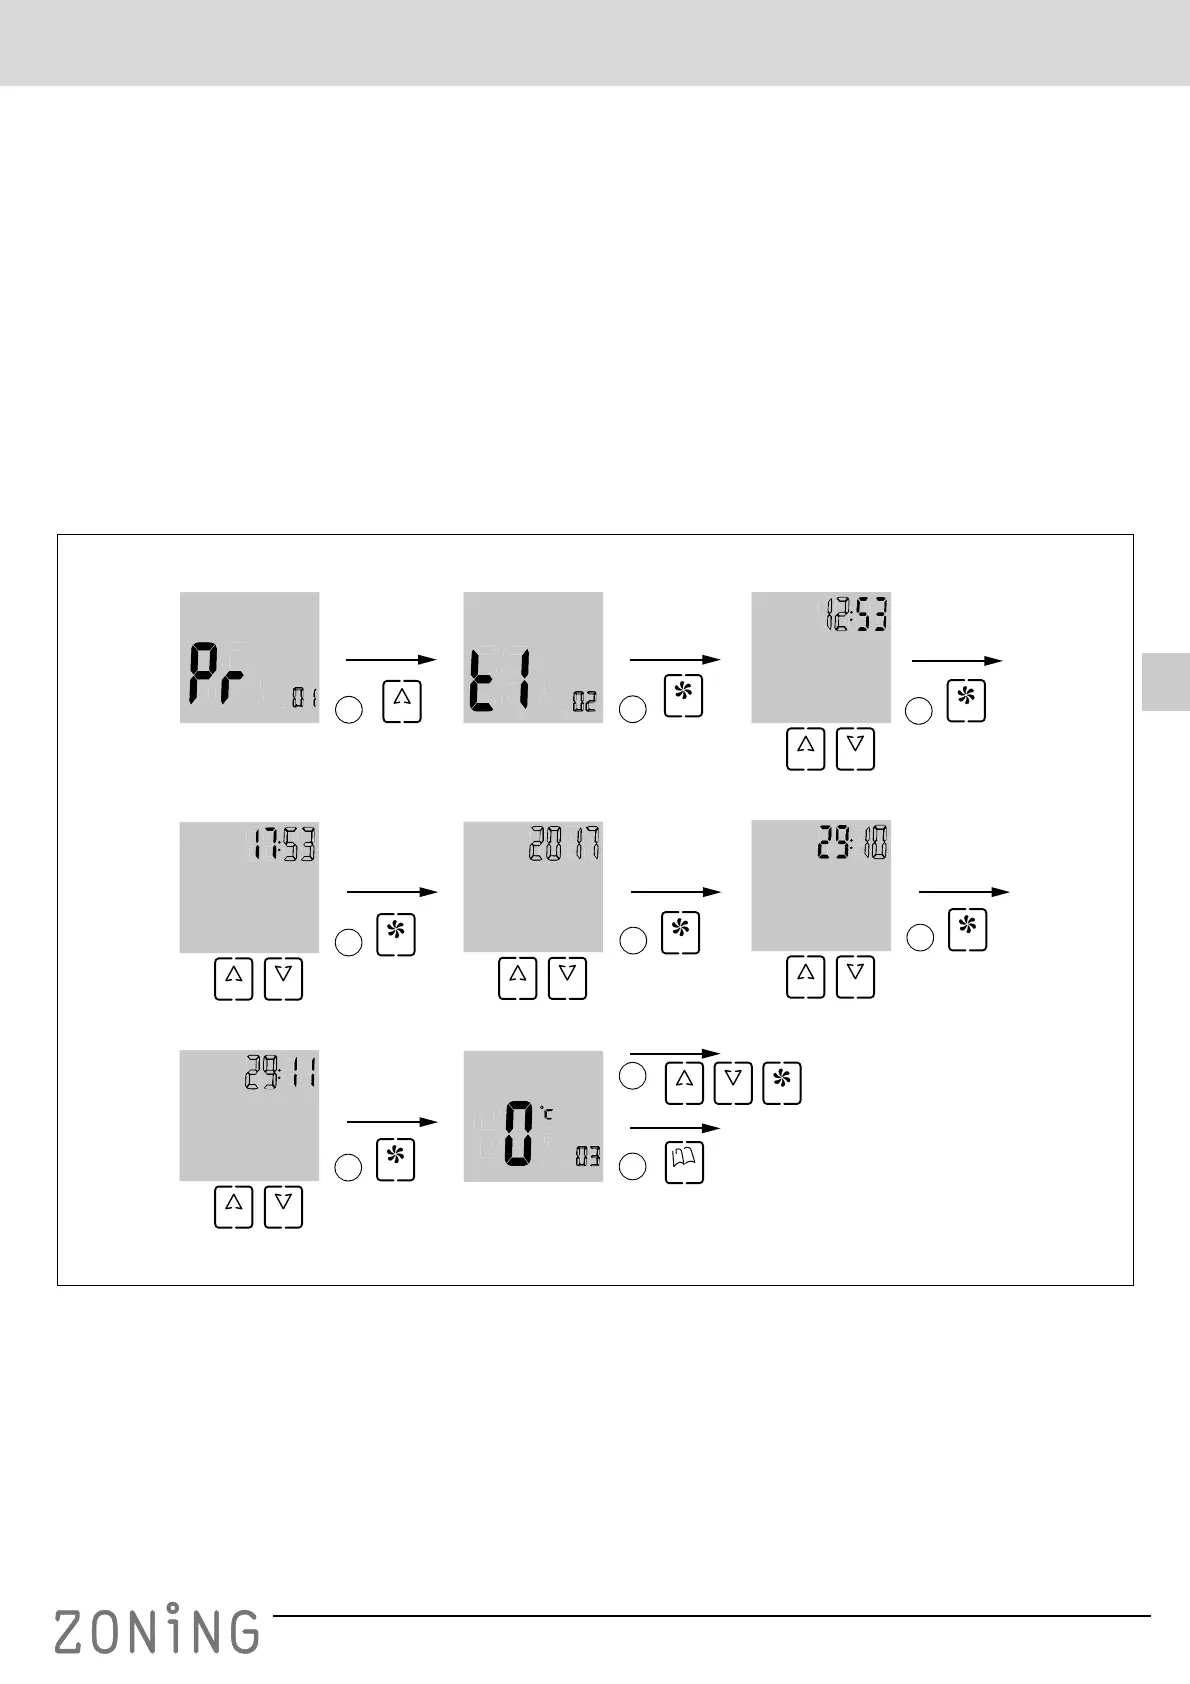
Date and time settings (menu No. 2, Fig. 12)
Time must be set in order to carry out weekly programming.
This is carried out as follows (follow the diagram in figure
12):
1 When you are in programming menu No. 1, press “UP”,
which will take you to menu No. 2 for setting the date
and time.
2 Press “FAN”: the hour will appear flashing; use the “UP”
and “DOWN” buttons to set the desired hour.
3 When you have set the hour, press “FAN” and the
minutes will flash. Set the desired value using the “UP”
and “DOWN” buttons.
4 When you have set the minutes, press “FAN” to accept
and the year will appear flashing. Use the “UP” and
“DOWN” buttons to set the desired value.
5 When you have set the year, press “FAN” to accept and
the month will appear flashing. Use the “UP” and
“DOWN” buttons to set the desired value.
6 When you have set the month, press “FAN” to accept
and the day of the week will appear flashing. Select the
desired value using the “UP” and “DOWN” buttons.
7 When you have set the day of the week, press “FAN” to
accept: the next programming menu will appear, in this
case No. 3.
8 If you want to continue with the programming, move
forward through the menus using the “UP” and “DOWN”
buttons and when you reach the desired menu, press
“FAN” to access that menu.
9 If you want to exit the programming, press “MODE”.
Fig. 12 Date and time settings
UP
FAN
1
4
3
2
UP DOWN
FAN
UP DOWN
FAN
UP DOWN
5
FAN
UP DOWN
6
FAN
UP DOWN
7
FAN
9
UP
8
DOWN FAN
MODE