ZEBRA Timer-thermostat
v 0.V 12/170 TAGBASE 23
ES
EN
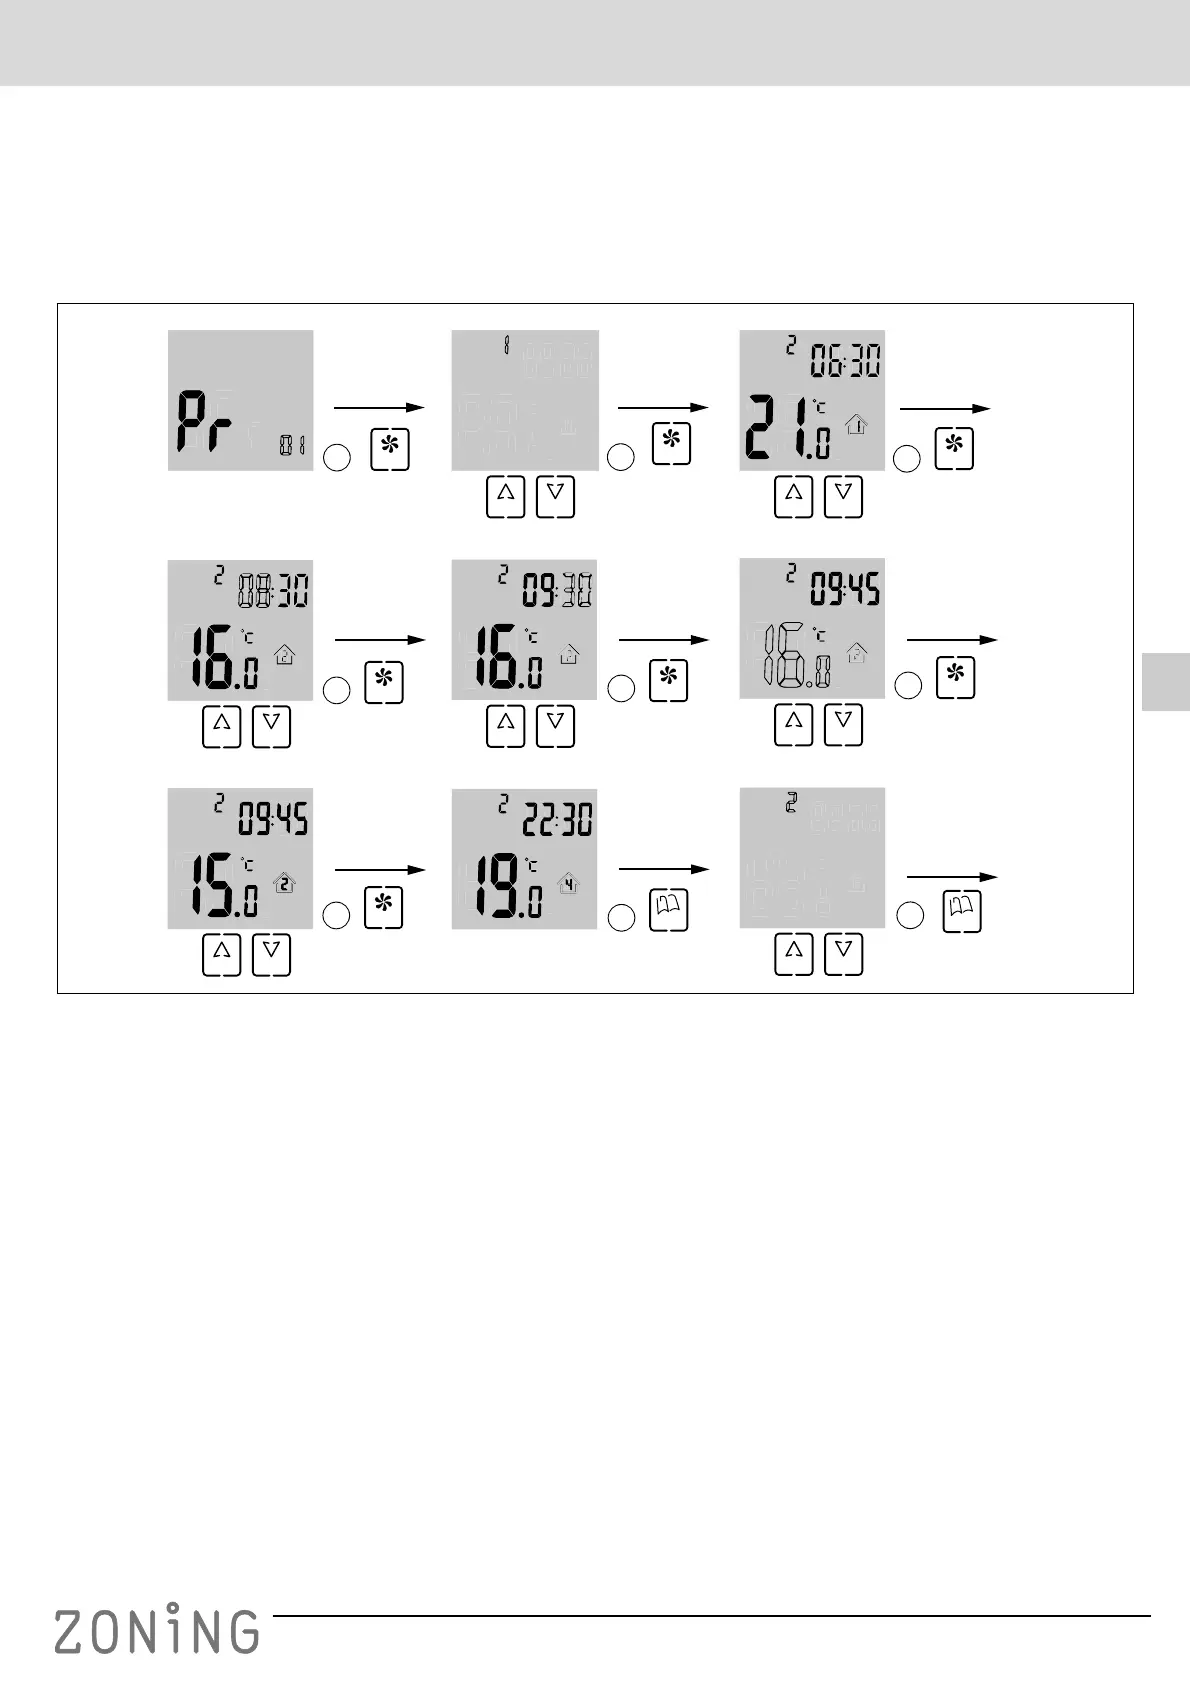
Weekly operation programming (menu No. 1, Fig. 15)
The timer-thermostat can be programmed to provide
different temperatures depending on the time of day and
the day of the week.
First of all, the weekly timeslots have to be programmed
(menu No. 13) as well as the daily timeslots (menu No. 16).
Once the weekly and daily timeslots have been set, do the
following:
Fig. 15 Menu No. 1, weekly operation programming
1 When you are already in programming menu No. 1,
press “FAN” to enter this menu: the digit for selecting
the day of the week will appear flashing; use the “UP”
and “DOWN” buttons to select the desired value.
• The possible selection options depend on the value
selected previously in menu No. 13:
– If 05 was selected in menu No. 13, the options that
appear will be 1 (Monday to Friday) and 6 (Saturday
and Sunday;
– If 06 was selected in menu No. 13 the options that
appear will be 1 (Monday to Saturday) and 7
(Sunday );
– If 07 was selected in menu No. 13 the options that
appear will be 1 to 7 (all the different days of the
week).
2 Once you have selected the digit for the day (weekly
timeslot) that you want to change, press “FAN”: the daily
timeslot will appear flashing (in the example, 1). The
temperature programmed for the timeslot and the start
time of the timeslot will also appear.
Use the “UP” and “DOWN” buttons to select the timeslot
that you want to change.
• The possible selection options depend on the value
selected previously in menu No. 16:
– If you selected 02 in menu No. 16, only two timeslots
will appear (options 1 and 2);
– If you selected 04 in menu No. 16, four timeslots will
appear;
– If you selected 06 in menu No. 16, six timeslots will
appear.
3 Once you have selected the daily timeslot that you want
to change, press “FAN”: the timeslot starting time will
appear flashing. Use the “UP” and “DOWN” buttons to
select the desired starting time.
4 Once you have selected the timeslot starting time, press
“FAN”: the minutes will appear flashing. Use the “UP”
and “DOWN” buttons to select the minutes.
MODE
ID
FAN
1
4
3
2
UP DOWN
FAN
UP DOWN
FAN
UP DOWN
5
FAN
UP DOWN
6
FAN
UP DOWN
7
FAN
9
UP
8
DOWN FAN
MODE
FAN
UP DOWN
ID
ID
ID
8
UP DOWN
ID
UP DOWN
 Loading...