Page | 8
• Del (delete) deletes forward of the cursor, unless you are at the end of a name then it
deletes backwards. To delete a specific letter, press the rewind (|◀◀ ) or fast forward
(▶▶|) buttons to navigate there.
• Finally, pressing enter at the bottom right saves the name.
The Finder menu
The finder menu allows you to navigate to, select and edit recorded files
To go to the menu:
• MENU
• FINDER
• SD1:F4_SD (this is the name of your SD card, it may be different for you)
You can edit these files, i.e. change their name, move them, or even delete them (although the
latter is not advisable—you never know what becomes useful in the edit!)
When you are in finder, extra functionality is provided by pressing the physical OPTION button
(on the front panel, above the channel 1 dial) when you do this, an options menu appears. To
edit a file, i.e. rename it, highlight the file and press the option button, then use the dial to enter
a new name and enter to overwrite.
Removing the SD Card and transferring files
To access the SD card, turn the Zoom carry case upside down and unzip the bottom of the case.
Inside there is a large camera battery. Carefully remove it. Ideally you should not detach the cable
connecting the battery to the Zoom.
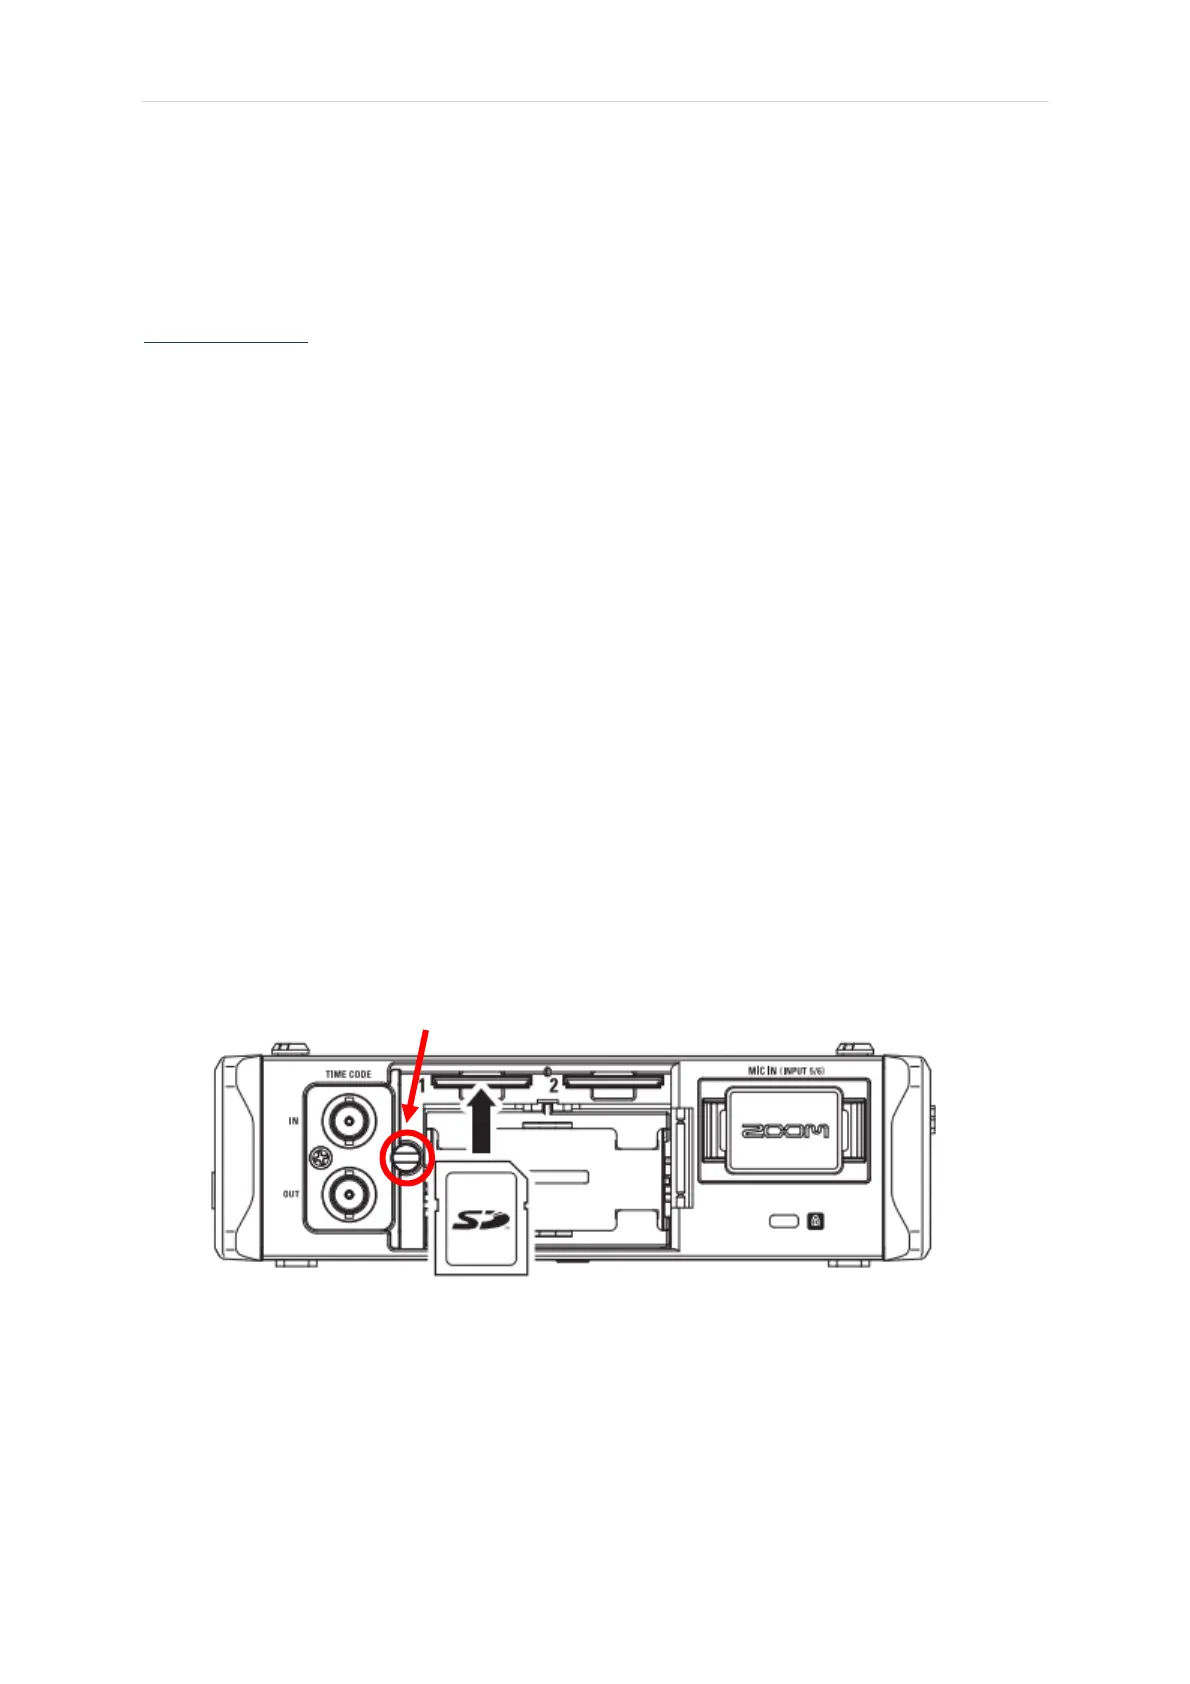
Under the battery there is a panel with the Zoom logo on it. Unscrew the screw to the left of the logo
to open the panel.
At the top, there are two slots, the left one is SD 1, the right SD 2.
Remove the SD card from slot one by pressing on the card. It should pop out, be aware though SD
cards have been known to fly out if pushed too hard. You can now plug the SD card into a computer,
and it should be readable to transfer files.
Once done remember to replace the card by pushing it in until it clicks, close the panel, and put the
battery back in place.