3
Instructions
1. Turning on the Zoom H4n Pro recorder
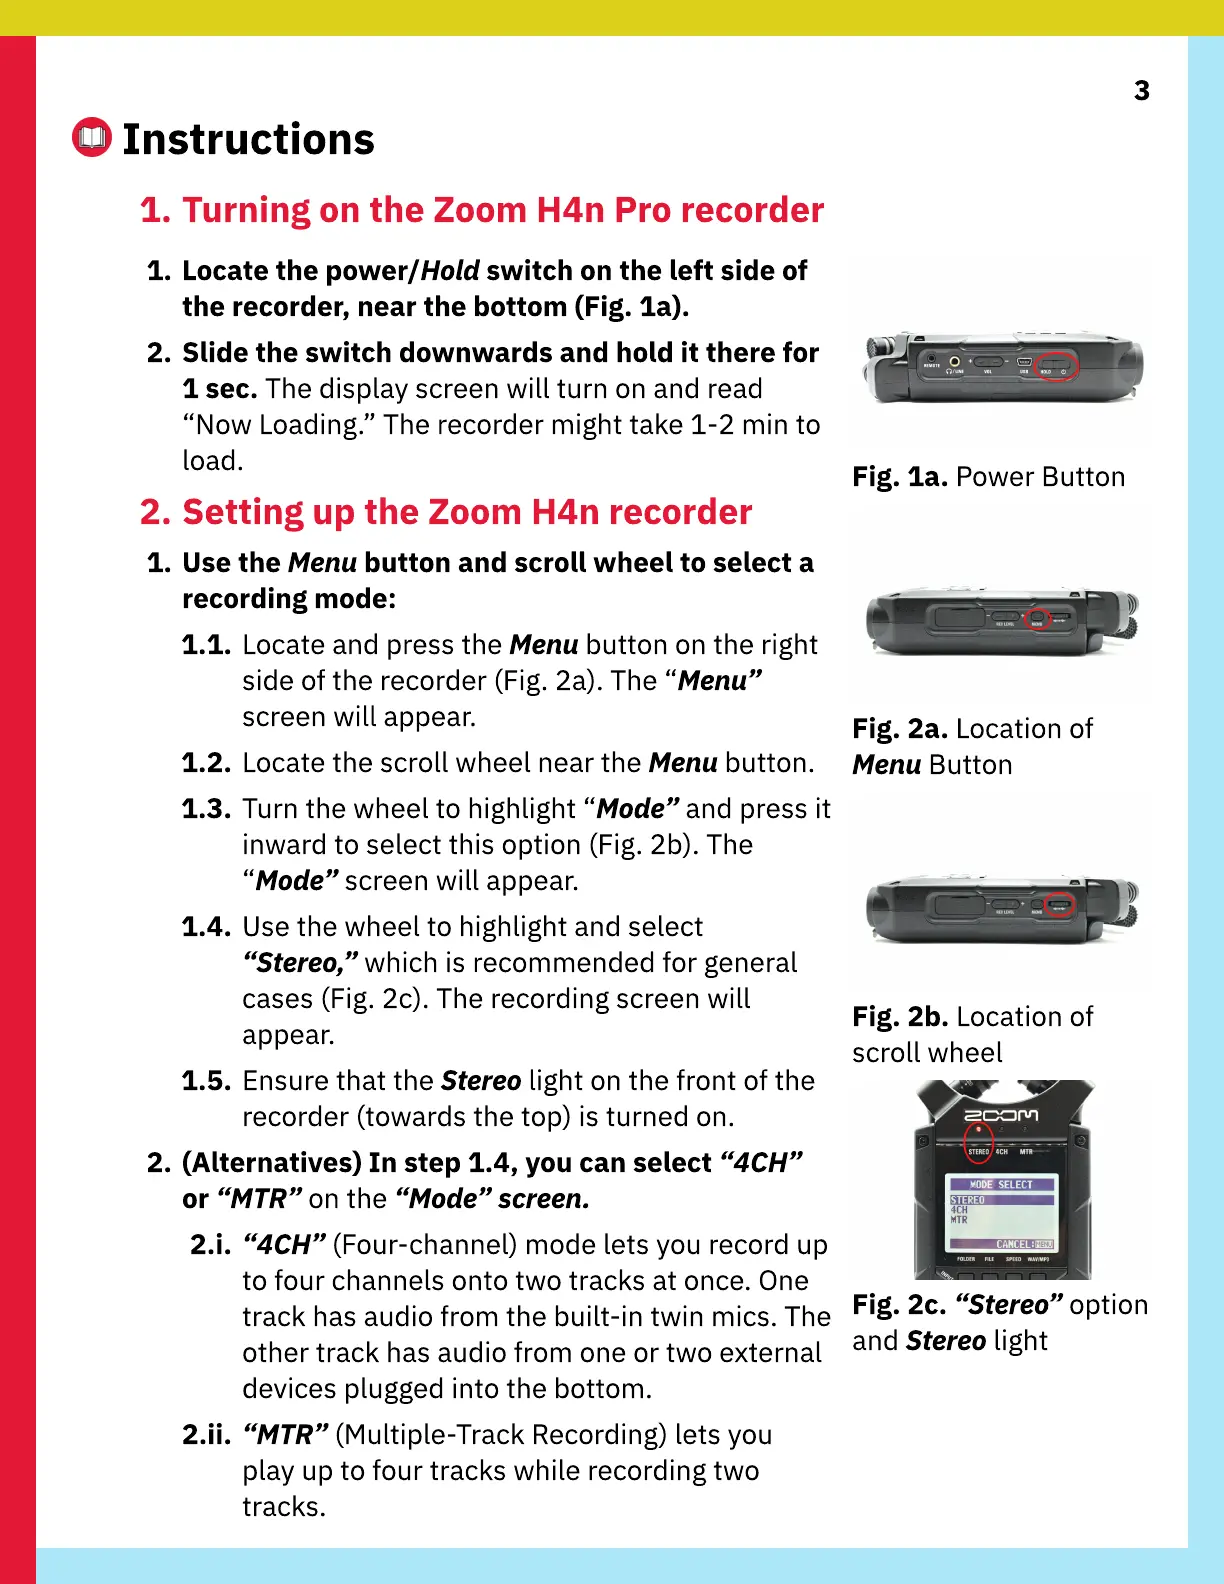
1. Locate the power/Hold switch on the left side of
the recorder, near the bottom (Fig. 1a).
2. Slide the switch downwards and hold it there for
1 sec. The display screen will turn on and read
“Now Loading.” The recorder might take 1-2 min to
load.
2. Setting up the Zoom H4n recorder
1. Use the Menu button and scroll wheel to select a
recording mode:
1.1. Locate and press the Menu button on the right
side of the recorder (Fig. 2a). The “Menu”
screen will appear.
1.2. Locate the scroll wheel near the Menu button.
1.3. Turn the wheel to highlight “Mode” and press it
inward to select this option (Fig. 2b). The
“Mode” screen will appear.
1.4. Use the wheel to highlight and select
“Stereo,” which is recommended for general
cases (Fig. 2c). The recording screen will
appear.
1.5. Ensure that the Stereo light on the front of the
recorder (towards the top) is turned on.
2. (
A
lternati
v
es) In step 1.4,
y
ou can select “
4C
H”
or “M
TR
” on the “Mode”
sc
reen
.
2.i. “
4C
H” (Four-channel) mode lets you record up
to four channels onto two tracks at once.
O
ne
track has audio from the built-in twin mics. The
other track has audio from one or two e
x
ternal
de
v
ices plugged into the bottom.
2.ii. “M
TR
” (
M
ultiple-Track
R
ecording) lets you
play up to four tracks while recording two
tracks.
Fig. 1a.
P
ower
B
utton
Fig. 2a. Location of
Menu
B
utton
Fig. 2b. Location of
scroll wheel
Fig. 2c. “Stereo” option
and Stereo light