5
4. Adjusting the playback volume
1. Use the Vol buttons (+ and -) to adjust playback:
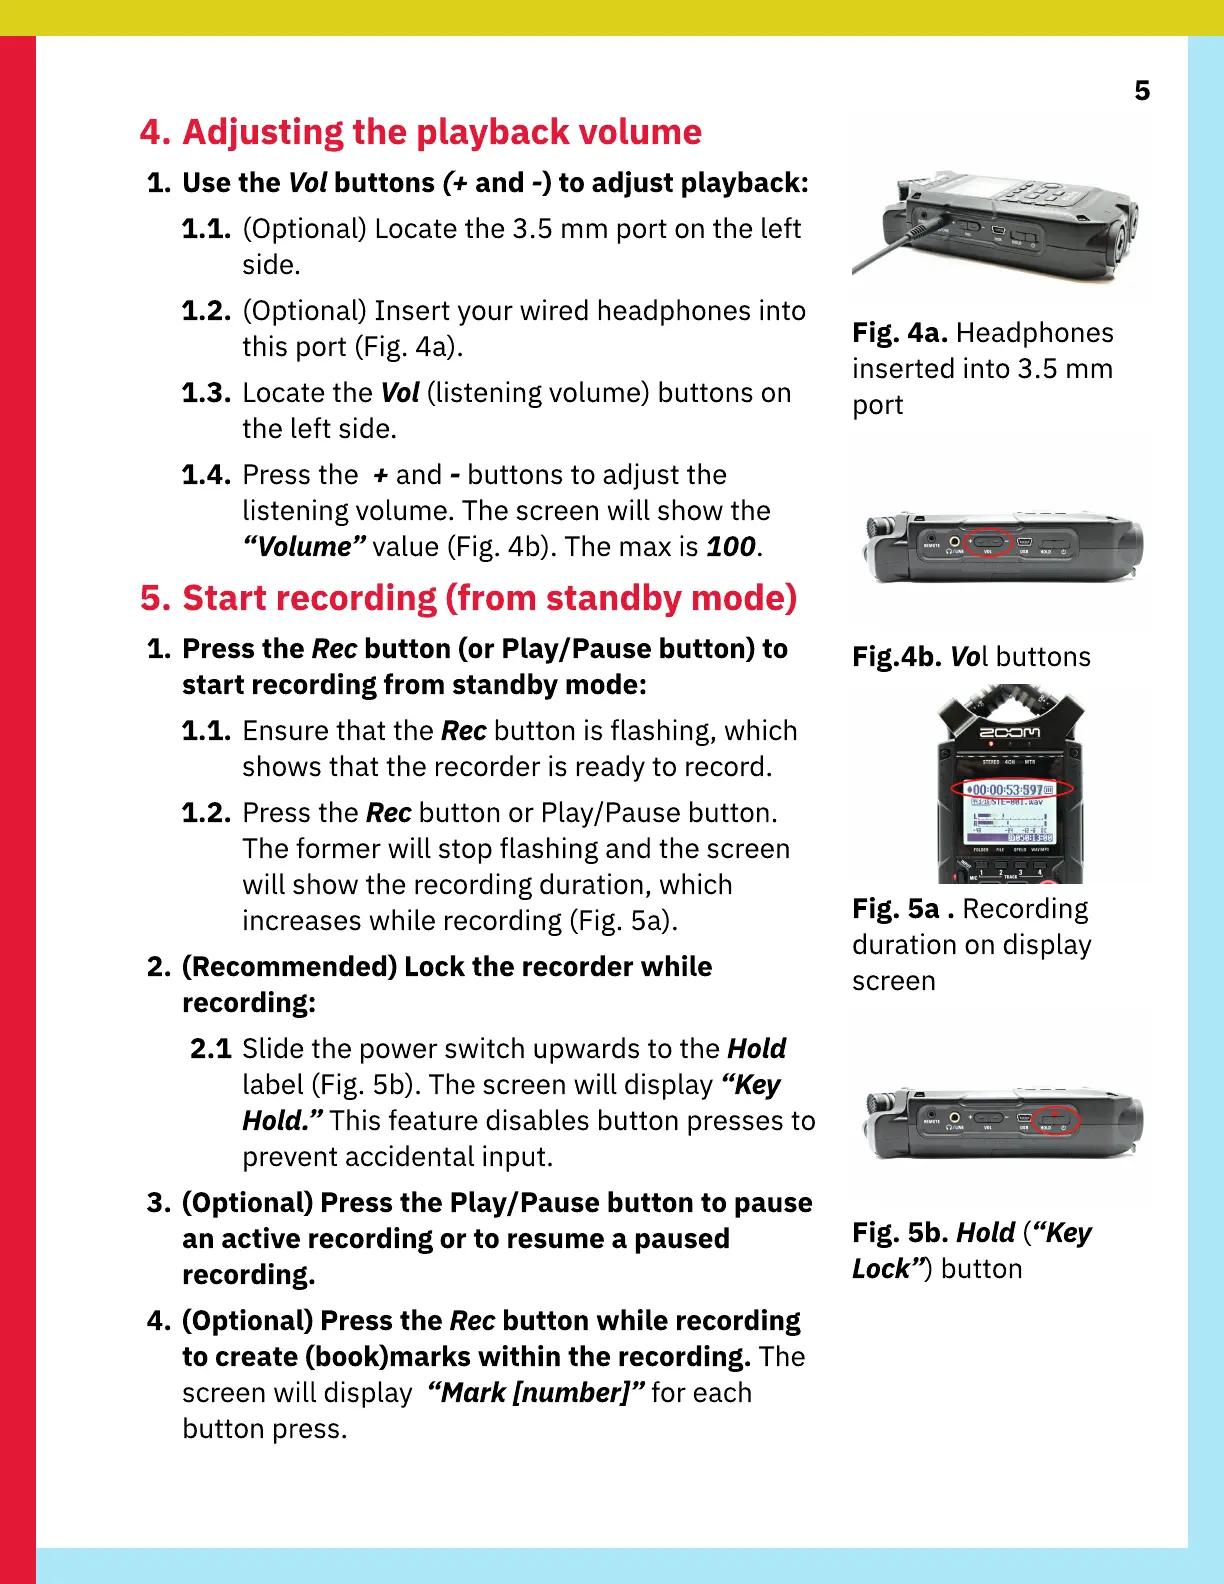
1.1. (Optional) Locate the 3.5 mm port on the left
side.
1.2. (Optional) Insert your wired headphones into
this port (Fig. 4a).
1.3. Locate the Vol (listening volume) buttons on
the left side.
1.4. Press the + and - buttons to adjust the
listening volume. The screen will show the
“Volume” value(Fig. 4b). The max is 100.
5. Start recording (from standby mode)
1. Press the Rec button (or Play/Pause button) to
start recording from standby mode:
1.1. Ensure that the Rec button is flashing, which
shows that the recorder is ready to record.
1.2. Press the Rec button or Play
/
Pause button.
The former will stop flashing and the screen
will show the recording duration, which
increases while recording (Fig. 5a).
2. (
R
ecommended)
L
ock the recorder
w
hile
recording:
2.1
S
lide the power switch upwards to the
H
ol
d
label (Fig. 5b). The screen will display “
K
e
y
H
ol
d.
” This feature disables button presses to
prevent accidental input.
3. (
O
ptional) Press the Play/Pause button to pause
an active recording or to resume a paused
recording.
4. (
O
ptional) Press the Rec button
w
hile recording
to create (book)marks
w
ithin the recording. The
screen will display “
Mark
[n
um
b
e
r]
” for each
button press.
F
ig. 4a.
H
eadphones
inserted into 3.5 mm
port
F
ig.4b. Vol buttons
F
ig. 5a .
R
ecording
duration on display
screen
F
ig. 5b.
H
ol
d
(“
K
e
y
L
oc
k
”) button