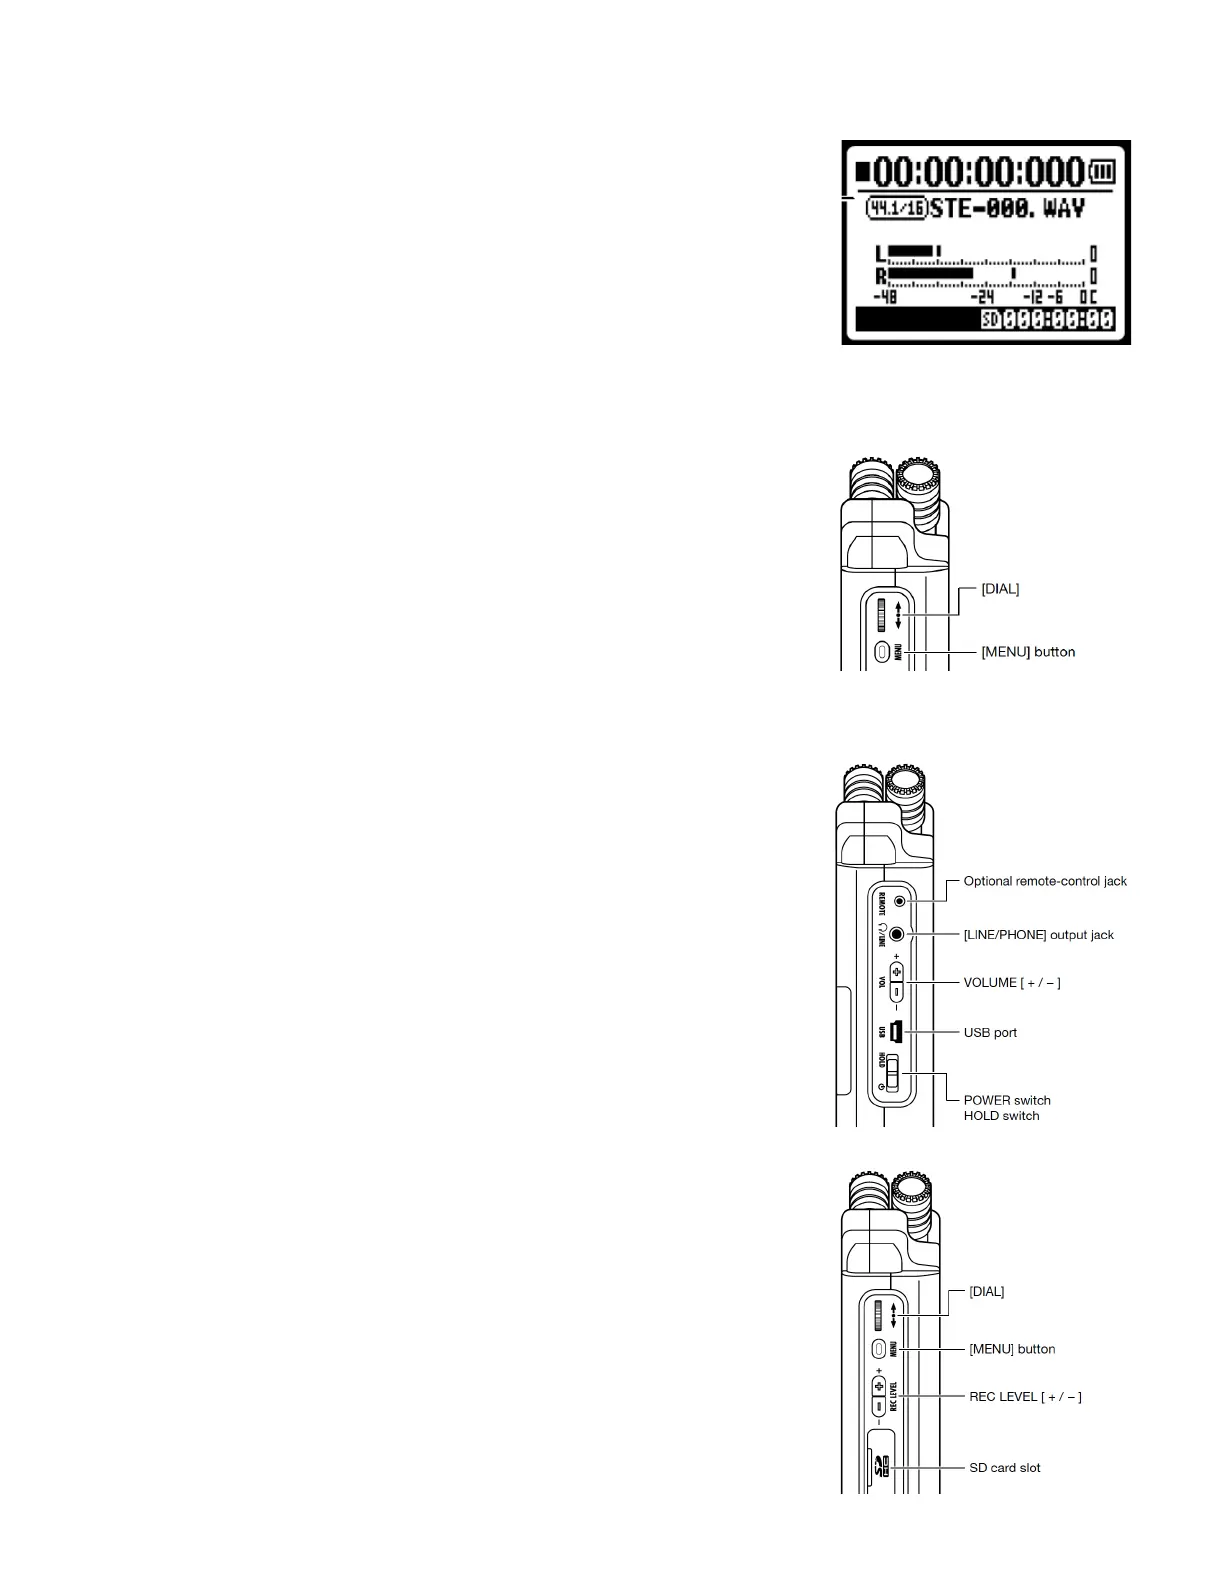
11. Select MENU => MODE => STEREO to set the recorder to Stereo Mode so that it will
record two track audio les. This does not, in and of itself, mean it will record in
stereo, the next step is very important.
12. Select MENU => INPUT SETTINGS => MONO MIX to OFF in order to record in stereo,
otherwise you’ll be recording MONO even though the recorder is in stereo mode.
The STEREO light indicates Stereo Mode, not that it will actually record in stereo. The
only way to conrm if you are recording in stereo is when the recorder is creating le
names that start with “STE” (if le names start with “MONO” you are not recording in
stereo.
13. Select MENU => INPUT SETTINGS => 1/2 LINK to ON, with this mode ON, the
recorder will set both channels 1 and 2 to the same level, which is usually what you
want when recording in Stereo.
14. Select MENU => INPUT SETTING => LIMITER to ON, the Comp 1 setting is ne.
You want to enable the limiter so that when a peak gets close to 0dBFS it will be
attenuated to avoid distortion in your recording.
15. Select MENU => INPUT SETTING => LOW CUT — Set this to ON for most
recording, unless low frequencies are important for the sound effects you are
recording, however, for dialogue recording it’s good to have the low cut
enabled to reduce rumble and plosives.
16. To enable the built-in microphone, press the MIC button on the front panel, it
will light up red, if 1 and 2 buttons are selected then the recorder is recording
from the external microphone inputs (and for this rst part of the QuickStart,
we’re assuming you want to record with the built-in microphone.
17. Connect a pair of headphones to monitor your recording; always monitor your
recordings! Adjust the headphone levels using the VOLUME buttons (on the left
side panel)
18. Now you're nally ready to record, press the RECORD button, it will blink red, this
is called Recording Standby Mode, check your levels, you’re not actually
recording yet
19. Adjust sound levels as needed using the REC LEVEL buttons (on the left side
panel), you want a healthy signal, too low, and the signal is lost in the noise oor,
too loud and the peaks will distort. The limiter will catch errant peaks, but don't
count on it constantly. Adjusting levels is crucial and takes some practice, set high
enough (with peaks sometimes over -6dB but rarely over -3dB) so you have a
healthy signal and only in rare occasions should you have a peak for which the
limiter needs to kick in and deal with the peak for you.
20. Press RECORD, to start recording! Always check for ascending timecode numbers
on the display to conrm you’re actually recording and not still in Record Standby
Mode!
21. Press the STOP button to stop recording, a new le is created for each recording
and the le name is displayed on the LCD while recording or in record-standby
mode.
22. To review the most recently recording, press PLAY. Review your other recordings
by pressing the FILE button and then selecting the le you want to listen to using
the scroll wheel/button, press play or other transport controls as needed.
23. Keep a log. The recorder shows you the le name it is recording to with makes it
easy to match recordings to sound log entries. Make a note of the le name, date,
place, and other details in your sound log. It’s a good idea to SLATE your take
(adding a verbal description of what you’re recording at the beginning of the
recording) which helps in identication of les without having to listen to the
whole thing.
24. When recording in STEREO mode, the recorder will save les to one of the ten
sub-folders of the STEREO folder. In the menu you can select with subfolder the
le will go into, but default it goes into “FOLDER 01” You can change the folder by
pressing the FOLDER button
25. When you are done with your recording, copy the contents of the SD card using
 Loading...