- At ‘0’ dB the sound will distort. The sound can never be fixed or recovered in
post-production – it is forever ruined! You need to leave enough ‘head room’
to allow for unexpected loud noises and editing.
6, Recording
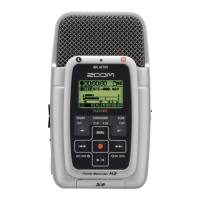
- To begin recording press the REC button (red dot button below screen). The
REC indicator – just above the screen and below ‘Zoom’ - will now be constantly
lit in red. The counter on the front display will turn over, indicating the length of
your recording.
- To finish recording press the REC key. The REC indicator goes out. The
counter will return to the beginning of this recording and you can play back from
here.
- If you begin recording again, a new track, or file, will automatically begin. This will
always happen, the recorder does not overwrite existing recordings.
- DO NOT edit in machine (except for normalizing) - there is plenty of room
on the disk. This will only lead to disaster … believe us!!! You can dump and get
rid of files once you have transferred them onto the computer.
7, Playback
- To check your recording, press the PLAY key (right hand side). Press the
PLAY/PAUSE key again to stop playback. Each track will have it’s own number eg.
ZOOM001.wav, ZOOM002.wav, etc.
8, Finding your files
- When the playback screen is open press MENU button (left hand side)
- Use the PLAY/FWD/REV button to select FILE LIST
- Press the MENU key repeatedly when you wish to return to the top screen.
9, Normalizing WAV files
- If the volume of a recording is lower than desired, you can raise the level of the
recording as a whole. Use the play button to select and play the file … then press
play again to bring up the option to normalize (see p.48-49 of the manual).
10, Connecting the H2 to a computer
- A USB cable is used to connect the H2 to your computer.
- Press the MENU button to bring up the main menu. Move the cursor to USB and
press the PLAY button.

 Loading...