(English)
11
6800 w/6000cart 501NegFit/6884.eps
2/20 2001 K&K
Fig. 13
6800 w/2000 NegFit/6884.eps
2/20 2001 K&K
Fig. 14
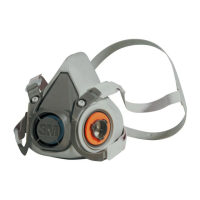
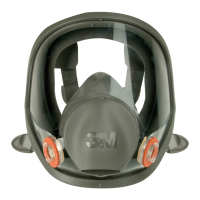
Negative Pressure User Seal Check with Cartridges 6000 Series (Side-Mounted)
1. Place palms of hands to cover face of cartridge or open area of 3M™ Filter Retainer 501 and inhale gently. If you feel facepiece collapse slightly
and pull closer to your face with no leaks between the face and facepiece, a proper seal has been obtained (Fig. 13).
2. If faceseal air leakage is detected, reposition the respirator on your face and/or readjust the tension of the straps to eliminate leakage and recheck
seal.
If you cannot achieve a proper seal, DO NOT enter contaminated area. See your supervisor.
NOTE: Use of 3M™ Filter Retainer 501 may aid respirator wearer in conducting a negative pressure user seal check.
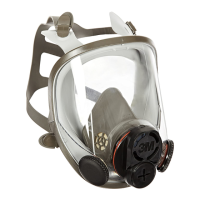
Negative Pressure User Seal Check with 2000 Series Filters (Side-Mounted)
1. Place your thumbs onto the center portion of the lters, restricting airow through lters and inhale gently. If you feel facepiece collapse slightly
and pull closer to your face with no leaks between the face and facepiece, a proper seal has been obtained (Fig. 14).
2. If faceseal air leakage is detected, reposition the respirator on your face and/or readjust the tension of the straps to eliminate the leakage and
recheck seal.
If you cannot achieve a proper seal, DO NOT enter contaminated area. See your supervisor.
Negative Pressure User Seal Check with Filters 7093/7093C (Side-Mounted)
1. Using hands press lter covers toward facepiece and inhale gently. If you feel facepiece collapse slightly and pull closer to your face with no leaks
between the face and facepiece a proper seal has been obtained.
2. If faceseal air leakage is detected, reposition the respirator on your face and/or readjust the tension of the straps to eliminate the leakage and
recheck seal.
If you cannot achieve a proper seal, DO NOT enter contaminated area. See your supervisor.
Negative Pressure User Seal Check with Dual Airline and Center Mounted Airline
1. Disconnect airline hose from air control valve.
2. With breathing tube still connected to the air control valve inhale gently. If you feel facepiece collapse slightly and pull closer to your face with no
leaks between the face and facepiece, a proper seal has been obtained.
3. For combination dual airline where cartridges or lters are attached perform user seal check as described under the appropriate cartridge or lter
that is being used.
4. If faceseal air leakage is detected, reposition the respirator on your face and/or readjust the tension of the straps to eliminate the leakage and
recheck seal.
If you cannot achieve a proper seal, DO NOT enter contaminated area. See your supervisor.
NOTE: Before assigning any respirator to be worn in a contaminated area, a qualitative or quantitative t test must be performed per OSHA
29 CFR 1910.134, or CSA Standard Z94.4.
RESPIRATOR REMOVAL
1. Fully loosen all four head straps by lifting up on buckles.
2. Remove respirator by pulling straps over head.
FIT TESTING
The effectiveness of a respirator will be reduced if it is not tted properly. Therefore, either qualitative or quantitative t testing must be
conducted prior to respirator being used.
NOTE: Fit testing is a U.S. OSHA and Canadian CSA Z94.4 standard requirement. Therefore, either quantitative or qualitative t testing must be
conducted prior to the respirator being issued.
Quantitative Fit Testing
Quantitative Fit Testing (QNFT) can be conducted using a 3M™ Fit Test Adapter 601 and P100 lters such as the 3M™ Particulate Filters P100 2091
or 7093.