2
LABORATORY ATTENUATION
WARNING! 3M strongly recommends individual t testing
of hearing protectors. If the NRR is used to estimate typical
workplace protection, 3M recommends that the noise
reduction value be reduced by 50% or in accordance with
applicable regulations.
Explanation of attenuation tables
ANSI S3.19-1974
A:1 Frequency (Hz)
A:2 Mean attenuation (dB)
A:3 Standard deviation (dB)
The level of noise entering a person’s ear, when hearing
protector is worn as directed, is closely approximated by the
difference between the A-weighted environmental noise level
and the NRR.
Example
1. The environmental noise level as measured at the ear is
92 dBA.
2. The NRR is 20 decibels (dB).
3. The level of noise entering the ear is approximately equal to
72 dB(A).
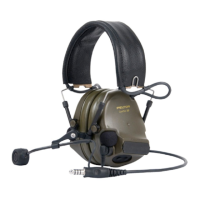
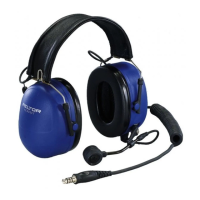
COMPONENTS
C:1 Foldable headband
C:2 Cup supporting arm
C:3 Earcup arm guide/Two-point fasteners
C:4 Cup
C:5 Battery lid
C:6 Microphone for ambient/environmental listening
C:7 Damping pad
C:8 Ear cushion
C:9 External input cable (only specic models)
C:10 Speech microphone (only specic models)
C:11 Backband
C:12 Speech microphone input (J22) (only specic models)
C:13 [-] button on keypad
C:14 [+] button on keypad
C:15 NIB PTT
FITTING INSTRUCTIONS
Headband
D:1 Slide out the cups and tilt the top of the shell out, as the
cable must be on the outside of the headband.
D:2 Adjust the height of the cups by sliding them up or down
while holding the headband in place.
D:3 The headband should be positioned across the top of the
head as shown and should support the weight of the headset.
Backband
D:4
D:5 D:6
D:4 Don the helmet and securely fasten the chin strap. Hold the
headset in front of you with the backband below the ear
cushions and towards the user.
D:5 Bring the headset over the head and behind the neck.
D:6 Slide the earcups under the helmet and over the ears.
D:7
D:8
D:7 Take the hook-and-loop straps attached to each headset
and bring over the helmet and fasten together, ensuring each
ear cushion remains over the ear and is supported by the
head strap. The head strap should be positioned across the top
of your helmet.
D:8 Reposition the ear cushion over the ear as needed.
D:10
D:9
D:9-D:10 IMPORTANT: Position the external input cable on the
inside of the backband as shown in gure D:10, and ensure that
you have a proper seal around the ear.
EN
D:6

 Loading...