© 3M 2006
4
Set Up and Installation
Remove the 3M™ Scotch-Weld ™ Hot Melt Applicator PG II from its shipper and inspect for obvious
damage.
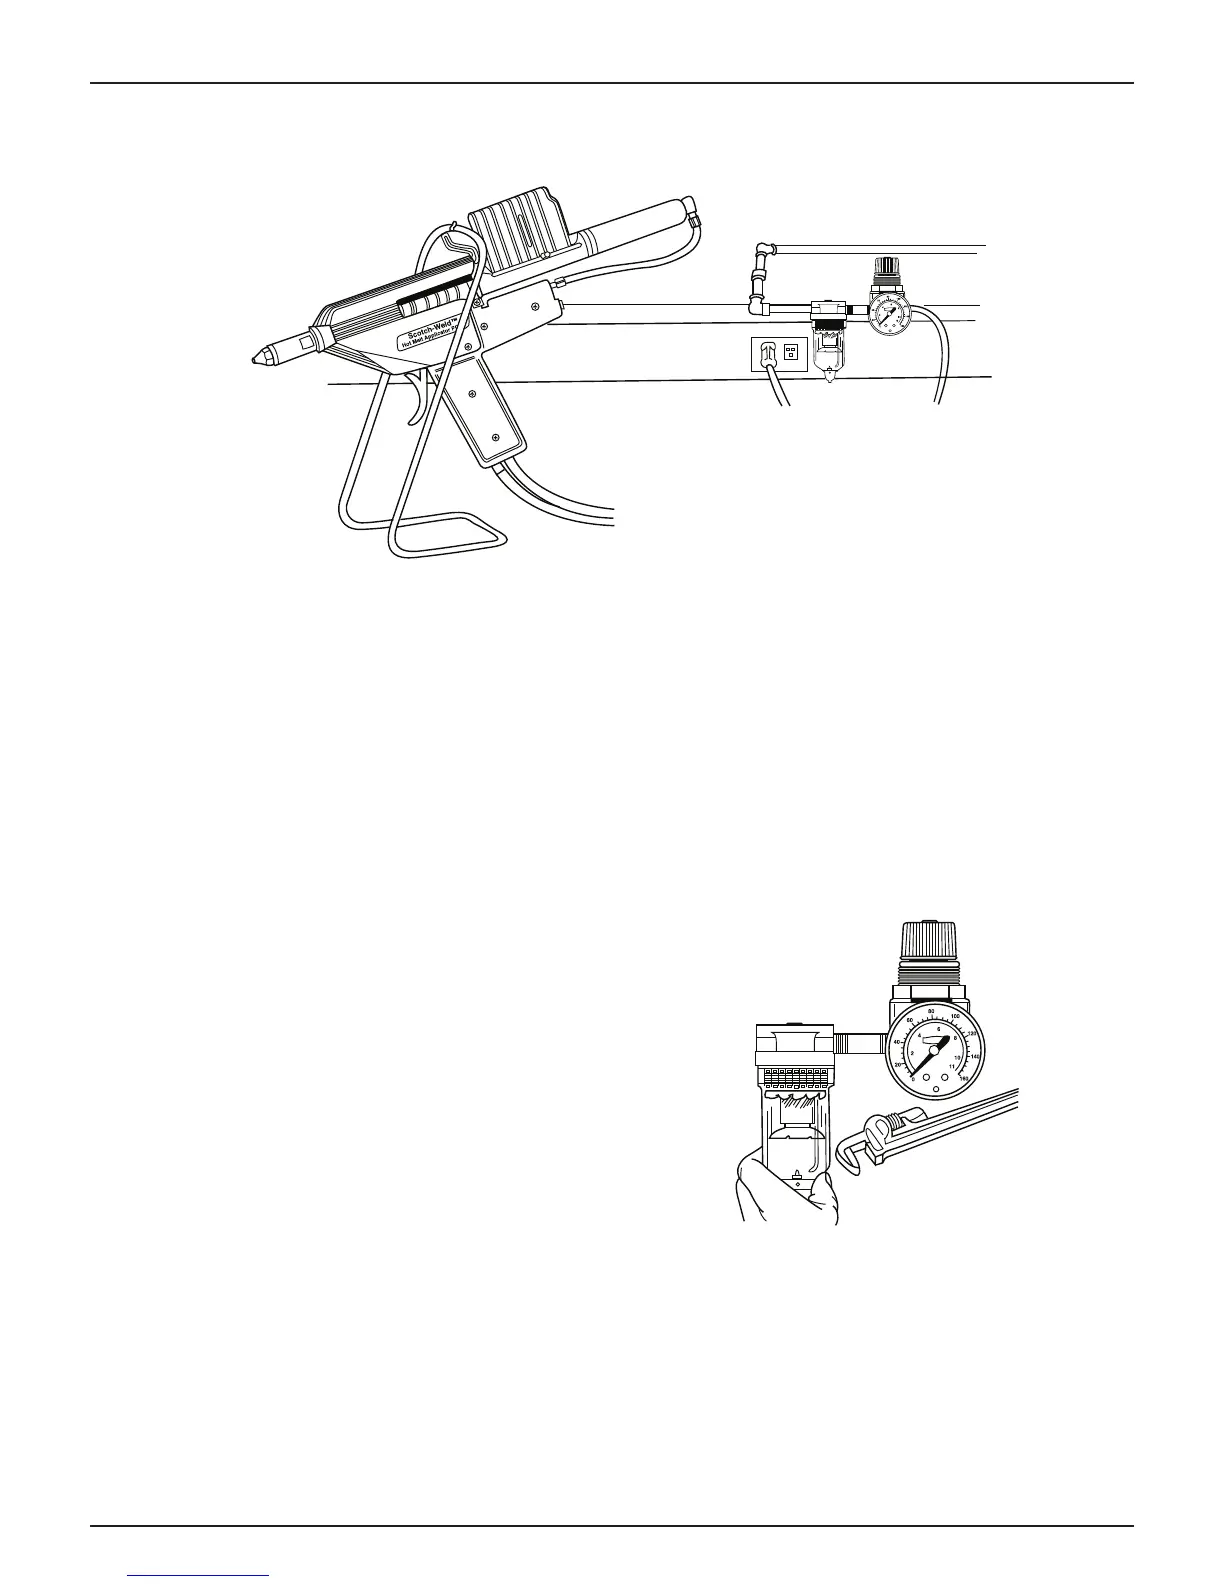
1. Connect Air and Electrical Service
Select a work station where 120 VAC grounded
receptacle and compressed air service are available.
Electrical outlet should be as close to air supply as
possible.
Filtered air regulated to 80 psi maximum
is vital to trouble-free operation.
Connect air hose
using two 1/2’’ open-end wrenches. Remove the steel
swivel portion of the connector and insert the steel
swivel into 1/8’’ female pipe thread air source. Insert
and tighten the brass fitting into the swivel and snug
up all fittings.
2. Install Air Filter and Regulator
An air filter and moisture trap must be installed at the
applicator connection point of the air system. Install
an air filter WATTS #602-2S Model M4 (or
equivalent) at the air outlet or as close as possible to
it. The hose connection at the end of the 3M Scotch-
Weld Hot Melt Applicator PG II air hose is 1/8’’
standard male pipe fitting.
3. Install Bench Stand
Prior to start up in operation, set the bench stand on
work surface so that tip of gun points away from
work area when gun is not in use. When bench stand
is in most desirable position, fasten permanently
using the screws provided. (If portability of the
bench stand is desired, simply attach the stand to a
piece of scrap wood approximately 7’’ x 16’’ using
either screws or by adhering the stand to the wood.)