Do you have a question about the 3M Scotch-Weld and is the answer not in the manual?
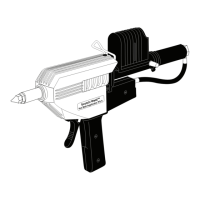
Connects air hose and electrical service. Filtered air regulated to 80 psi is vital.
Install an air filter and moisture trap at the air outlet.
Position bench stand so tip points away from work area. Fasten securely.
Ensure applicator is loaded, turn on, and set in bench stand for 15 mins.
Retract piston, insert adhesive sticks, and prepare for extrusion.
Feather trigger for variable flow. Never operate without a nozzle tip.
Tips can be changed when hot using wrenches. Avoid overtightening.
Check air, power, adhesive, and allow warm-up before starting.
Use bench stand, do not lay applicator on its side. Keep sticks clean.
Turn off applicator, continue use until one stick is consumed. Lubricate weekly.
Lists available part kits for repair. Order by name and number.
Instructions for disassembling the handle, including removing screws and wiring.
Replace regulator assembly, ensuring snug fittings and checking for leaks.
Replace nozzle valve assembly, using safety goggles and heat-resistant gloves.
Replace heaters by driving old ones out and installing new ones.
Replace thermostat and TCO as a unit, ensuring proper seating in the heat block.
Part kit for replacing the applicator handle assembly.
Part kit for replacing the applicator's regulator assembly.
Part kit for replacing the applicator's nozzle valve assembly.
Part kit for replacing the applicator's heater elements.
Diagram showing the electrical connections and layout of components.
Lists available nozzle tips and their descriptions for controlling adhesive flow.
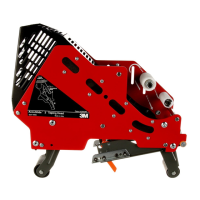
Describes a bench mount for positioning the applicator and using a foot pedal.
Describes a magazine feed for semi-automatic loading of adhesive sticks.
Contact nearest 3M Sales Branch or distributor for service during warranty.
Information on repair, ordering parts, or using the refurbish program.
| Brand | 3M |
|---|---|
| Model | Scotch-Weld |
| Category | Power Tool |
| Language | English |