9
INSTALLATION OF BLOWER
1. The blower assembly should be removed from the box
containing the PVC PIPE and FITTINGS. Check to make
sure that the plastic bag with harness and two hold down
clips is in the box and does not get misplaced.
2. Unwrap packing material from the blower assembly. Make
sure no material is still attached to the outside or inside of
blower assembly. The mounting bracket on the inlet of the
blower assembly will need to be removed and turned to the
correct orientation before blower assembly is mounted.
3. Remove two (2) screws installed in top cover at mounting
locations. Place screws aside for later use in securing blower
assembly to top cover.
4. Locate the blower assembly, the 3 inch PVC pipe which is 7
inches in length, and the tee.
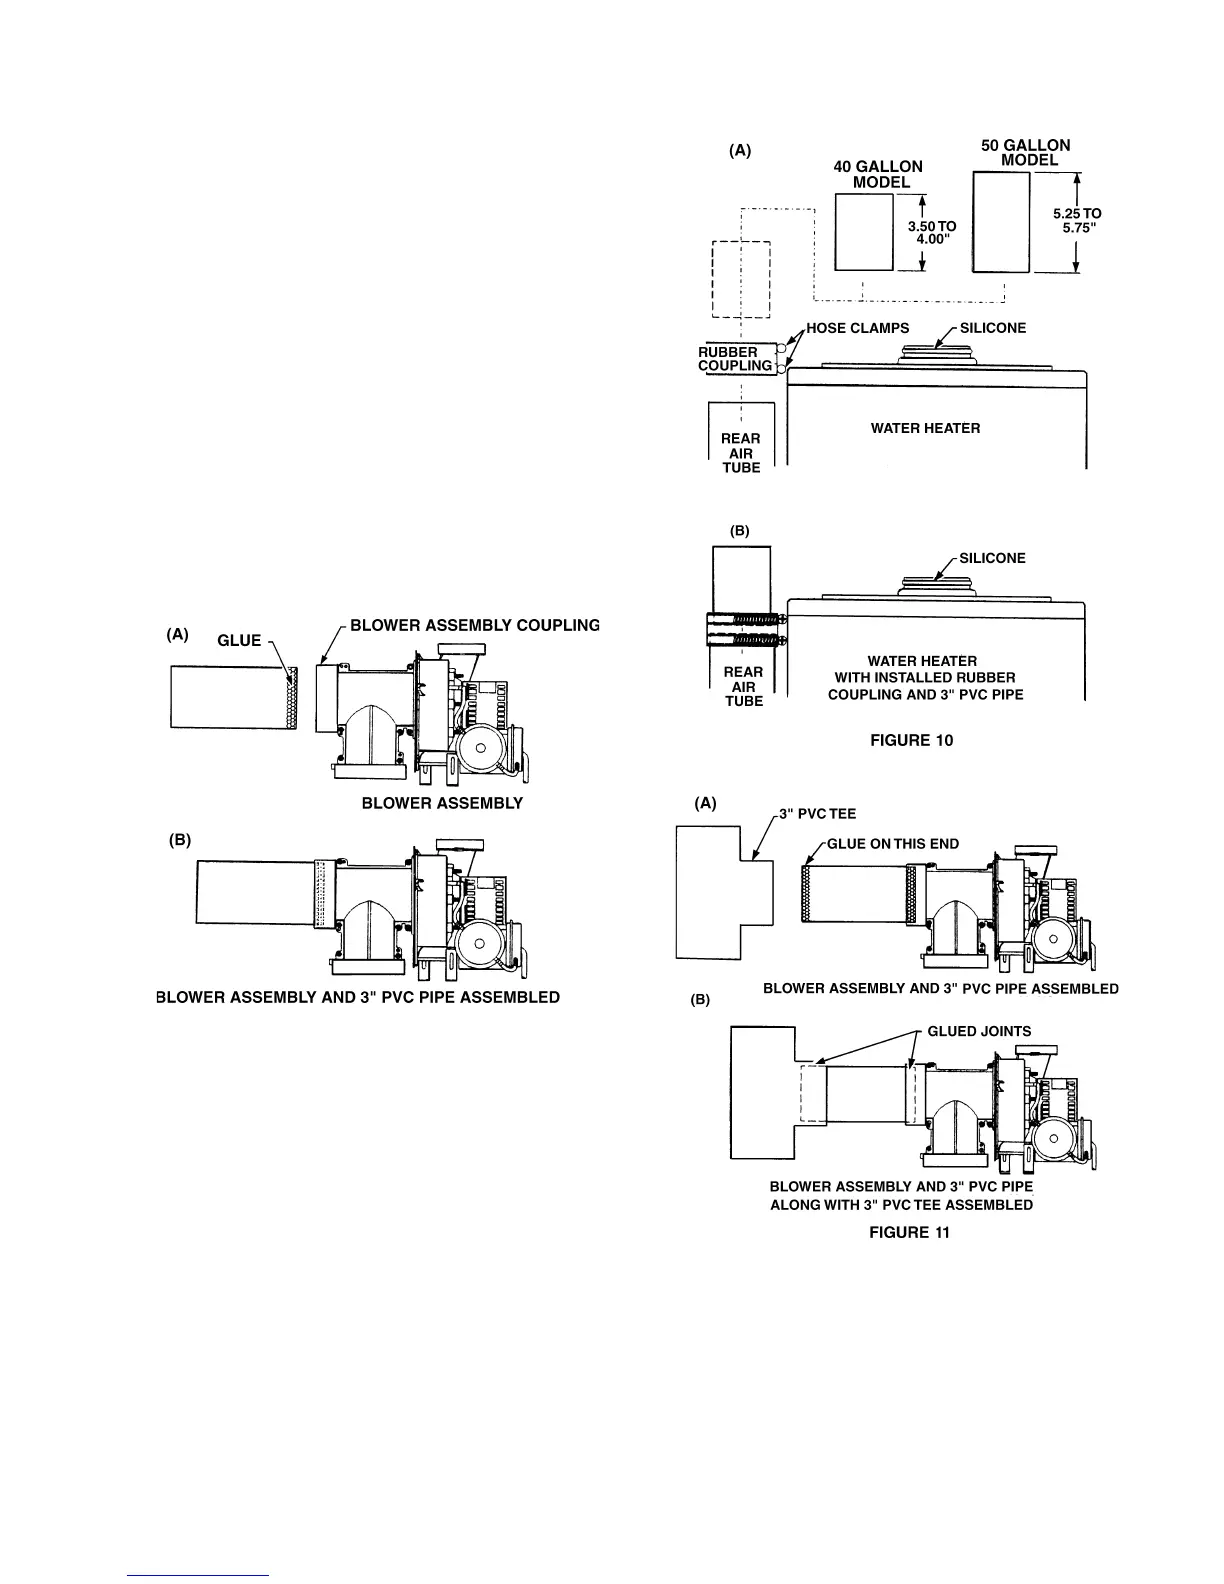
5. Take the 3 inch PVC pipe which is 7 inches in length and put
glue on one end. Take the end which is covered with glue
and insert it into the blower assembly’s coupling twisting
slowly to make sure the glue is spread evenly. (Fig. 9)
FIGURE 9
6. Find tube of high temperature silicone and the larger flexible
rubber coupling with hose clamps in the box that contained
the blower assembly. Place the larger flexible rubber coupling
on the rear air tube and tighten the hose clamp (Make sure
to remove plastic cap on air tube before installing coupling).
7. Cut a 3 inch PVC pipe approximately 4 inches for the 40
gallon and approximately 5.75 inches for the 50 gallon. Take
the cut 3 inch PVC pipe and place into rubber coupling and
tighten hose clamps. (Fig.10)
8. Locate the blower assembly and previously glued 3 inch PVC
pipe and the 3 inch PVC tee. Before gluing the tee and pipe
together, first insert pipe into tee and make sure the alignment
is correct, glue the pipe and 3 inch PVC tee together. (Fig.
11)
NOTE: The 3 inch PVC tee and 3 inch PVC tee may have a
snug fit. If so, use a soft mandrel to help tap the 3 inch PVC
pipe into tee if necessary.
NOTE: Because of tolerances built into the water heater, when
the blower assembly, the 3 inch PVC pipe, and 3 inch PVC tee is
being located on the top of the heater and air tube, the installer
may have to shorten the 3 inch PVC pipe cut earlier to fit between
the tee and the air tube. The range for the 40 gallon should be
between 4 inches to 3.5 inches and the 50 gallon should be
between 5.75 inches to 5.25 inches.
NOTE: The installer may have to remove the rear air tube bracket
screws to allow the air tube to be shifted right or left to allow proper
alignment of the tee to the blower assembly.




 To Next Page