the front housing. Take note of the side on which the spacer has
been removed. The spacer is used to fill the gap that is created when
shifting the viewfinder between formats. Replace the viewfinder as-
sembly accordingly:
Secure the viewfinder by installing the spacer on the appropriate side
and installing the four screws loosely. After all four screws are in pla-
ce, tighten each screw until it is snug.
• 4. (a) Shifting the PL Lens Port
The PL lens port needs to be reset to the new optical center of the
shifted viewing screen and viewfinder.
If the port cap is on, remove it. Notice that there are six slotted
screws which lock the lens port ring to the lens holder, each with an
unoccupied hole alongside it. Also note that one of each pair of
holes will be marked with a red dot indicating Super16 positioning.
Remove the six screws and carefully lift off the lens port ring and its
accompanying shims and place on a clean surface with the shim side
face up. Take note of the screw holes from which the six screws have
been removed. Also note an unoccupied hole alongside each.
Shift the lens port by refastening the lens port ring utilizing the se-
cond set of screw holes on both the lens port ring and the lens hol-
der. The clockwise-side holes on both are for standard 16 positio-
ning, the counter-clockwise holes are for Super16.
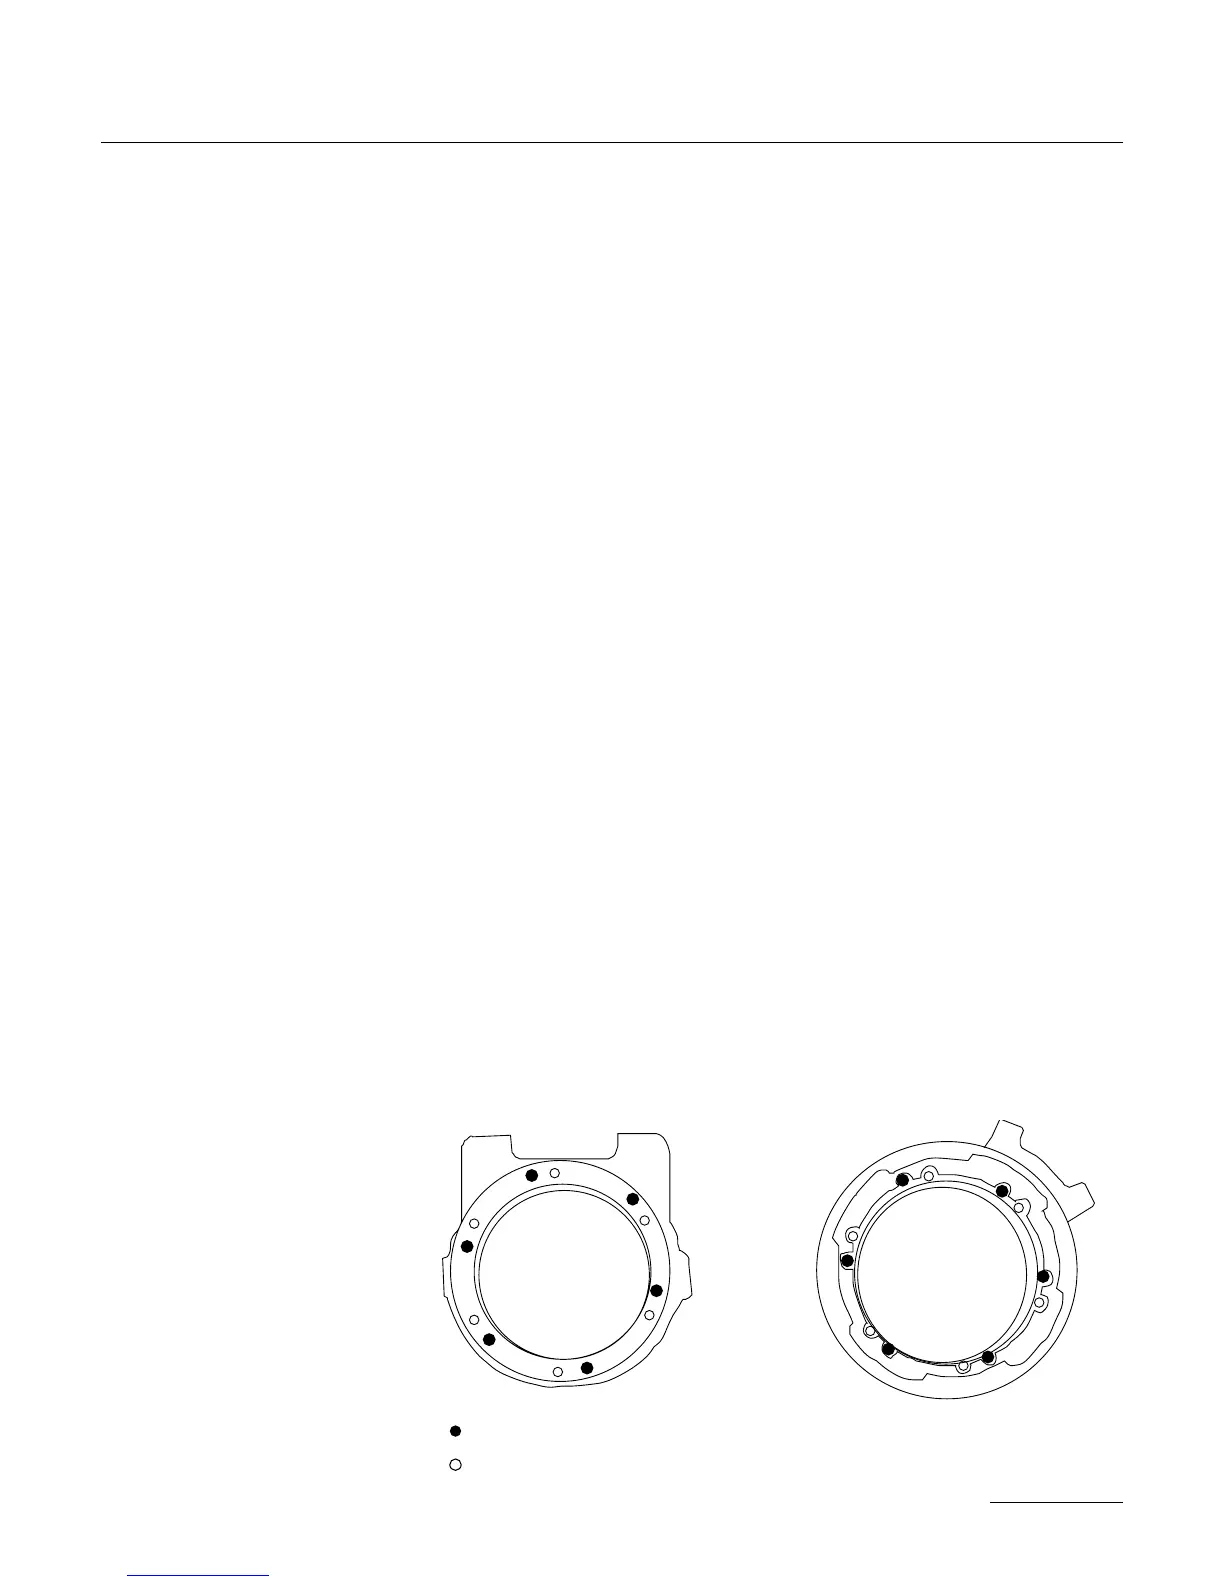
Carefully replace the lens port ring and its shims, and install the six
screws in the appropriate holes as detailed in the diagram below. Be
sure not to damage the shims;
take extra care to align their
cutouts around the holes to
be used. Fasten the screws,
then loosen each 1/2 a turn
in preparation for fine cente-
ring.
• 4. (b) Shifting the Aaton
Lens Port
95
SUPER16