87
—
6. Assembly of the switchgear at site
6.9 Pressure relief ducts
The pressure relief duct is supplied assembled.
The rear and front wall correspond, as far as
length is concerned, with the appropriate panel
width.
The screw fixing material is contained in the
“pressure relief duct” set of bags. Rivet nuts are
already provided in the metal sheets.
Detailed instructions for gas exhaust duct
assembly are described in document Assembly
manual 1VLM000034.
Note:
The rear pressure relief flap must be mounted
according to Figure 135. Details regarding
connection to the wall and a discharge grating for
pressure relief outside the switchroom will be
agreed on with the customer.
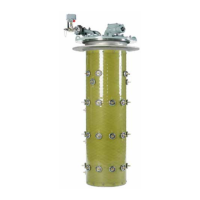
Figure 135:
1 Pressure relief duct
If the switchgear is equipped with a pressure relief duct,
the pressure relief flap for the cable connection compart-
ment is fixed to the rear side of the panel and will open to
the front (into the duct) in case of an arc fault.
Gas duct with outlet
Once the panels are bolted up, and busbars are
installed, it is possible to start fixing the gas duct
on the top of the switchgear. The gas duct outlet
Figure 136: Figure 137:
must be always led into safety space with limited
access. Every panel has three fixing points in the
front part and three fixing points on the rear part.
Note:
This side of the preassure relief flaps has to be
fixed by plastic screws. The marked screws must
be plastic.
Figure 138: Figure 139:
Note:
If a gas duct is used turn off the cable
compartment flap according to figure. The
marked screws must be plastic.
Assembly of pressure relieve flaps without
gas duct
Assembly of pressure relieve flaps with gas
duct
Fixing points on the rearFixing points on the front
Schematic diagram of the pressure relief
duct

 Loading...