WaterMaster
Electromagnetic flowmeter 4 Electrical Installation
IM/WM–EN Rev. M 29
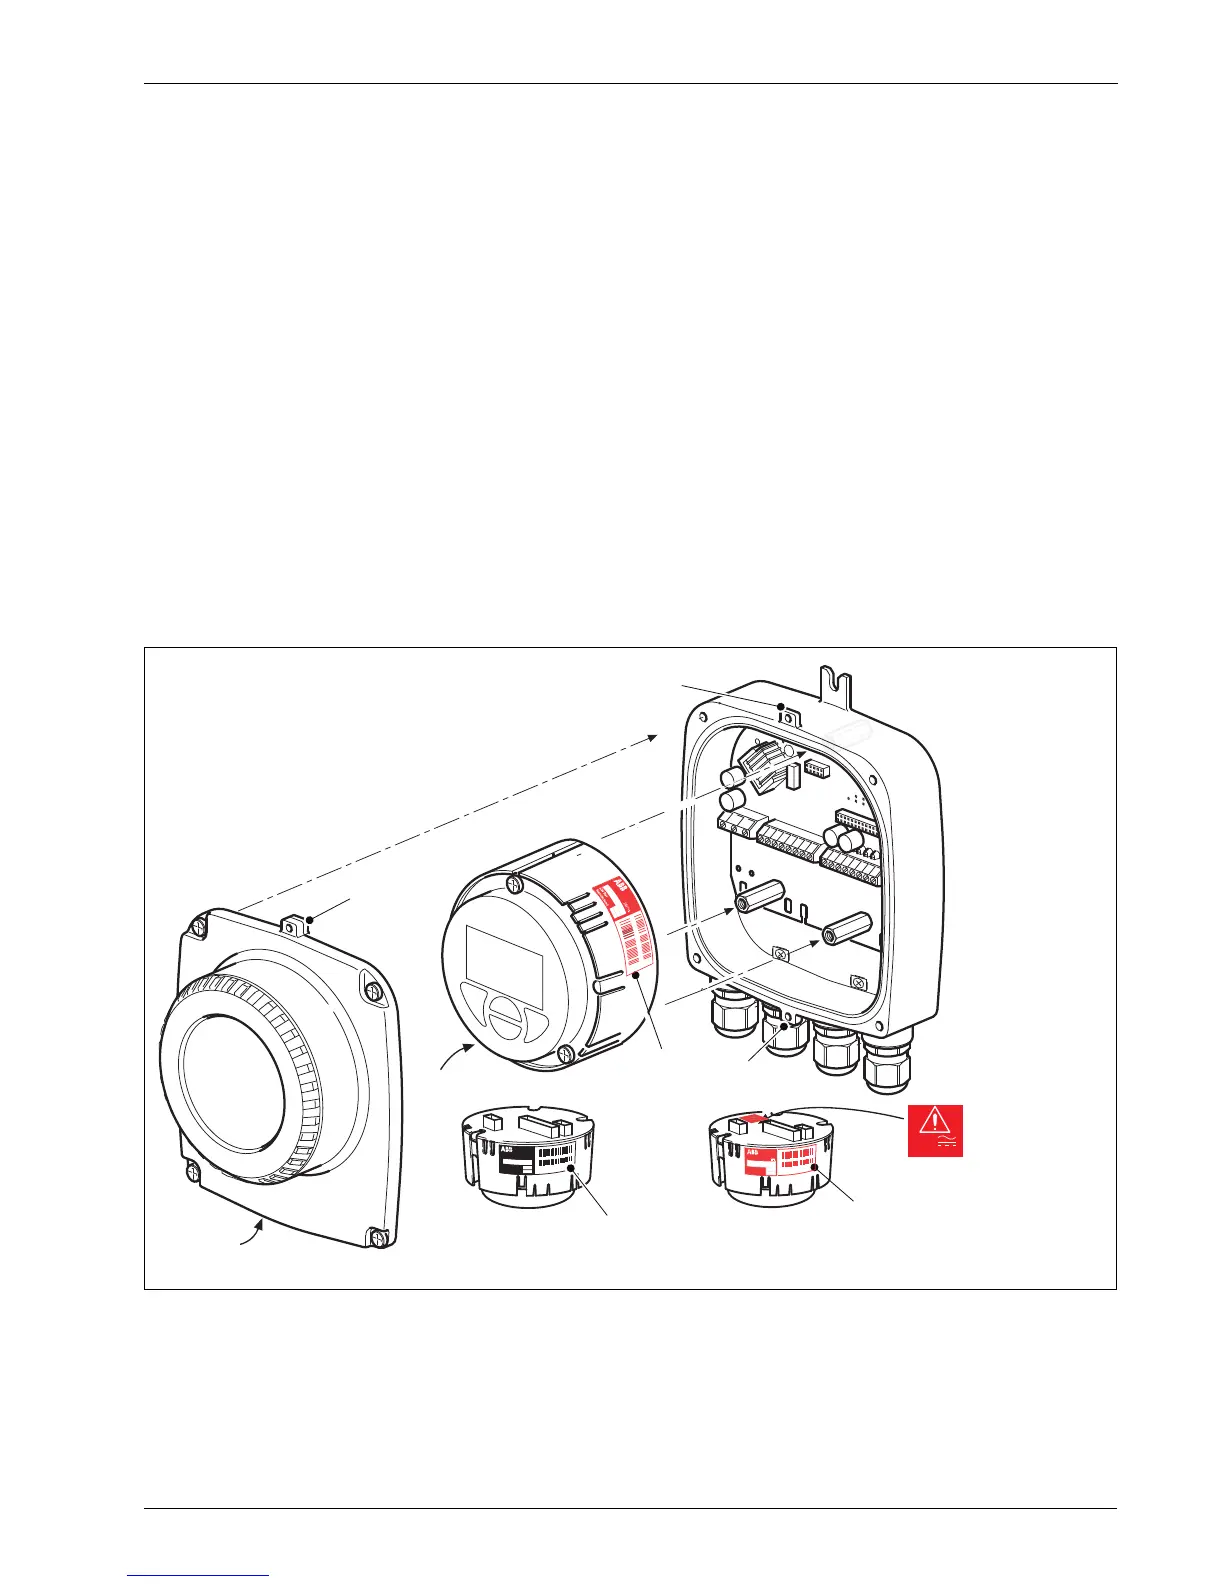
Referring to Fig. 4.21:
1. Confirm that the cartridge to be fitted is of the correct power supply and for the correct
communications bus type (HART, PROFIBUS or Modbus) by checking the label
A on the side of
the cartridge:
– AC cartridges have one black label on the cartridge side.
– DC (and low voltage AC) cartridges have two red DC labels – one on the cartridge side and
one on the cartridge rear plate.
2. Align the three cartridge screws
B with the cartridge housing pillars and tighten the screws carefully
until the cartridge is held in position.
3. If necessary, rotate the cartridge to the required orientation before refitting the cover – see Fig. 4.8,
page 18 for details.
4. For high integrity / security installations, set DIP switch SW1 to the 'ON' (Read-only) position – see
Fig. 4.20, page 28.
5. Align the transmitter cover with the housing and tighten the four cover screws
C carefully.
6. For high integrity / security installations or where MID is required, fit anti-tamper seals to the security
fixtures
D.
Fig. 4.21 Refitting the Cartridge and Cover