Do you have a question about the Abit VA-20 and is the answer not in the manual?
Details the hardware specifications and features of the motherboard.
Describes the connectors and ports on the rear of the motherboard.
Covers form factor and other general information about the motherboard.
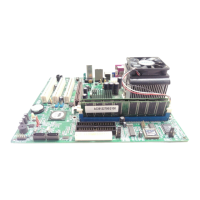
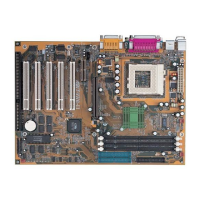
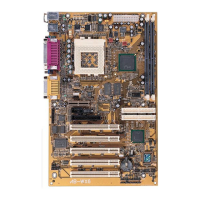
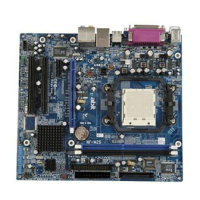
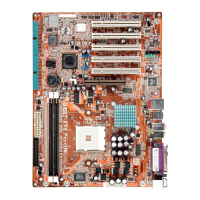
Provides a visual representation of the motherboard's components and connectors.
Explains the function and default settings of jumpers and connectors.
Outlines essential safety precautions to be taken before hardware installation.
Provides step-by-step instructions for mounting the motherboard into the computer chassis.
Details the procedure for installing the CPU and its associated heatsink and fan assembly.
Explains how to install and configure system memory modules (DIMMs).
Presents a table showing memory module compatibility and total memory capacity.
Provides detailed steps for inserting and removing RAM modules.
Details various connectors, headers, and switches on the motherboard.
Describes the 20-pin ATX12V power connector and its pinout.
Explains the function of CPU and chassis fan power connectors.
Details how to clear CMOS memory using the JP1 header.
Explains the function of the JP3 header for protecting BIOS contents.
Describes how to select CPU FSB frequency using jumpers JP8 and JP9.
Details the pinout and function of the front panel connection header.
Explains the pinout for connecting additional USB ports.
Describes the pinout for front panel audio connections.
Explains the AGP slot and compatibility with different AGP card types.
Describes connectors for internal CD-ROM or add-on card audio.
Explains the floppy disk drive connector and cable connection.
Details the IDE connectors for hard drives and their ribbon cable connection.
Describes the pinout for an additional serial port header.
Explains the Serial ATA connectors and RAID support.
Details the external connectors and ports available on the motherboard.
Explains the purpose and capabilities of the BIOS Setup Utility.
Discusses the default BIOS configuration and when to use it.
Guides on how to access the BIOS Setup Utility using the DEL key.
Lists and explains the function of keys used for navigating the BIOS.
Provides step-by-step instructions for downloading and installing BIOS updates.
Explains how to navigate and utilize the various options within the BIOS Setup Utility.
Describes how to configure basic system settings like date, time, and IDE devices.
Covers advanced BIOS settings related to boot order, system tests, and security.
Configures critical timing parameters for the motherboard chipset.
Defines operation of peripheral components on input/output ports.
Controls system power-saving modes and timeouts.
Configures Plug and Play and PCI expansion cards, including IRQ/DMA assignments.
Monitors critical voltages, temperatures, and fan speeds for system health.
Adjusts clock speeds and system bus frequencies.
Loads fail-safe default settings for system stability.
Loads optimized default settings for performance.
Allows setting or disabling BIOS password protection.
Saves current settings and exits the BIOS Setup Utility.
Discards changes and exits the BIOS Setup Utility.
Lists the drivers and utilities available on the CD for installation.
Instructions to install the VIA 4-in-1 driver for Windows.
Instructions to install the VIA VGA graphics driver for Windows.
Instructions to install the audio driver for Windows.
Instructions to install the LAN driver for Windows.
Instructions for installing VIA USB 2.0 drivers for different Windows versions.
Instructions to install the VIA Serial ATA RAID driver for Windows.
Instructions to view the user's manual in PDF format.
Instructions to install supporting software like Acrobat Reader.
Instructions to install FlashMenu (BIOS Update Utility).
Instructions to browse the contents of the CD-ROM.
Exit the CD setup items menu.
Recommends consulting the manual for information before seeking support.
Advises downloading the latest BIOS, software, and drivers from the website.
Suggests checking the website's FAQ and technical terms guide.
Recommends using internet newsgroups for information and help.
Recommends contacting the reseller for initial technical support.
Provides instructions on how to contact ABIT's technical support department directly.
Explains the process for obtaining RMA (Return Merchandise Authorization) service.
Advises on reporting compatibility issues with detailed system information.
Contact information for ABIT in North and South America.
Address for the RMA Center.
Contact information for ABIT in the UK and Ireland.
Contact information for ABIT European office in Germany/Benelux.
Contact information for Asguard Computer in Austria.
Contact information for ABIT in Shanghai.
Contact information for ABIT in Russia and CIS.
Contact information for ABIT in Poland.
Web site for ABIT in Japan.
Contact information for ABIT Taiwan Head Office.
| Form Factor | Micro ATX |
|---|---|
| Memory Type | DDR SDRAM |
| Number of Memory Slots | 3 |
| LAN | 10/100 Mbps |
| Socket Type | Socket 462 |
| Memory Slots | 3 |
| Expansion Slots | 1 x AGP, 3 x PCI |
| Onboard Audio | AC'97 |
| Onboard LAN | 10/100 Mbps |
| CPU Socket | Socket 462 |
| Socket | Socket 462 |
| Storage Interfaces | 2 x IDE |