Home
Acer
Desktop
ConceptD 500
Page 9 (Installing the Rear System Cover)
Acer ConceptD 500 - Installing the Rear System Cover
27 pages
Manual
Save Page as PDF
To Next Page
To Next Page
To Previous Page
To Previous Page
Loading...
UPGRADING Y
OUR COM
PUTER -
5
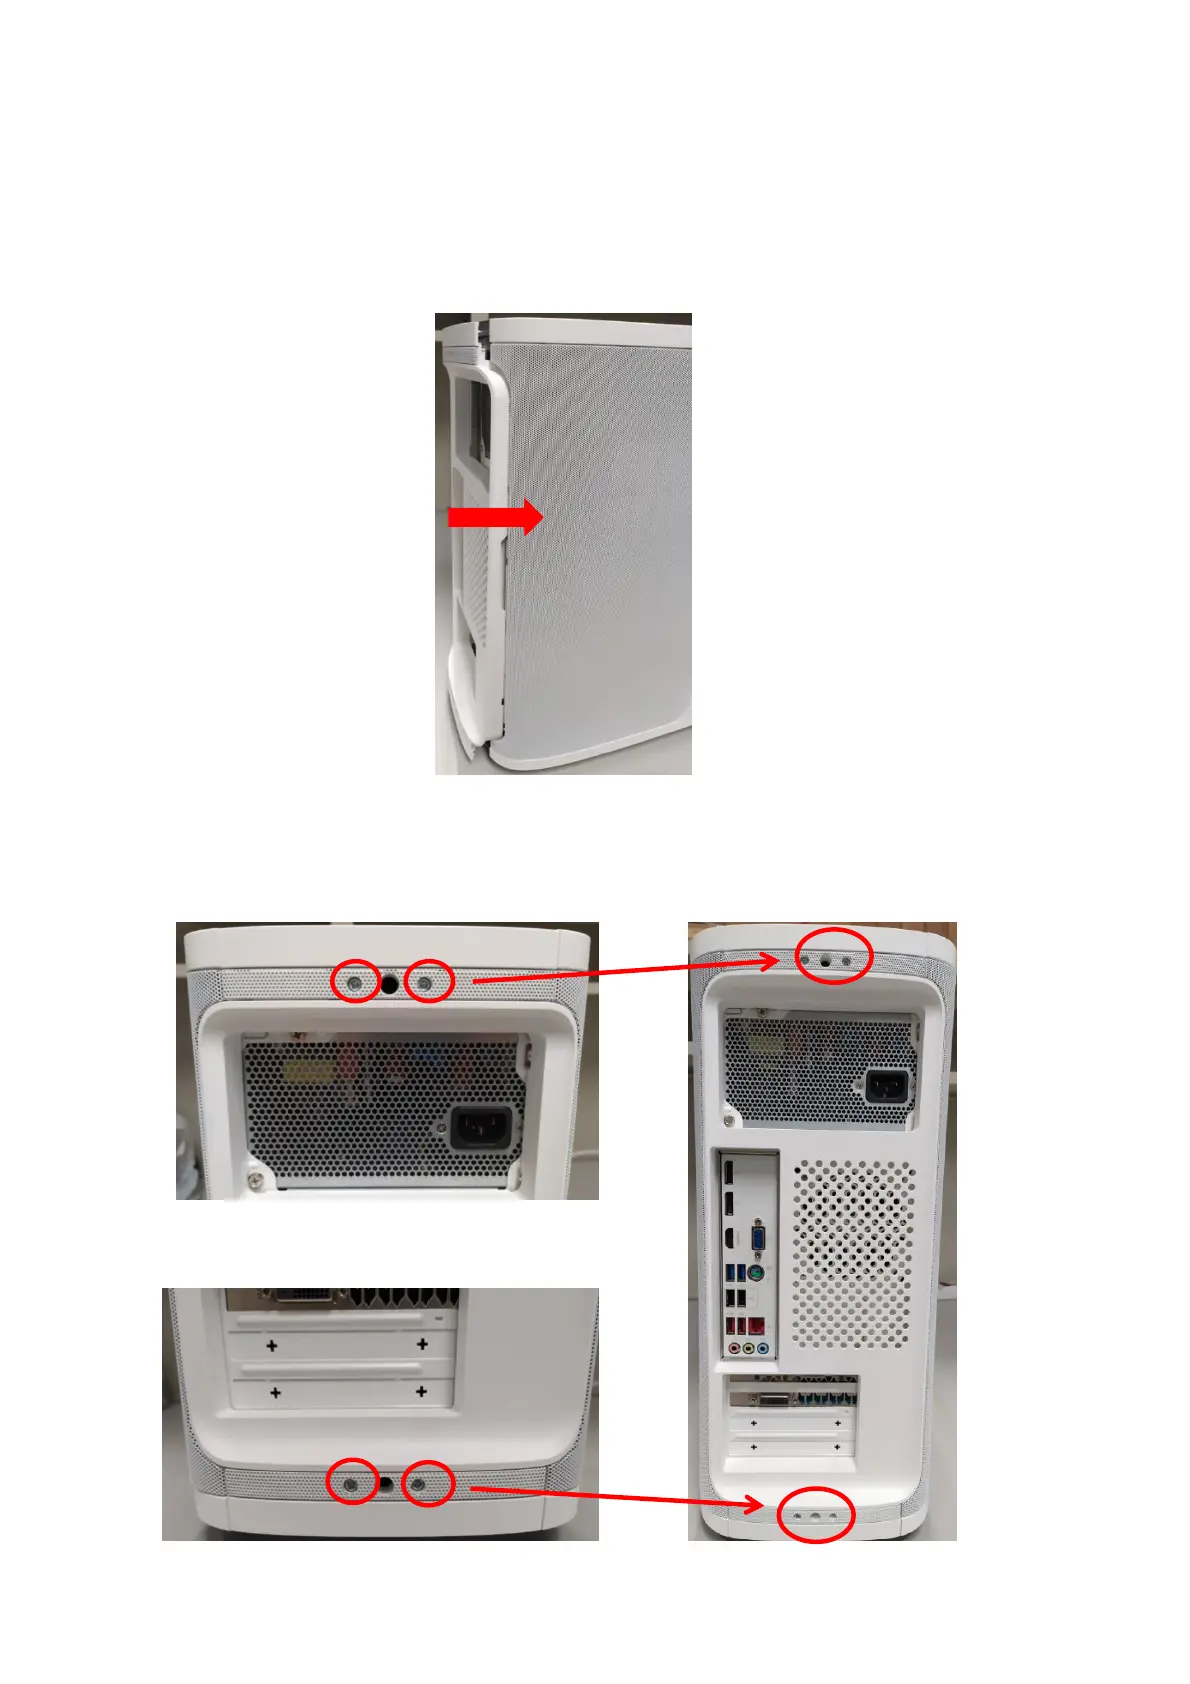
Installin
g the
rear
syste
m cover
1.
Alig
n th
e
cov
er t
o
t
he s
ide
s of
th
e c
om
put
er
and
sli
de
the
co
ver
tow
ard
th
e fr
ont
of t
he
co
mp
uter
.
2.
Inser
t t
he
re
ar
sys
tem
co
ver
3.
Se
cur
e th
e c
over
w
ith
four
s
cre
ws.
8
10
Table of Contents
Main Page
Default Chapter
3
Table of Contents
3
Upgrading Your Computer
5
Installation Precautions
5
ESD Precautions
5
Required Tools
5
Pre-Installation Instructions
6
Post-Installation Instructions
6
System Upgrade
7
Removing the Rear System Cover
7
Installing the Rear System Cover
9
Removing the Left Side System Cover
11
Installing the Left Side System Cover
12
Removing the Right Side System Cover
13
Installing the Right Side System Cover
14
Hard Drives
15
Removing the 3.5-Inch Hard Drives
15
Installing the 3.5-Inch Hard Drives
17
Memory
19
Memory Configuration Guidelines
19
Removing a Memory Module
20
Installing a Memory Module
21
Graphic Board
22
Removing the Graphic Board
22
Installing the Graphic Board
24
M.2 SSD Module
26
Removing the M.2 SSD Module
26
Installing the M.2 SSD Module
27
Related product manuals
Acer ConceptD 300
31 pages
Acer Aspire iDea 500 Series
87 pages
Acer Chromebase 24
43 pages
Acer ChromeBox CXI
27 pages
Acer ChromeBox CXI3
33 pages
Acer CHROMEBOX CXI4
33 pages
Acer Aspire C22-820
49 pages
Acer Aspire C27-1655
45 pages
Acer Aspire C27-1700
45 pages
Acer Chromebase CA24I2
31 pages
Acer Aspire M3970
127 pages
Acer Aspire S Series
26 pages