EasyManua.ls Logo

Acer KA2 Series - User Manual

Acer KA2 Series
5 pages
Print Icon
To Next Page IconTo Next Page
Loading...
USER GUIDE
LCD Monitor KA2 series/KA242Y
Question and Answer IconNeed help?

Do you have a question about the Acer KA2 Series and is the answer not in the manual?

Summary

Important Safety Instructions

Cleaning the LCD Monitor Screen

Turn off and unplug the monitor. Spray non-solvent cleaner onto a rag and clean the screen gently.

Monitor Placement and Handling

Avoid placing near windows, avoid pressure on screen, and do not remove covers. Store in specified temperature range.

Troubleshooting and Servicing

Immediately unplug and call a technician if the signal cable is frayed, liquid spills, or the monitor/case is damaged.

Monitor Setup and Connection

Attaching the Monitor to the Base

Steps to remove the monitor from packaging and securely attach the stand and base using screws.

Connecting Your Monitor to a Computer

Instructions on connecting the signal cable (HDMI/DP) and power cable, and plugging into an electrical outlet.

External Controls and Functions

Power Button Functionality

Turns the monitor on/off. Blue indicates power on, amber indicates standby/power saving mode.

Function Key Operations

Controls for viewing main page, entering hotkey functions, selecting scenario/game modes, and input selection.

Joystick Navigation

The single toggle button on the backside operates like a joystick for cursor movement and selection.

Regulatory and Safety Notices

FCC Compliance Information

Details on FCC rules compliance for Class B digital devices and measures to correct interference.

CE Declaration of Conformity

Acer declares compliance with EU directives for EMC, Low Voltage, RoHS, and ecodesign requirements.

Shielded Cables Requirement

All connections to other computing devices must use shielded cables for EMC compliance.

Peripheral Device and Cautionary Notices

Use only certified peripherals. Modifications void user authority. Device complies with FCC rules.

Disposal of Waste Equipment

Instructions for proper disposal of electronic waste in the EU, emphasizing recycling for environmental protection.

Overview

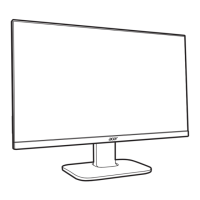
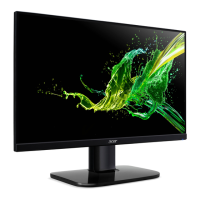
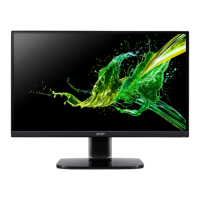
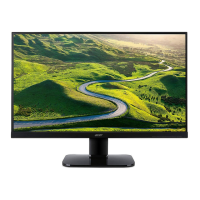
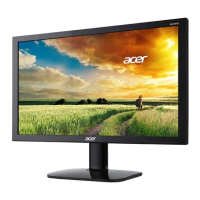
This document is a user guide for an Acer LCD Monitor, specifically the KA2 series/KA242Y. It provides essential information for setting up, operating, and maintaining the monitor, along with important safety and regulatory notices.

Function Description

The Acer LCD Monitor KA2 series/KA242Y is designed to provide video and visual display of information obtained from electronic devices. It serves as an output peripheral for computers, allowing users to view content from their PC. The monitor supports dynamic adjustment of the display refresh rate when connected to a FreeSync-supported graphics source, which contributes to power efficiency, a smoother viewing experience (virtually stutter-free), and low-latency display updates.

Usage Features

The monitor features several external controls for easy operation:

  • Power Button: This button turns the monitor on or off. A blue light indicates that the monitor is powered on, while an amber light signifies standby or power-saving mode.
  • Function Key 1 (Information/Reset): Pressing this key once brings up the Main page. Pressing it again allows access to hotkey 1 functions. When the Function Menu is active, this key displays basic monitor information, current input, or resets custom color settings to factory defaults.
  • Function Key 2 (Scenario/Game Mode): Similar to Function Key 1, a single press opens the Main page, and a second press activates hotkey 2 functions. In the Function Menu, this button is used to select scenario mode or game mode, optimizing display settings for different content types.
  • Function Key 3 (Input Select/Quit OSD): This key also opens the Main page with a single press and then allows for input selection. When the Function Menu is active, this button serves to exit the On-Screen Display (OSD).
  • Function Key 4 (Joystick/Navigation): This is a single toggle button located on the backside of the display bezel, functioning like a joystick. It allows users to navigate the cursor in four directions within the Function Menu. Pressing the button selects the desired option. Bright gray indicators denote operable options, while dark gray indicates inoperable ones.

Connecting the monitor to a computer involves a few simple steps:

  1. Ensure the computer is turned off and its power cord is unplugged.
  2. Connect the signal cable (HDMI or DisplayPort, if optional) from the monitor's input socket to the corresponding output socket on the computer's graphics card. Thumbscrews on the signal cable connector should be tightened.
  3. Insert the monitor's power cable into the power port at the back of the monitor.
  4. Plug both the computer's and the monitor's power cords into a nearby electrical outlet.

For models with audio output, the monitor provides audio output capabilities. Users should refer to the full user manual for detailed instructions on audio features.

Maintenance Features

The user guide emphasizes important safety instructions that double as maintenance guidelines to ensure the longevity and proper functioning of the monitor:

  • Cleaning the LCD Monitor Screen: Before cleaning, turn off the monitor and unplug its power cord. Use a non-solvent cleaning solution sprayed onto a rag, then gently clean the screen. This prevents damage from direct liquid application or harsh chemicals.
  • Environmental Protection: Avoid placing the monitor near a window to protect it from rain, moisture, or direct sunlight, which can cause severe damage.
  • Handling Precautions: Do not apply excessive pressure to the LCD screen, as this can lead to permanent damage.
  • Storage: Store the LCD monitor within a temperature range of -20°C to 60°C (-4°F to 140°F). Storing it outside this range can result in permanent damage.
  • Professional Servicing: Users are advised not to remove the cover or attempt to service the unit themselves. Any servicing should be performed by an authorized technician.
  • Immediate Action for Damage: If any of the following occur, immediately unplug the monitor and contact an authorized technician:
    • The monitor-to-PC signal cable is frayed or damaged.
    • Liquid spills onto the LCD monitor, or the monitor is exposed to rain.
    • The LCD monitor or its case is damaged.

The guide also includes regulatory and safety notices, such as FCC notices, CE declaration of conformity, and information on shielded cables, to ensure compliance and safe operation. It also provides instructions for the disposal of waste equipment by users in the European Union, highlighting the importance of proper recycling to conserve natural resources and protect human health and the environment.

Acer KA2 Series Specifications

General IconGeneral
Aspect Ratio16:9
Contrast Ratio1000:1
Color Gamut72% NTSC
VESA Mount100 x 100 mm
Refresh Rate75Hz
PortsVGA, HDMI (depending on the specific model)
Screen Size27 inches

Related product manuals