Do you have a question about the Acer KA220HQ bid and is the answer not in the manual?
Instructions for safely cleaning the LCD monitor screen using a rag.
Guidelines on monitor placement near windows, pressure application, and storage temperature.
Procedures for servicing the unit and actions to take if the monitor is damaged or exposed to liquid.
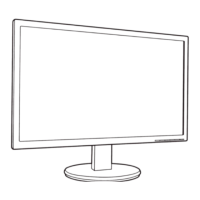
Steps to securely attach the monitor to its base after unboxing.
Procedure for connecting the monitor to a computer via signal and power cables.
Turns the monitor on/off; indicates power status with blue or amber light.
Toggles OSD options or adjusts volume when OSD is inactive (Optional).
Press to view OSD; press again to enter a selection within the OSD.
Exits OSD or auto-optimizes display position, focus, and clock when OSD is inactive.
Acts as exit key for OSD menu or selects scenario mode when OSD is inactive.
Compliance with FCC rules for Class B digital devices and potential interference.
Acer's declaration of compliance with EU directives for EMC, Low Voltage, and Ecodesign.
Requirement to use shielded cables for connections to maintain EMC compliance.
Guidance on using certified peripherals to avoid interference with radio and TV reception.
Warnings against unauthorized modifications and lifting the monitor by its base.
Instructions for proper disposal of waste electrical equipment in private households in the EU.
This document serves as a Quick Start Guide (QSG) for an Acer LCD Monitor, providing essential information on its setup, operation, and maintenance, along with important safety and regulatory notices.
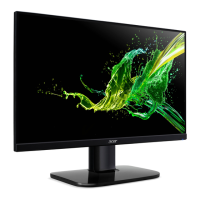
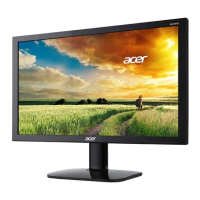
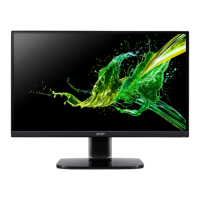
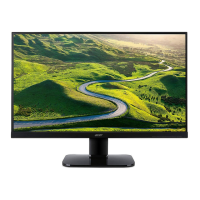
The Acer LCD Monitor is a display device designed to connect to a computer, providing visual output. It supports both VGA and DVI-D signal inputs, allowing for compatibility with various graphics cards. The monitor features an On-Screen Display (OSD) menu for adjusting various display settings, and dedicated buttons for power, volume (optional), OSD navigation, and scenario mode selection. It is designed for use in private households and adheres to various environmental and safety regulations.
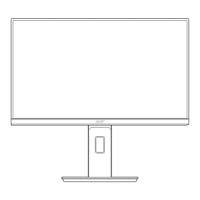
Setup and Connection: The monitor requires assembly of its base, which involves aligning a release button on the monitor with a corresponding slot on the base until a clicking sound confirms secure attachment. Once assembled, the monitor connects to a computer via a signal cable (VGA or DVI-D, optional) and a power cable. Users must ensure the computer is turned off and unplugged before making connections. The signal cable connects to the input socket on the monitor and the output socket of the graphics card on the computer, with thumbscrews to secure the connection. The monitor's power cable plugs into the power port at the back of the monitor, and both the monitor and computer power cords are then plugged into an electrical outlet.
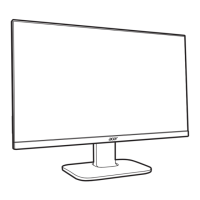
External Controls: The monitor features several external controls for easy operation:
OSD Navigation: The OSD menu allows users to customize various display settings. The Minus/Plus buttons are used to navigate through options, and the Menu button is used to enter selections. The Auto button or Empowering Key can be used to exit the OSD.
Scenario Mode: The Empowering Key allows users to select different display scenario modes, likely pre-set configurations for various viewing activities (e.g., text, movie, game).
Cleaning the LCD Monitor Screen: To clean the monitor screen, users should first turn off the LCD monitor and unplug its power cord. A non-solvent cleaning solution should be sprayed onto a rag, not directly onto the screen, and then the screen should be gently cleaned with the rag.
Storage: The LCD monitor should be stored in a room with a temperature range of -20°C to 60°C (-4°F to 140°F). Storing the monitor outside this range can lead to permanent damage.
Troubleshooting and Professional Service: Users are advised to immediately unplug the monitor and contact an authorized technician if any of the following issues occur:
Safety Precautions:
Disposal: The product features a symbol indicating that it should not be disposed of with regular household waste. Instead, it must be handed over to a designated collection point for the recycling of waste electrical and electronic equipment. This separate collection and recycling help conserve natural resources and protect human health and the environment. Users can contact their local city office, household waste disposal service, or the shop where the product was purchased for more information on recycling.
Regulatory Compliance: The monitor complies with FCC regulations for Class B digital devices, designed to provide reasonable protection against harmful interference in a residential installation. It also adheres to CE declaration of conformity, meeting essential requirements of various EU directives related to EMC, low voltage, RoHS, and ecodesign for energy-related products. Shielded cables must be used for all connections to other computing devices to maintain compliance with EMC regulations. Only peripherals certified to comply with Class B limits should be attached to this equipment to avoid interference. Users are cautioned that changes or modifications not expressly approved by the manufacturer could void their authority to operate the product.
| Screen Size | 21.5 inches |
|---|---|
| Panel Type | TN |
| Refresh Rate | 60 Hz |
| Response Time | 5 ms |
| Aspect Ratio | 16:9 |
| Brightness | 200 cd/m² |
| Contrast Ratio | 1000:1 |
| Resolution | 1920 x 1080 |
| Inputs | DVI, HDMI, VGA |
| Viewing Angle | 90° horizontal / 65° vertical |