Do you have a question about the Acer KA240H and is the answer not in the manual?
Instructions for safely cleaning the LCD monitor screen using appropriate cleaning solutions.
Protect monitor from moisture, sunlight, and extreme temperatures to prevent damage.
Avoid applying pressure, unauthorized servicing, and unplug immediately if damage or liquid contact occurs.
Steps to securely attach the monitor footstand and base to the monitor stand.
Instructions for connecting signal cables (VGA, DVI, HDMI), audio cable, and power cord.
Explains the function of monitor control buttons like Power, Minus/Plus, Menu, Auto, and Empowering Key.
Information regarding FCC compliance, CE declaration, shielded cables, and peripheral device connections.
Warnings about modifications, lifting by base, FCC operation conditions, and Canadian user notices.
Guidance on properly disposing of the product as electronic waste in the EU to protect health and environment.
This document provides a Quick Start Guide (QSG) for an Acer LCD Monitor, covering essential safety instructions, package contents, assembly, connection to a computer, external controls, and regulatory notices.
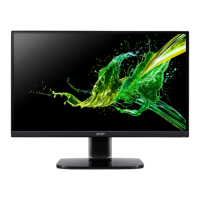
The Acer LCD Monitor is a display device designed to connect to a computer, providing visual output. It supports various input types including VGA, DVI-D (optional), and HDMI (optional), allowing for flexible connectivity with different computer systems and graphics cards. The monitor is equipped with external controls for power management, On-Screen Display (OSD) navigation, volume adjustment (optional), and display optimization. It also features an audio input socket (AUDIO IN) for models with audio output capabilities, enabling sound playback through the monitor. The monitor is designed for use in private households and adheres to various international regulations concerning electromagnetic compatibility (EMC), low voltage, and the restriction of hazardous substances (RoHS).
The monitor offers user-friendly features for setup and operation. Attaching the monitor to its base is a straightforward process, involving removing it from packaging, attaching the footstand, turning clockwise to lock, and securing it with a screw. For connecting to a computer, users need to turn off their computer, unplug its power cord, and then connect the signal cable (VGA, DVI-D, or HDMI) from the monitor to the computer's graphics card output socket. Thumbscrews on the signal cable connector ensure a secure connection. For models with audio output, an audio cable can be connected from the monitor's AUDIO IN socket to the computer's line-out port. Finally, both the computer and monitor power cords are plugged into an electrical outlet.
External controls provide intuitive interaction with the monitor. The power button turns the monitor on or off, with a blue light indicating power on and an amber light indicating standby or power-saving mode. Minus and Plus buttons are used to toggle between OSD options when the OSD is active, or to adjust the volume when the OSD is inactive (for optional audio models). A Menu button allows users to view the OSD and enter selections. The Auto button, when the OSD is active, exits the OSD; when inactive, it automatically optimizes the display position, focus, and clock. An Empowering Key serves as an exit key when the OSD menu is active and allows selection of scenario modes when the OSD menu is inactive.
The monitor is designed to operate within specific environmental conditions. It should be stored in a room with a temperature range of -20° to 60° C (-4° to 140° F) to prevent permanent damage. During operation, it is important not to expose the monitor to rain, moisture, or direct sunlight, as these can severely damage the device. The monitor is also designed to comply with FCC rules, ensuring it does not cause harmful interference in a residential installation and accepts any interference received.
Maintaining the Acer LCD Monitor involves simple and safe practices to ensure its longevity and optimal performance. For cleaning the screen, users should first turn off the LCD monitor and unplug its power cord. A non-solvent cleaning solution should be sprayed onto a rag, and the screen should be cleaned gently. It is crucial not to apply excessive pressure to the LCD screen, as this can cause permanent damage to the display.
The monitor is designed for user safety and should not be opened or serviced by unauthorized personnel. Any servicing should be performed by an authorized technician. Users are advised to immediately unplug the monitor and call an authorized technician if specific circumstances occur, such as the monitor-to-PC signal cable being frayed or damaged, liquid spilling onto the monitor, the monitor being exposed to rain, or the monitor or its case being damaged.
For environmental responsibility, the monitor is marked with a symbol indicating that it should not be disposed of with regular household waste in the European Union. Instead, it should be handed over to a designated collection point for the recycling of waste electrical and electronic equipment. This practice helps conserve natural resources and ensures environmentally sound recycling.
The document also highlights several regulatory notices that contribute to the monitor's maintenance and safe operation. All connections to other computing devices must use shielded cables to maintain compliance with EMC regulations. Only peripherals certified to comply with Class B limits should be attached to the equipment to avoid interference. Users are cautioned against making changes or modifications not expressly approved by the manufacturer, as this could void their authority to operate the product. Additionally, to prevent damage, the monitor should not be lifted by its base.
| 3D | No |
|---|---|
| Panel type | TN |
| Screen shape | Flat |
| Display diagonal | 24 \ |
| Display technology | LED |
| Native aspect ratio | 16:9 |
| Viewing angle, vertical | 160 ° |
| Contrast ratio (dynamic) | 100000000:1 |
| Contrast ratio (typical) | 1000:1 |
| Display number of colors | 16.78 million colors |
| Viewing angle, horizontal | 170 ° |
| Display brightness (typical) | 250 cd/m² |
| Supported graphics resolutions | 1920 x 1080 (HD 1080) |
| TV tuner integrated | - |
| Product color | Black |
| Cable lock slot type | Kensington |
| Energy efficiency scale | A to G |
| Power consumption (off) | 0.3 W |
| Power consumption (standby) | 0.5 W |
| Power consumption (typical) | 22.5 W |
| Depth (with stand) | 192 mm |
|---|---|
| Height (with stand) | 434.6 mm |
| Depth (without stand) | - mm |
| Width (without stand) | 567 mm |
| Height (without stand) | 335.9 mm |
| Weight (without stand) | 3340 g |