Do you have a question about the Acer P216HV and is the answer not in the manual?
This document describes an Acer LCD monitor, providing details on its function, usage, and maintenance.
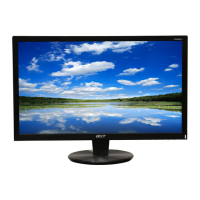
The Acer LCD monitor is a display device designed to connect to a host computer system. Its primary function is to visually present information generated by the computer. The monitor supports various video input signals, including VGA, DVI, and DisplayPort/HDMI, allowing for compatibility with a wide range of computer systems. It is capable of displaying images at different resolutions and refresh rates, with a focus on standard timing tables for optimal performance.
The monitor incorporates DDC (Display Data Channel) protocol, which enables Plug and Play functionality. This means the monitor can automatically communicate its capabilities, such as supported resolutions and timing, to the host system, simplifying the installation process. The monitor supports the DDC2B standard.
For power management, the monitor features a "Power Saving" mode. When the display controller sends a control signal, the monitor enters this mode, indicated by an amber-colored power LED. This helps conserve energy when the monitor is not actively in use. The monitor will remain in power-saving mode until a control signal is detected or the keyboard or mouse is activated, with a recovery time of approximately 3 seconds to return to the ON state.
The LCD screen itself is manufactured using high-precision techniques. While it generally offers effective pixels of 99.99% or more, it's noted that some pixels may occasionally misfire, appearing as black or red dots. These are considered normal and do not affect the recorded image or constitute a malfunction. Additionally, due to the nature of fluorescent light, initial use might show screen flickering, which can be resolved by cycling the power. Uneven brightness might also be observed depending on the desktop pattern. An afterimage of a previously displayed screen may persist if the same image is shown for extended periods; this condition slowly recovers by changing the image or turning off the power.
The monitor also includes an audio input feature, allowing it to process and output sound, although this is an optional component depending on the specific model.
The Acer LCD monitor is designed for ease of use, offering various features to optimize the viewing experience and ensure user comfort.
Installation: To install the monitor, users must first ensure both the monitor and computer are powered off. The video cable (VGA, DVI, DP, or HDMI, depending on the model) should be connected from the monitor to the computer's corresponding port. If applicable, an audio cable should also be connected. After connecting the cables, the power cord is plugged into a grounded AC outlet. The recommended power-on sequence is to turn on the monitor first, followed by the computer, which is crucial for proper functioning.
Physical Adjustments: The monitor allows for tilt adjustment to achieve an optimal viewing position. Users can hold the edges of the monitor with both hands to adjust the tilt, which ranges from 15 degrees upward to 5 degrees downward. This flexibility helps users find a comfortable viewing angle, reducing strain.
On-Screen Display (OSD) Controls: The monitor features an intuitive OSD menu for adjusting various settings. Accessing the OSD is done via a dedicated MENU button. The OSD allows users to:
Shortcut Menu: A shortcut menu provides quick access to commonly used settings. This menu typically includes options for "Empowering," "Auto Adjust," "OSD functions," "Volume Up/Down," and "Input."
Acer eColor Management: The "Empowering" key opens the Acer eColor Management OSD, offering scenario modes to optimize the display for different content types. These modes include:
Input Selection: The "Input" key allows users to switch between different video sources connected to the monitor (VGA, DVI, DP/HDMI). When cycling through inputs, messages indicating the currently selected source appear on the screen. If a selected input cable is not connected, a "No Cable Connect" or "No Signal" dialog box will appear.
Proper maintenance ensures the longevity and optimal performance of the Acer LCD monitor.
Cleaning: The monitor should always be unplugged before cleaning. A soft cloth should be used to wipe the screen and the front and sides of the cabinet. This prevents damage to the delicate screen surface and other components.
Safety Precautions:
Servicing: Users are advised not to attempt to service the product themselves, as opening covers may expose them to dangerous voltage points. All servicing should be referred to qualified service personnel. The monitor should be unplugged from the wall outlet and serviced by qualified personnel if the power cord or plug is damaged, liquid has been spilled, the product has been exposed to rain, the product has been dropped, the case has been damaged, or if it exhibits a distinct change in performance or does not operate normally after following operating instructions.
Comfort and Ergonomics: The manual emphasizes tips for comfortable computer use to prevent eyestrain, headaches, and physical injuries. These include:
These guidelines aim to ensure both the physical well-being of the user and the proper functioning of the monitor over time.
| Screen Size | 21.5 inches |
|---|---|
| Aspect Ratio | 16:9 |
| Response Time | 5 ms |
| Panel Type | TN |
| Resolution | 1920 x 1080 |
| Connectivity | VGA |
| Input Ports | 1 x VGA |