Do you have a question about the Acer XF240H and is the answer not in the manual?
Controls the monitor's power state, indicating on/standby.
Navigates menus, selects functions, and adjusts OSD settings.
Activates game mode or scenario modes for enhanced visual performance.
Details compliance with FCC rules for digital devices and potential interference.
States compliance with EU directives for EMC, Low Voltage, RoHS, and ecodesign.
Requirements for using shielded cables and certified peripherals for EMC compliance.
Covers FCC operation conditions, user modifications, and handling cautions.
Information regarding Canadian compliance standards for digital devices.
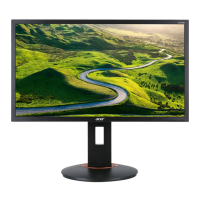
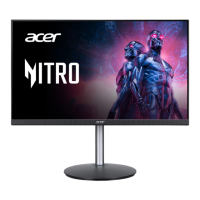
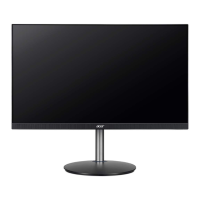
This document describes the Acer LCD Monitor, a display device designed for various computing needs. It provides essential information on its functions, usage, and maintenance to ensure optimal performance and user safety.
The Acer LCD Monitor serves as a visual output device for computers, displaying images and video content. It supports multiple input types, including DVI-D, HDMI, DP (DisplayPort), and MHL, allowing connectivity with a wide range of graphics sources. The monitor is equipped with a power button that indicates its status (blue for on, amber for standby/power saving mode).
For enhanced user experience, the monitor integrates several function keys. The volume adjustment function allows users to control audio output, while the input select function enables switching between different video sources. A dedicated function key provides access to the main function menu and allows navigation through various settings. Another function key is specifically designed to activate the Overdrive function, which can be set to either Normal or Extreme mode for improved response times in fast-paced content. Additionally, a Game mode control function is available, allowing users to select specific scenario modes optimized for gaming.
The monitor also supports FreeSync technology (via DP only). This feature enables a FreeSync-supported graphics source to dynamically adjust the display's refresh rate. This dynamic adjustment is based on typical content frame rates, leading to power-efficient, virtually stutter-free, and low-latency display updates, which is particularly beneficial for gaming and video playback.
The Acer LCD Monitor is designed for straightforward setup and operation. To attach the monitor to its base, users need to remove it from the packaging, attach the footstand to the base (for selected models), and turn it clockwise to lock. It is crucial to ensure the base is securely locked onto the stand. For additional security, the base can be secured to the stand by turning a screw using an integrated tab or a suitable coin.
Connecting the monitor to a computer involves several steps. First, the computer should be turned off, and its power cord unplugged. The signal cable (DVI-D, DP, HDMI, or MHL) is then connected to the corresponding input socket on the monitor and the output socket on the computer's graphics card. Thumbscrews on the signal cable connector should be tightened to ensure a secure connection. Optionally, an audio cable can be connected from the monitor's audio input socket (AUDIO IN) to the computer's line-out port for audio output. Finally, the monitor's power cable is inserted into the power port at the back of the monitor, and both the computer and monitor power cords are plugged into a nearby electrical outlet.
The external controls on the monitor provide intuitive navigation and adjustment. The power button controls the monitor's on/off state. Function key 3 allows users to view the Main page and enter the Volume adjustment function. When the Function Menu is active, this key can be used to select or move to the next function. Function key 4 also accesses the Main page and allows entry into the Input select function. In the Function Menu, it selects or moves to the previous function. Function key 5 views the Main page and enters the next function in the Function Menu. When the OSD menu is active, this button enters a selection. Function key 6 views the Function Menu and activates the Overdrive function. When the OSD menu is active, this button acts as the exit key. Function key 7 triggers the Game mode control when the Main page is active and selects scenario mode when the Function Menu is active.
Proper maintenance is crucial for the longevity and optimal performance of the Acer LCD Monitor. When cleaning the screen, it is essential to first turn off the monitor and unplug its power cord. A non-solvent cleaning solution should be sprayed onto a rag, not directly onto the screen, and then used to gently clean the screen.
To prevent damage, the monitor should not be placed near a window, as exposure to rain, moisture, or direct sunlight can severely damage it. Users should also avoid applying excessive pressure to the LCD screen, as this can cause permanent damage to the display. It is important not to remove the cover or attempt to service the unit oneself; any servicing should be performed by an authorized technician.
The monitor should be stored in a room with a temperature range of -20° to 60° C (-4° to 140° F). Storing the monitor outside this range can lead to permanent damage. In case of any of the following circumstances, the monitor should be immediately unplugged, and an authorized technician should be called: if the monitor-to-PC signal cable is frayed or damaged, if liquid spills onto the monitor or it is exposed to rain, or if the LCD monitor or its case is damaged.
The device complies with FCC rules, ensuring it does not cause harmful interference and accepts any interference received. All connections to other computing devices must use shielded cables to maintain compliance with EMC regulations. Only peripherals certified to comply with Class B limits should be attached to this equipment to avoid interference. Changes or modifications not expressly approved by the manufacturer could void the user's authority to operate the product. To prevent damage, the monitor should not be lifted by its base.
| Screen Size | 24 inches |
|---|---|
| Resolution | 1920 x 1080 (Full HD) |
| Refresh Rate | 144 Hz |
| Panel Type | TN |
| Response Time | 1 ms |
| Aspect Ratio | 16:9 |
| Brightness | 350 cd/m² |
| Contrast Ratio | 1000:1 |
| Adaptive Sync | AMD FreeSync |
| Viewing Angle | 170° horizontal, 160° vertical |
| Color Support | 16.7 million colors |
| USB Ports | No |
| VESA Mount | 100 x 100 mm |
| Ports | 1 x DisplayPort, 1 x HDMI, 1 x DVI |