EasyManua.ls Logo

Acer XF240Q - User Manual

Acer XF240Q
2 pages
Print Icon
To Next Page IconTo Next Page
Loading...
English
Acer LCD Monitor Quick Start Guide (QSG)
Important safety instructions
Please read the following instructions carefully.
1. To clean the LCD monitor screen:
• Turn off the LCD monitor and unplug the power cord.
• Spray a non-solvent cleaning solution onto a rag and clean the screen gently.
2. Do not place the LCD monitor near a window. Exposing the monitor to rain, moisture or sunlight can severely damage
it.
3. Do not apply pressure to the LCD screen. Excessive pressure may cause permanent damage to the display.
4. Do not remove the cover or attempt to service this unit yourself. An authorized technician should perform servicing of
any nature.
5. Store the LCD monitor in a room with a temperature of -20° to 60° C (-4° to140° F). Storing the LCD monitor outside
this range may result in permanent damage.
6. Immediately unplug your monitor and call an authorized technician if any of the following circumstances occur:
• Monitor-to-PC signal cable is frayed or damaged.
• Liquid spills onto the LCD monitor or the monitor is exposed to rain.
• The LCD monitor or case is damaged.
Attaching the monitor to the base
1. Remove the monitor from the packaging.
2. Attach the footstand to the base. (for selected models).
3. Turn clockwise to lock. Ensure that the base in locked onto the stand. (for selected models)
4. Secure the base to the stand by turning the screw using the intergrated tab or a suitable coin. (for selected models)
Connecting your monitor to a computer
1. Turn off your computer and unplug your computer's power cord.
2. Connect the signal cable to the DP (optional) and/or HDMI (optional)
input socket of the monitor, and the DP (optional) and/or HDMI
(optional) output socket of the graphics card on the computer. Then
tighten the thumbscrews on the signal cable connector.
3. Optional: Connect the audio input socket (AUDIO IN) of the LCD
monitor and the line-out port on the computer with the audio cable.
4. Insert the monitor power cable into the power port at the back of the
monitor.
5. Plug the power cords of your computer and your monitor into a
nearby electrical outlet.
------------------------------------------------------------------------------------------
Note: Audio output is only for audio output model. Please check user
manual for more instruction.
FreeSync:
It can allow a FreeSync supported graphics source to dynamically adjust display refresh rate based on typical content
frameratesforpowerefcient,virtuallystutterfreeandlow-latencydisplayupdate.
External controls
1&2 Power button Turns the monitor on/off.Blue indicates power on. Amber indicates standby/
power saving mode.
3 Function key
/
a. Press to view Main page.Press again to enter next function in the Function
Menu.
b. When the Function Menu is active, press this key selected or move to the
next function.
4 Function key
Input
/ /
a. Press to view Main page.Press again to enter Input select function.
b. When the Function Menu is active, press this button selected or move to
the previous function.
Question and Answer IconNeed help?

Do you have a question about the Acer XF240Q and is the answer not in the manual?

Summary

Important Safety Instructions

Monitor Setup and Connection

Attaching the Monitor to the Base

Steps for physically connecting the monitor stand to the base.

Connecting to a Computer

Instructions for connecting the monitor signal cable and power.

External Controls and Navigation

Power Button Operation

Describes the monitor's power button function and status indicator lights.

Function Key Navigation

Explains how to use function keys for menu navigation and selection.

Input Source Selection

Details how to select the monitor's input source using function keys.

Volume Adjustment

Instructions for adjusting the monitor's volume via function keys.

Brightness Adjustment

Instructions for adjusting the monitor's brightness via function keys.

Game Mode Control

Explains how to access and control the monitor's game mode settings.

Regulations and Safety Notices

FCC Compliance Notices

Information regarding FCC rules and potential radio frequency interference.

CE Declaration of Conformity

Statement of compliance with relevant European Union directives.

Shielded Cables Requirement

Notice on using shielded cables for EMC regulation compliance.

Peripheral Device Certification

Guidance on using certified peripheral devices for Class B limits.

Operational Precautions

Cautionary notes on modifications and handling the monitor.

Canadian User Notice

Information specific to Canadian users regarding ICES regulations.

Waste Equipment Disposal

Instructions for proper disposal of waste equipment in the EU.

Overview

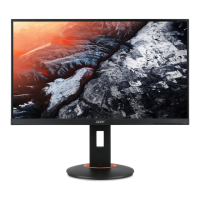
This document provides a quick start guide for an Acer LCD Monitor, outlining its functions, safety instructions, setup procedures, and regulatory notices.

Function Description

The Acer LCD Monitor is designed to display visual output from a computer. It features various input options, including DP (DisplayPort) and HDMI, allowing for connection to different graphics cards. The monitor also includes an audio input for models with audio output capabilities.

Key functionalities include:

  • Power Management: The monitor can be turned on/off using the power button, with blue indicating power on and amber indicating standby/power saving mode.
  • Menu Navigation: A series of function keys allow users to navigate the On-Screen Display (OSD) menu to adjust various settings.
  • Input Selection: Users can select the desired input source (DP or HDMI) via a dedicated function key.
  • Volume Adjustment: For models with audio output, a function key allows for volume adjustment.
  • Brightness Adjustment: A function key is provided for adjusting the screen brightness.
  • Game Mode Control: A dedicated function key allows users to trigger Game mode controls, likely optimizing display settings for gaming.
  • FreeSync Support: The monitor supports FreeSync technology, which enables a FreeSync-compatible graphics source to dynamically adjust the display refresh rate. This feature aims to provide power-efficient, stutter-free, and low-latency display updates based on content frame rates.

Important Technical Specifications

While specific numerical specifications like resolution or panel type are not detailed in this guide, the document highlights several important technical aspects:

  • Input Ports: DP (optional) and HDMI (optional) for video input, and AUDIO IN for audio input (on models with audio output).
  • Operating Temperature Range: The monitor should be stored in a room with a temperature of -20° to 60° C (-4° to 140° F) to prevent permanent damage.
  • Regulatory Compliance: The device complies with FCC Class B digital device limits, EMC Directive 2014/30/EU, Low Voltage Directive 2014/35/EU, RoHS Directive 2011/65/EU, and Directive 2009/125/EC for ecodesign requirements. It also complies with CAN ICES-3(B)/NMB-3(B) for Canadian users.
  • Shielded Cables: All connections to other computing devices must use shielded cables to maintain EMC compliance.

Usage Features

The guide provides clear instructions for setting up and using the monitor:

  • Attaching to the Base:
    1. Remove the monitor from its packaging.
    2. Attach the footstand to the base (for selected models).
    3. Turn clockwise to lock the base onto the stand.
    4. Secure the base to the stand using the integrated tab screw or a coin.
  • Connecting to a Computer:
    1. Turn off the computer and unplug its power cord.
    2. Connect the signal cable (DP and/or HDMI) from the monitor to the graphics card on the computer, and tighten the thumbscrews.
    3. (Optional) Connect an audio cable from the monitor's AUDIO IN socket to the computer's line-out port.
    4. Insert the monitor power cable into the power port at the back of the monitor.
    5. Plug the power cords of both the computer and monitor into an electrical outlet.
  • OSD Navigation:
    • Function Key 3 (Menu/Enter): Press to view the Main page, then press again to enter the next function in the Function Menu. When the Function Menu is active, this key selects or moves to the next function.
    • Function Key 4 (Input/Previous): Press to view the Main page, then press again to enter the Input select function. When the Function Menu is active, this button selects or moves to the previous function.
    • Function Key 5 (Volume/Select): Press to view the Main page, then press again to enter the Volume adjustment function. When the Function Menu is active, this button enters a selection in the OSD.
    • Function Key 6 (Brightness/Exit): Press to view the Main page, then press again to enter the brightness adjustment function. When the Function Menu is active, this button returns to the previous Menu or exits the current Menu.
    • Function Key 7 (Game Mode/Exit): When the Main page is active, press to trigger the Game mode control. When the Function Menu is active, this button exits the current Menu.

Maintenance Features

The guide emphasizes several important safety and maintenance practices to ensure the longevity and proper functioning of the monitor:

  • Cleaning the Screen:
    1. Turn off the monitor and unplug the power cord.
    2. Spray a non-solvent cleaning solution onto a rag.
    3. Gently clean the screen with the rag.
  • Environmental Precautions:
    • Do not place the monitor near a window to avoid exposure to rain, moisture, or sunlight, which can cause severe damage.
    • Store the monitor within the specified temperature range (-20° to 60° C) to prevent permanent damage.
  • Physical Handling:
    • Do not apply excessive pressure to the LCD screen, as it can cause permanent damage.
    • Do not remove the cover or attempt to service the unit yourself; only authorized technicians should perform repairs.
    • Do not lift the monitor by its base to prevent damage.
  • Troubleshooting (Immediate Unplugging Required): Unplug the monitor and call an authorized technician immediately if any of the following occur:
    • Monitor-to-PC signal cable is frayed or damaged.
    • Liquid spills onto the monitor, or the monitor is exposed to rain.
    • The LCD monitor or its case is damaged.
  • Disposal: The product should not be disposed of with household waste. Instead, it must be handed over to a designated collection point for the recycling of waste electrical and electronic equipment, in accordance with European Union regulations. This ensures the conservation of natural resources and protection of human health and the environment.

Acer XF240Q Specifications

General IconGeneral
BrandAcer
ModelXF240Q
CategoryMonitor
LanguageEnglish

Related product manuals