17
ACORN 80 Maintenance & Service Manual
SECTION 6
Testing & Setting
6.3.2 Pre-power Up Checks
6.3.3 Power Up Sequence
6.3.4 Calibrating The Levelling
Remove the front cover and check that all programming switches are in the off position, to the left. Select LEFT
or RIGHT hand install. Check that the correct hand has been selected, as these switches should not be changed
at all from now.
Check that the seat holding switch is switched off. Connect the positive leads from both batteries to the
positive spade connectors on the board. The board will display the bottom right hand corner decimal point.
Switch on the seat holding switch. The selected hand of the lift will be displayed momentarily, then the
no datum set symbol will be displayed. The lift cannot be moved with this displayed.
ONLY TO BE DONE IF THE PCB HAS BEEN CHANGED. Now switch the PROGRAM MODE to ON.
Datum search will be displayed. Call the lift with either the rocker switch or the remote in either
direction. Using a spirit level on the footrest, finely adjust the potentiometer until the lift is level. Once
the level position is set, the potentiometer should not be altered after programming or the whole rail
MUST be programmed again.
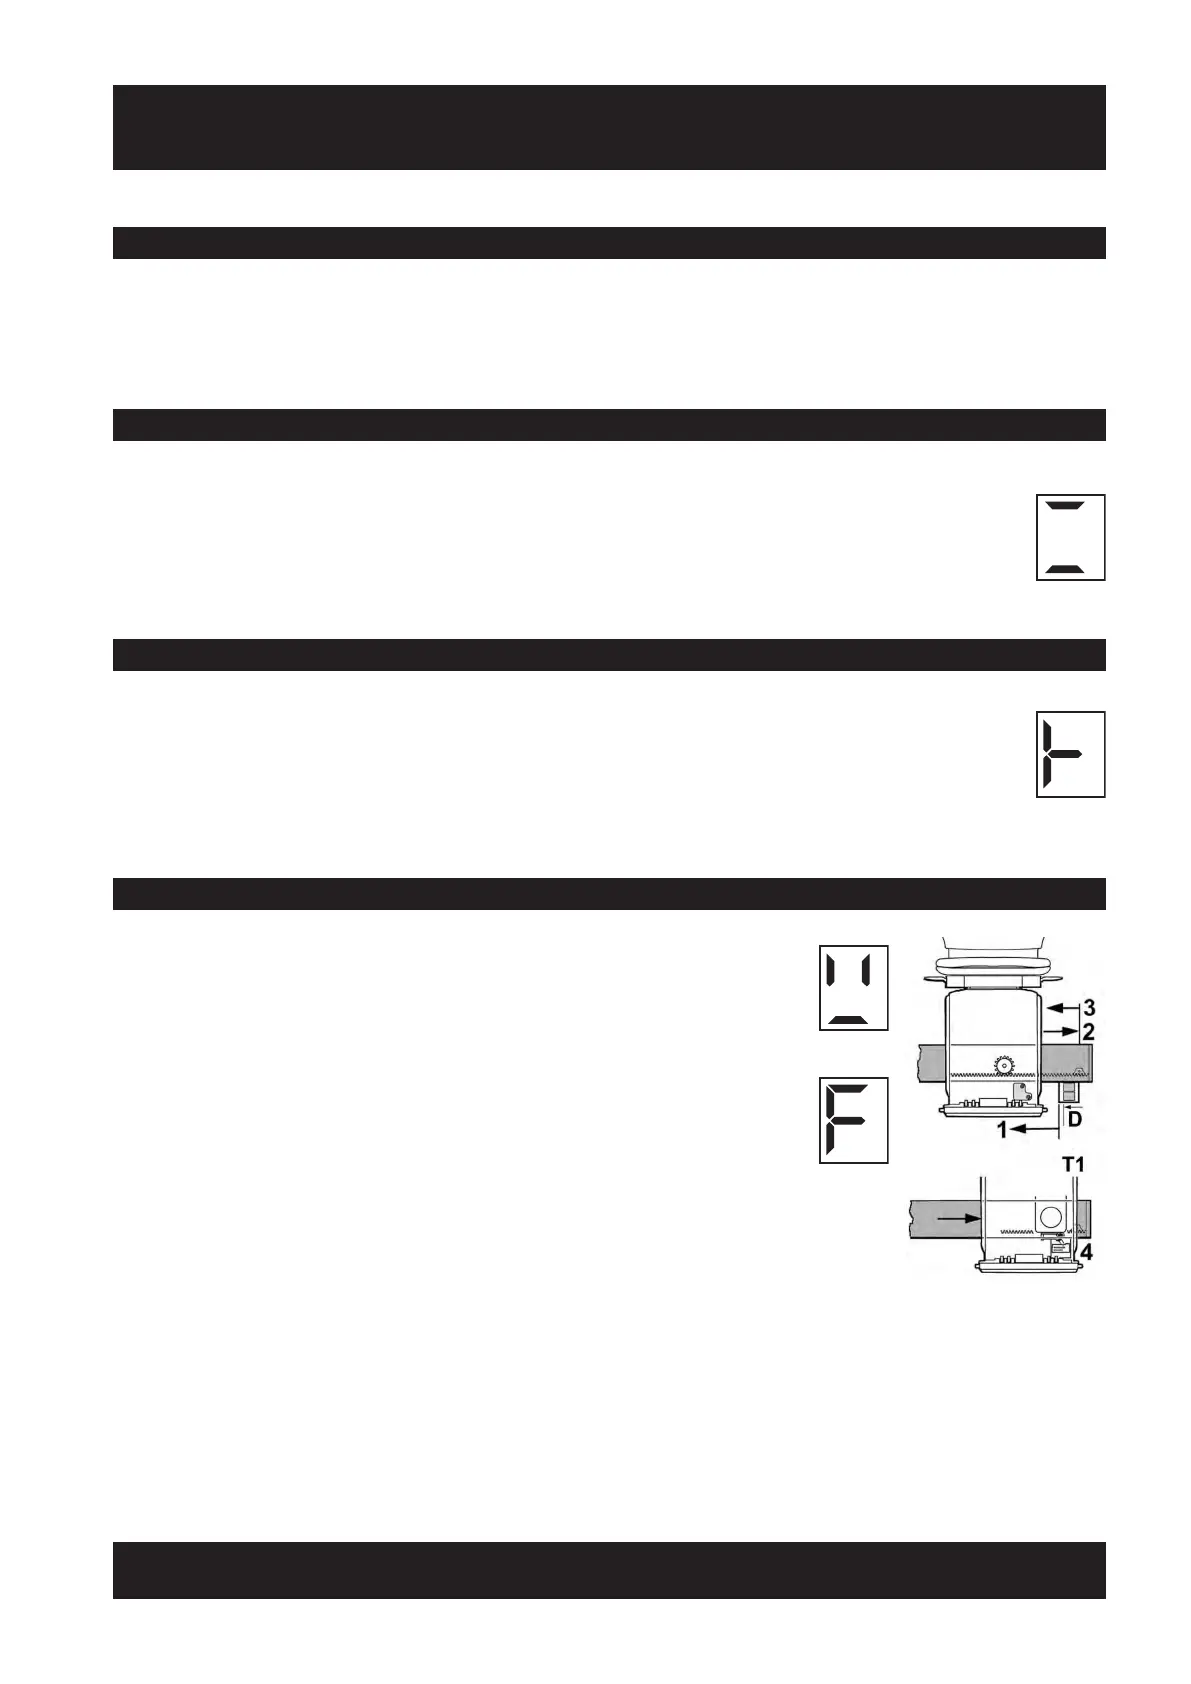
6.3.5 Programming The Top Terminal Limit
Call the lift down off the charge point. As the positive charge plunger leaves
the charge point, the programming rail symbol will be displayed. This sets the
“datum point”.
This is a reference point for the memory during programming of the rail. Stop
the lift and drive it back up onto the final limit striker will be displayed. Note
that the top terminal limit will be approximately 10-15mm down from the final
limit stop position. Adjust the striker to the required position. This position
depends on the angle of the rail at this point. When the correct position is
found, call the lift down the rail off the charge point, and then back up onto the
final limit for a second time. The carriage is now ready for programming down
the full length of the rail.
 Loading...